By Emin Alemdar on Jan 6, 2022 8:55:36 AM
In this blog post, I’m going to dive into the on-premises world and talk about an innovative solution for managing different workloads and platforms from a single pane.
HCI (Hyperconverged Infrastructure) is a software-defined infrastructure solution that virtualizes and combines compute, storage and networking layers together. It allows you to manage your traditional data center components in a single hardware device. Before HCI, you would have to purchase and manage the storage layer separately.
There are many traditional and proprietary HCI options available from different vendors like VMware, HPE, Nutanix and Dell EMC. These solutions add some new features to their current virtualization platform. Specifically, these solutions use datacenter server hardware with locally attached storage devices and deliver the capacity to the upstream workloads with a software-defined approach. This structure eliminates the need for a separate SAN device and reduces the operational burden of the storage system. While these abstractions are helpful, these traditional solutions do not embody the modern IT approaches in their architecture and their codebases.
There are two main problems with these solutions. The first problem is the architecture. These solutions are meant to manage only virtual machines (VM) and traditional IT components. But we are now using containers and Kubernetes in our environments with all of the other cloud-native technologies for our application workloads. Also, adding a software layer on top of the existing platform is not very innovative. It is like the automobile companies building EV models on the same platform with the company’s old combustion engine model cars. It works but it is not completely modern.
Second problem with these traditional HCI solutions is licensing options and pricing. These solutions are extremely expensive. You would have to pay for the hardware, virtualization software, HCI software, centralized management software, support subscription separately and then you have to pay extra for some features in these solutions. Furthermore, licensing options are complex with these solutions. For example, some of these solutions are quoted based on both the physical CPU count of the nodes and CPU Core count of the CPUs, separately.
In 2020, SUSE announced a new solution called Harvester. In December 2021, they announced the v1.0 GA release of Harvester and it is now production-ready.
So, what is Harvester? Harvester is an open source, simple, %100 free-to-use modern HCI solution built for running VMs and container workloads together. It’s built on open source, cloud native, enterprise-grade technologies such as Kubernetes, KubeVirt and Longhorn.
You don’t have to have prior knowledge for these technologies with Harvester because it is designed to be easy to understand, operate and benefit from those cloud native technologies. This simplification opens up interesting opportunities with other technologies that can integrate with Kubernetes. With Harvester’s small footprint, you can install and operate your workloads even at the Edge.
You can also use the official Terraform Provider for Harvester to manage your Virtual Machine management platform with IaC.

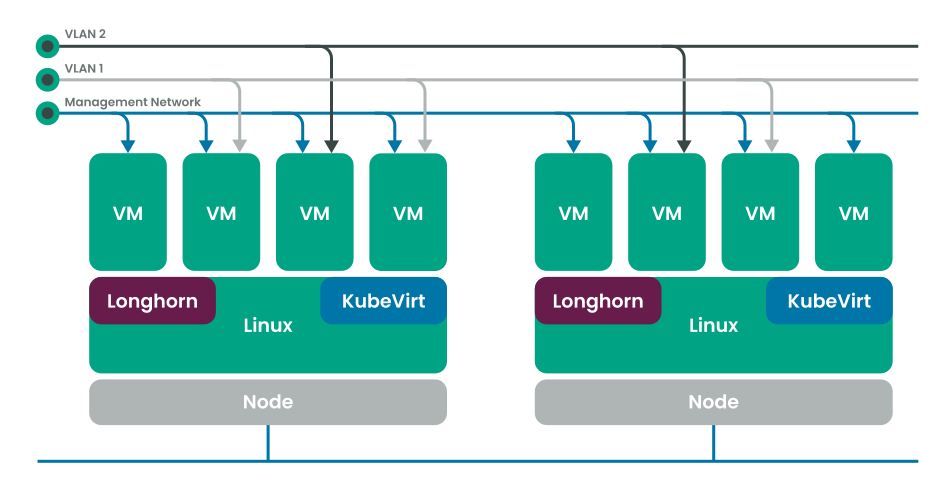
As you can see from the architecture diagram above, Harvester contains three main components. Longhorn, KubeVirt and openSUSE Leap 15.3 OS. Longhorn is a lightweight distributed block storage solution for Kubernetes. KubeVirt is a VM management toolkit for Kubernetes environments. Finally, openSUSE Leap is a Linux distro optimized for running Kubernetes clusters.
Harvester supports ISO and PXE boot installation methods. You can download and install Harvester on your bare metal servers easily. It also supports nested virtualization, so that you can try Harvester on top of your existing Virtualization platform. The ISO image contains all the necessary packages for air-gapped installations.
Last but not least, I should mention the Rancher integration. Rancher is an open source Kubernetes multi-cluster management platform. Rancher integration is one of the most exciting features of Harvester. With this integration you can now manage both Virtual Machine workloads and Kubernetes workloads from a single platform. Prior to this integration, you would have to manage different environments individually. Now you can import Harvester Clusters to Rancher’s Virtualization Management page and benefit from Rancher’s Authentication, Authorization and RBAC featureset for multi-tenant environments. Also, you can now deploy RKE and RKE2 Kubernetes Clusters on Harvester Clusters. Built-in Harvester Node Driver support is added to Rancher in v2.6.3. Furthermore, you can get the Load Balancer and persistent storage support automatically with clusters provisioned on Harvester.
Using these two solutions together will bring a lot of efficiencies with the consolidation of management and operation burden.
Now let’s move on to the demonstration.
In this demonstration, I will explain how to install a Harvester Cluster, how to join a node to the cluster, how to configure it and manage resources inside the cluster. Finally, I will integrate the Harvester Cluster with Rancher and show some features of that integration.
I’ve also created a GitHub repository with example Terraform codes for managing Harvester Resources like VMs, Networks and Images that you can use but I will show you how to operate the environment from the UI with screenshots.
Let’s start with the installation. I will use the ISO installation method for this and I will setup a three node cluster. Installation is actually pretty simple and straightforward.
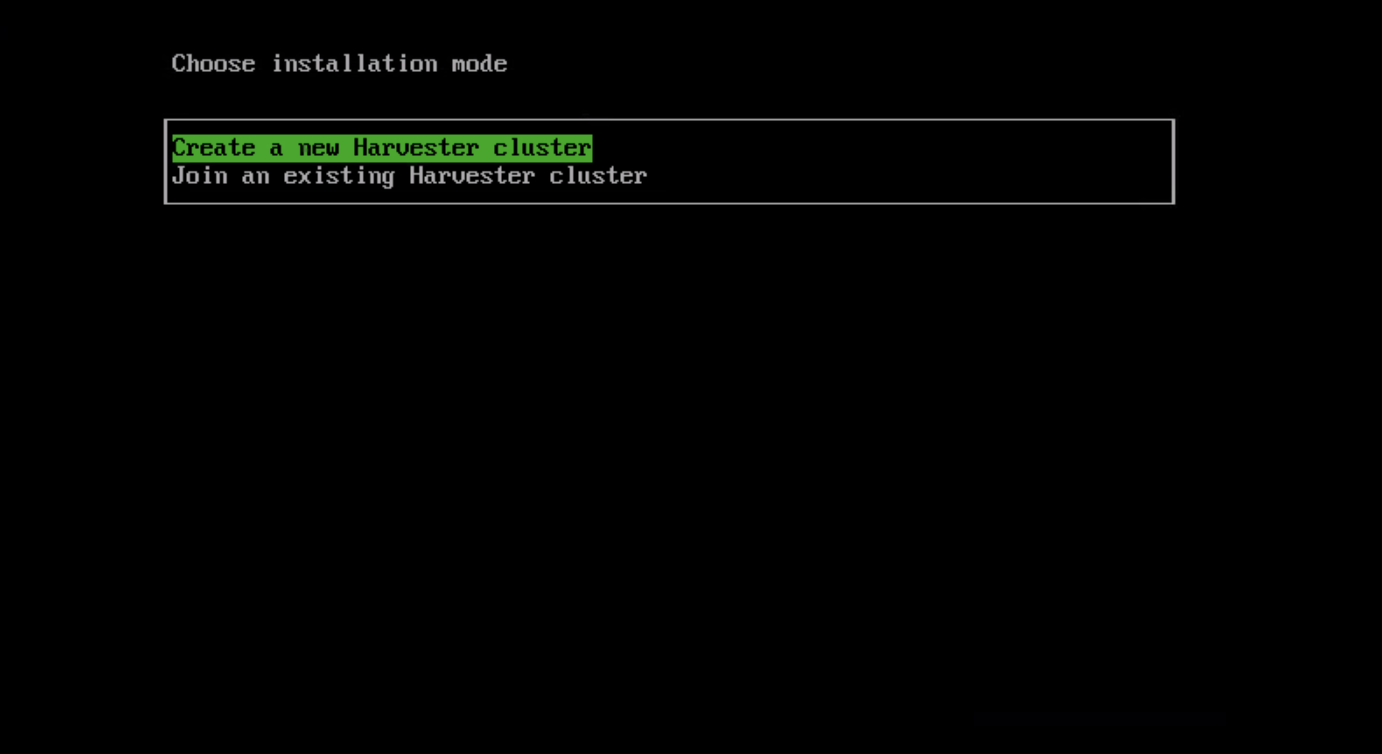
When the first node boots up, you have two options as you can see from the screenshot. I am choosing the first one with the first node.

Then I move on with network configuration, choosing the physical NIC for the management and HostName.
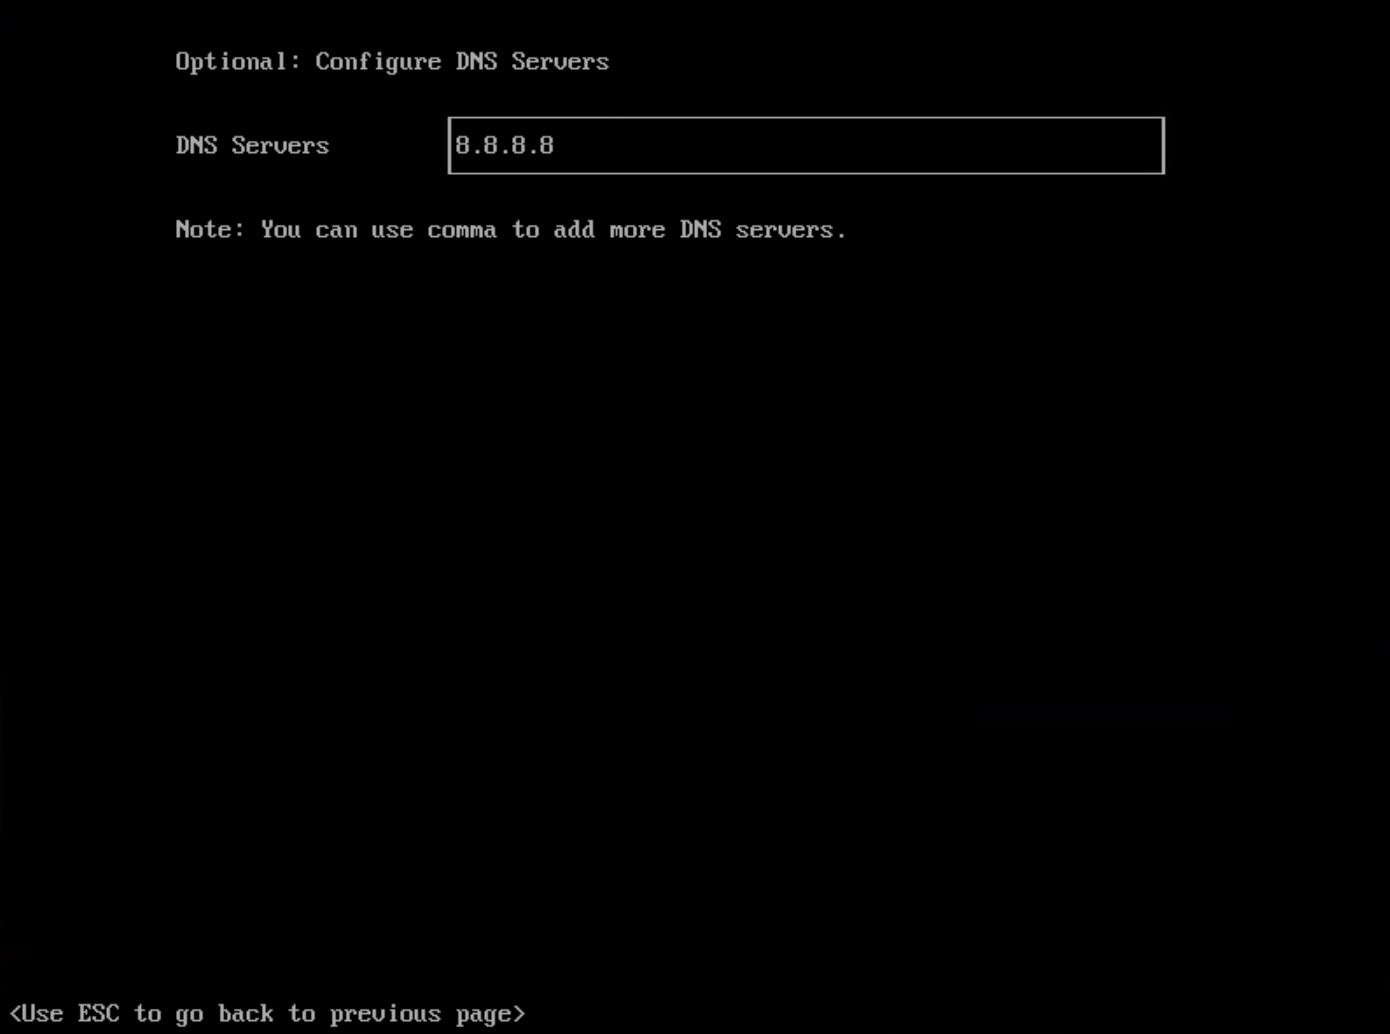
After configuring the network, I configure the DNS as well.
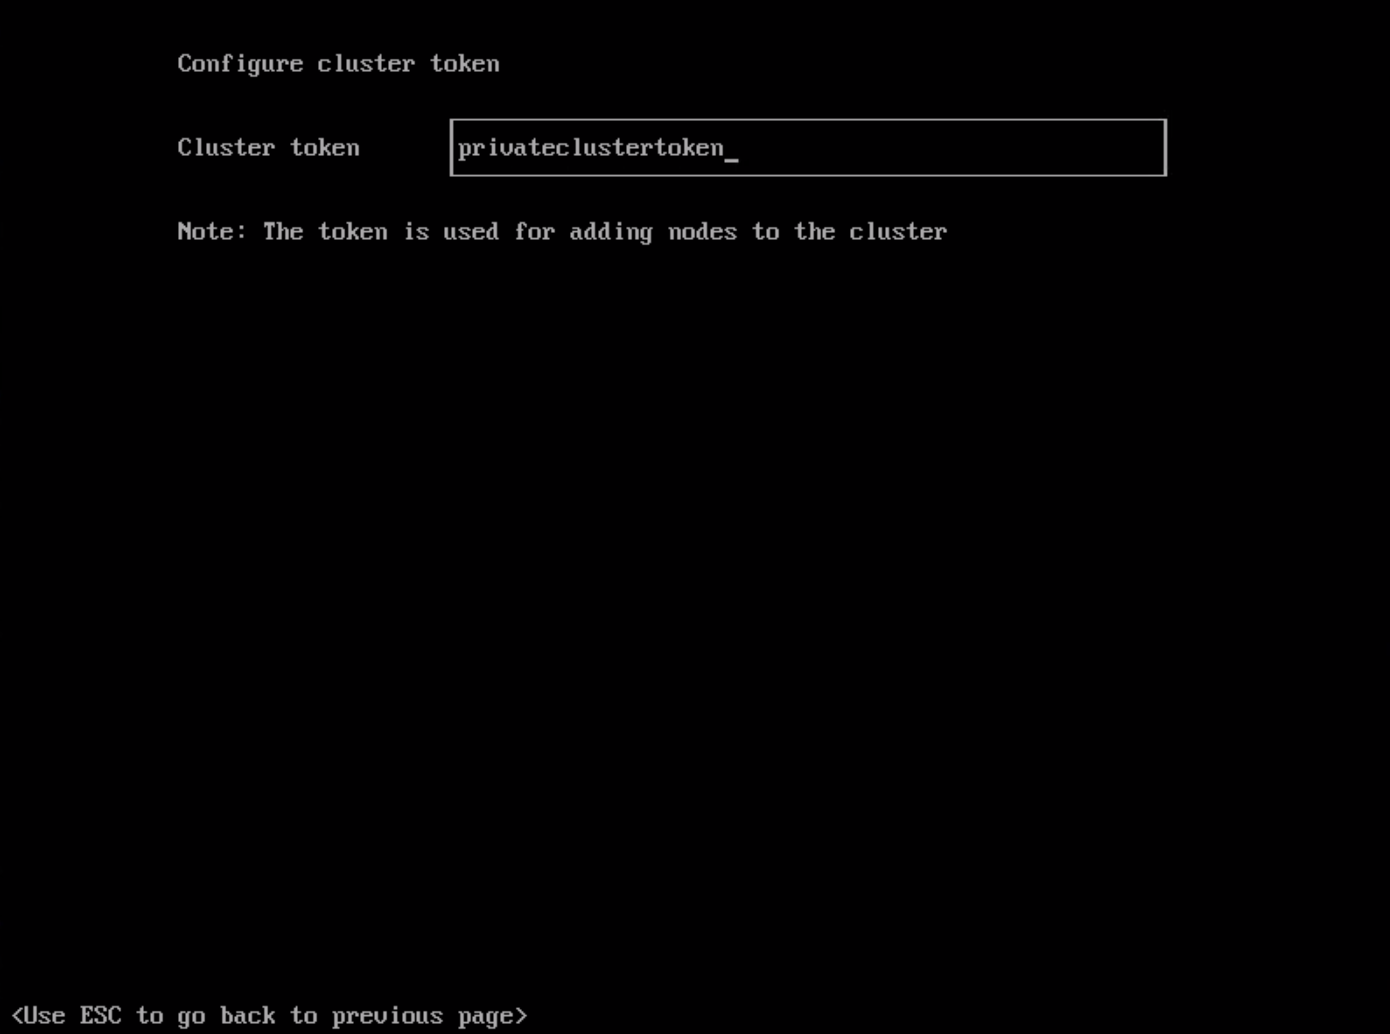
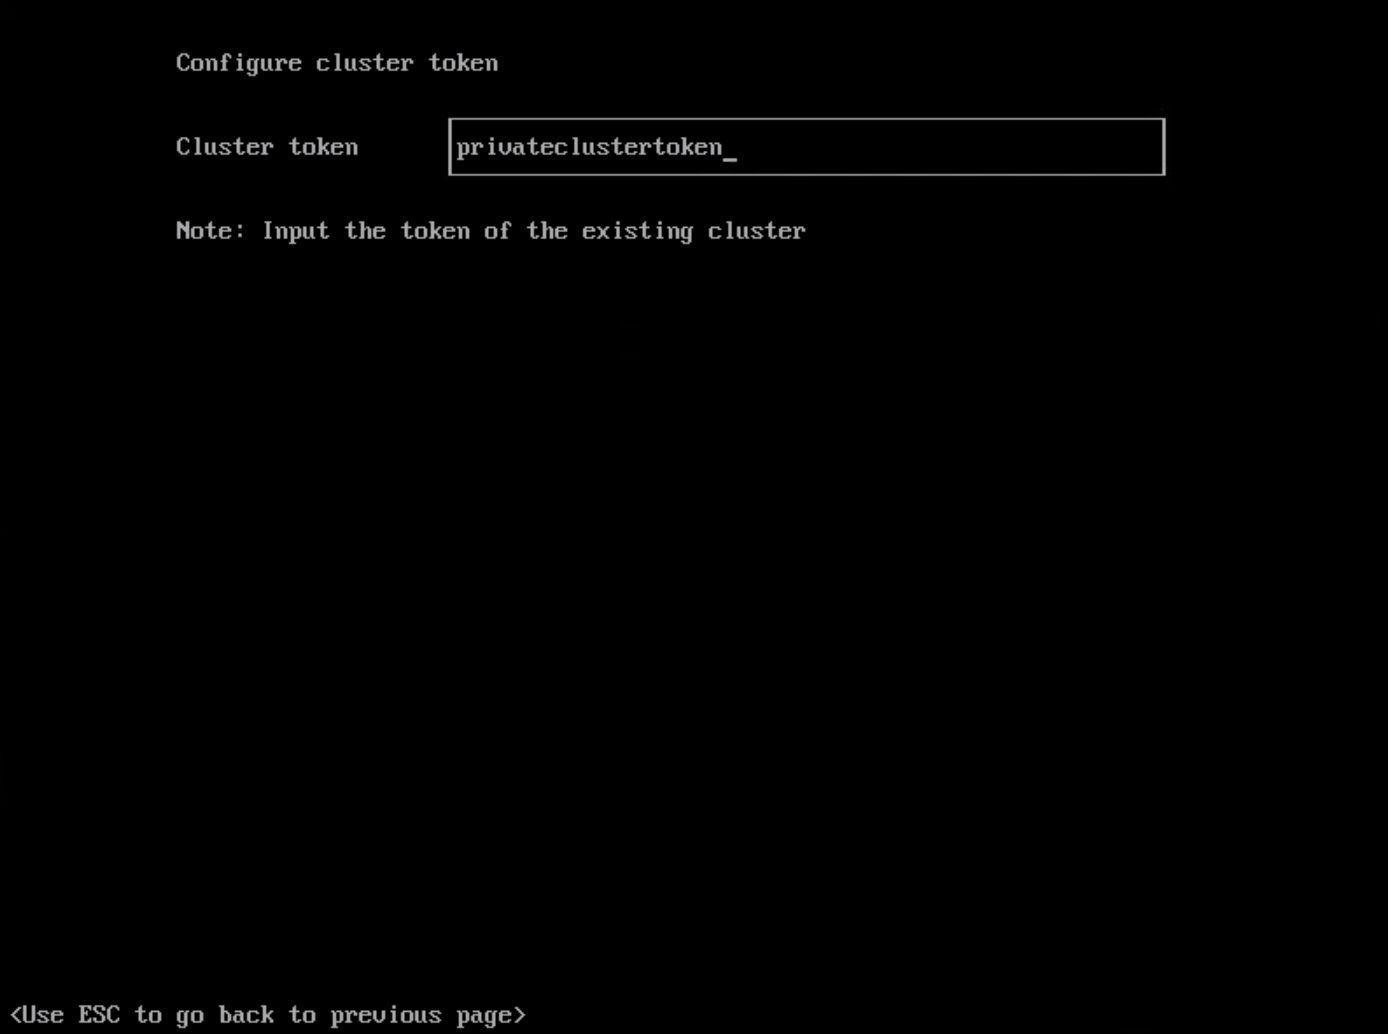
After configuring the DNS, I am creating a Cluster token for adding the additional nodes to the cluster.
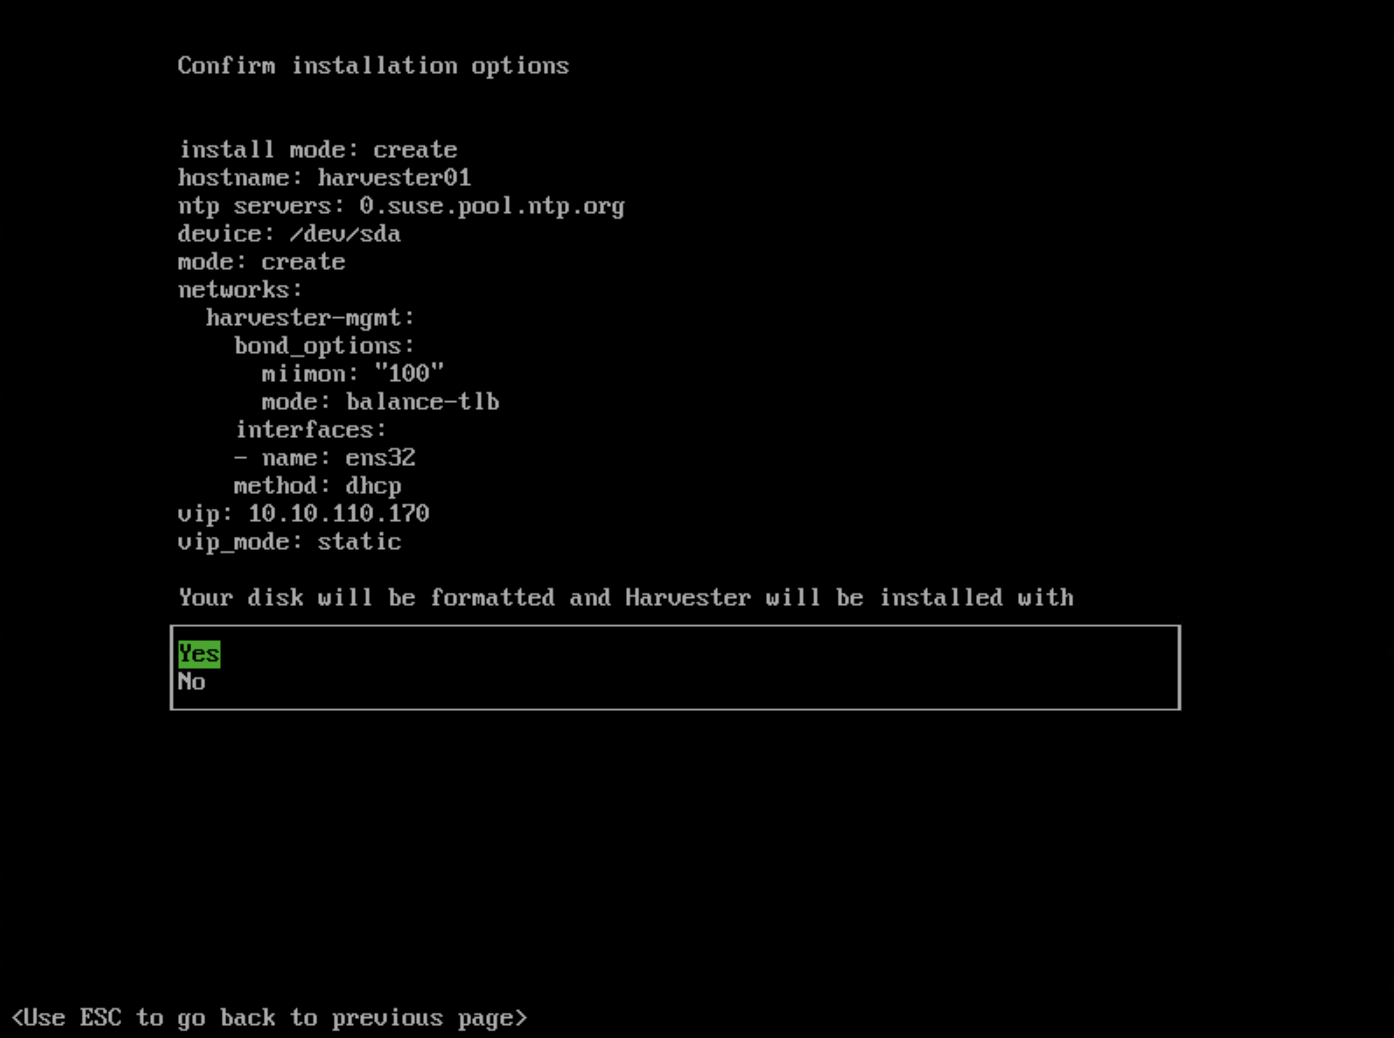
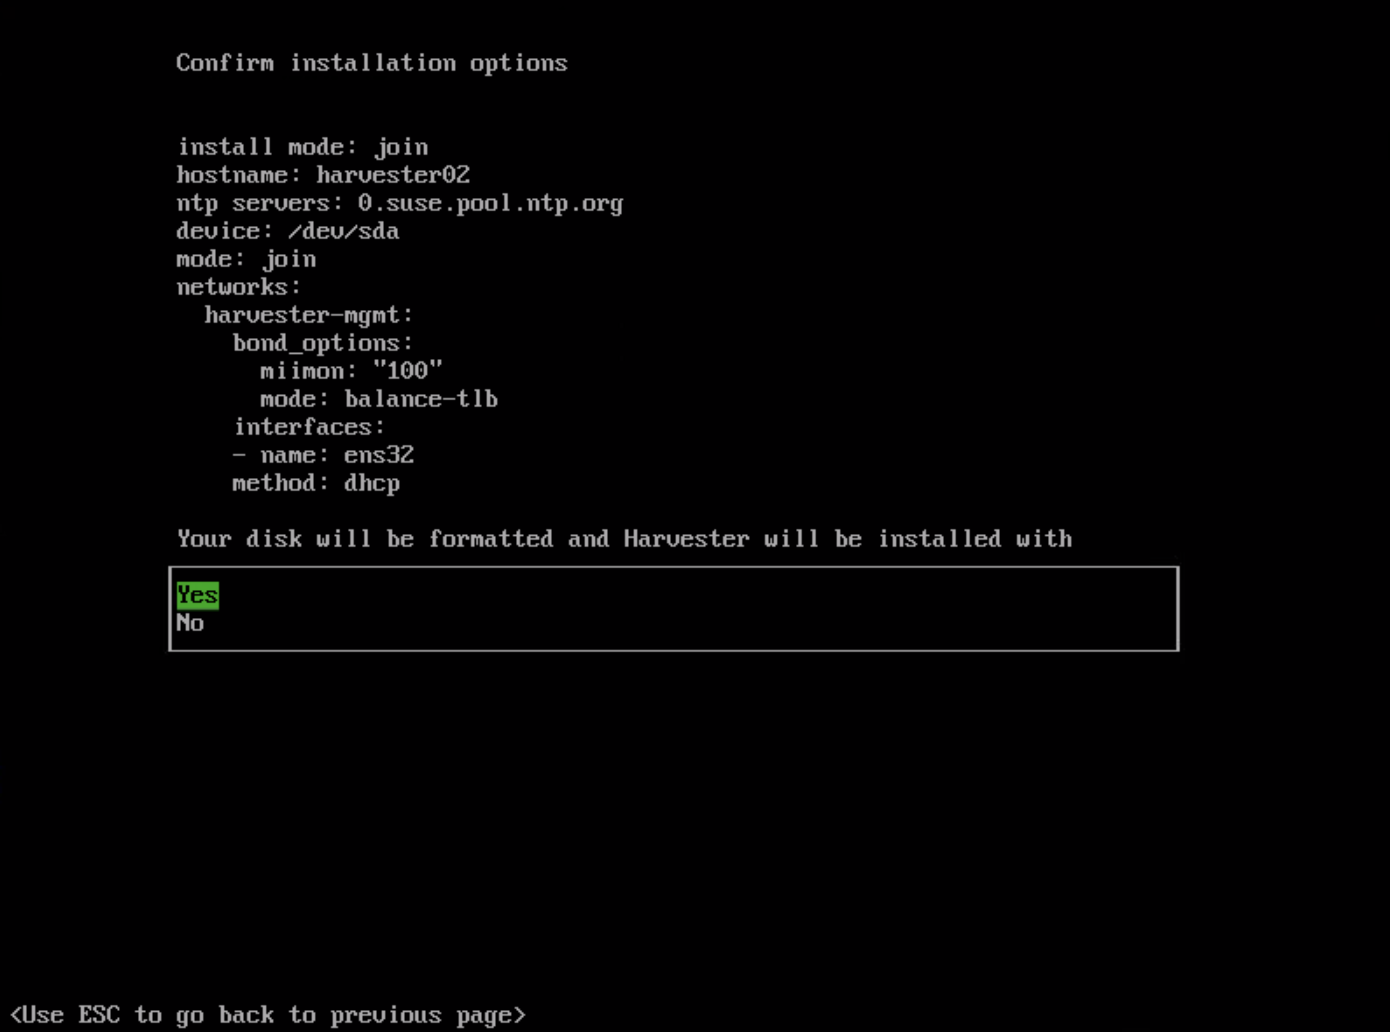
After reviewing the configuration, I select Yes and the installation starts.

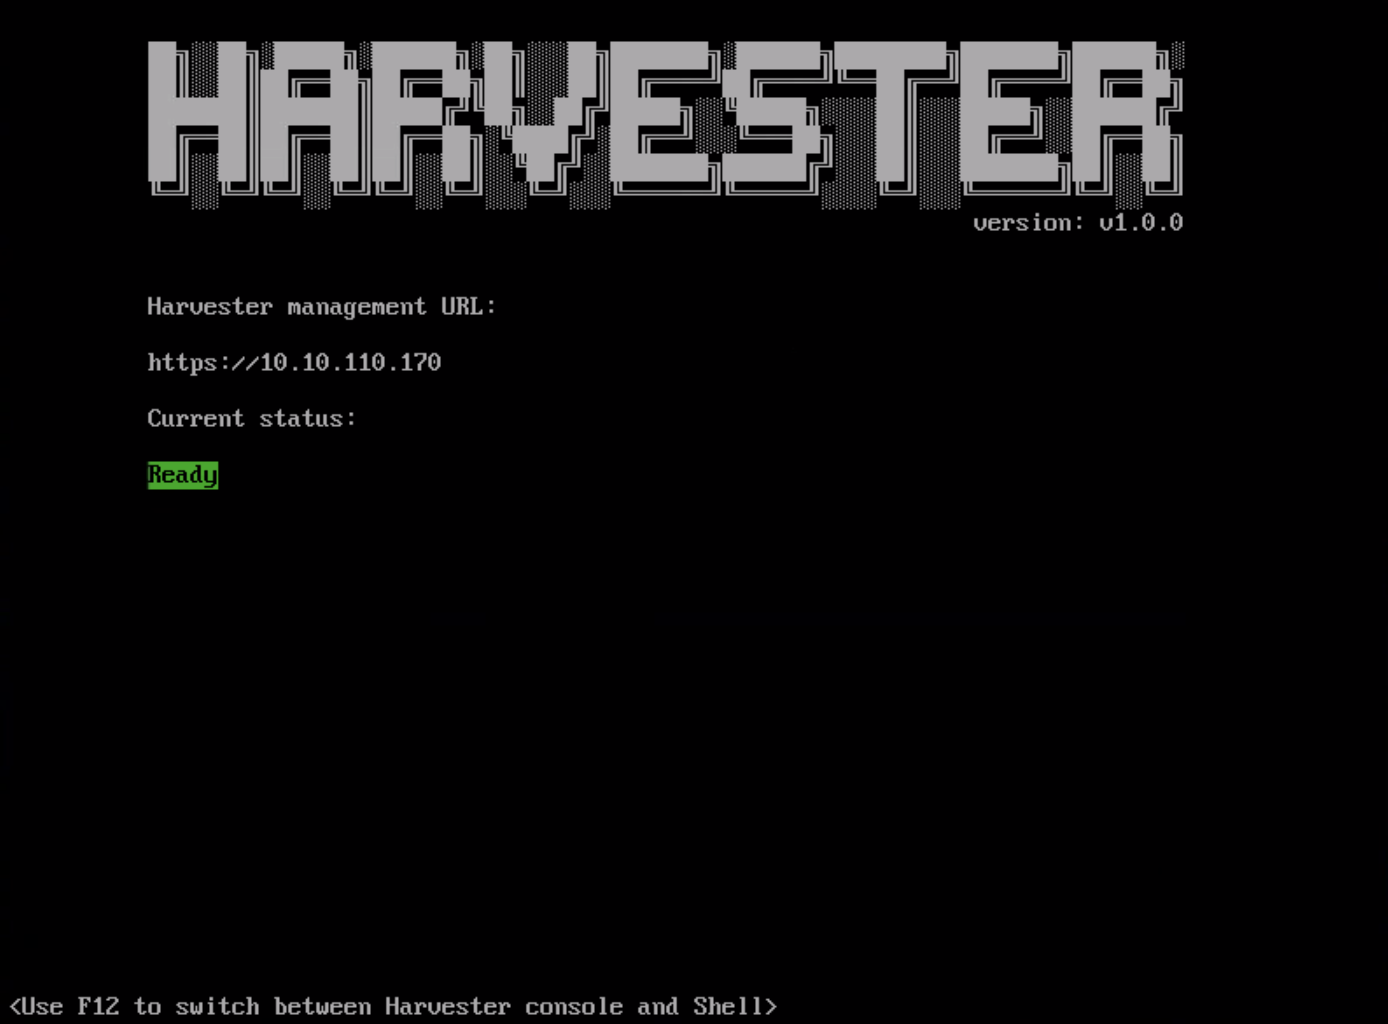
After completion of the installation, the node’s current status is Ready. I can now login to the UI using the management URL.

After logging in to the system for the first time, I see this dashboard. The dashboard consists of general information about the Hosts, VMs, Capacity information and Cluster/VM metrics.
I will start configuring the cluster options starting with the Host Network.
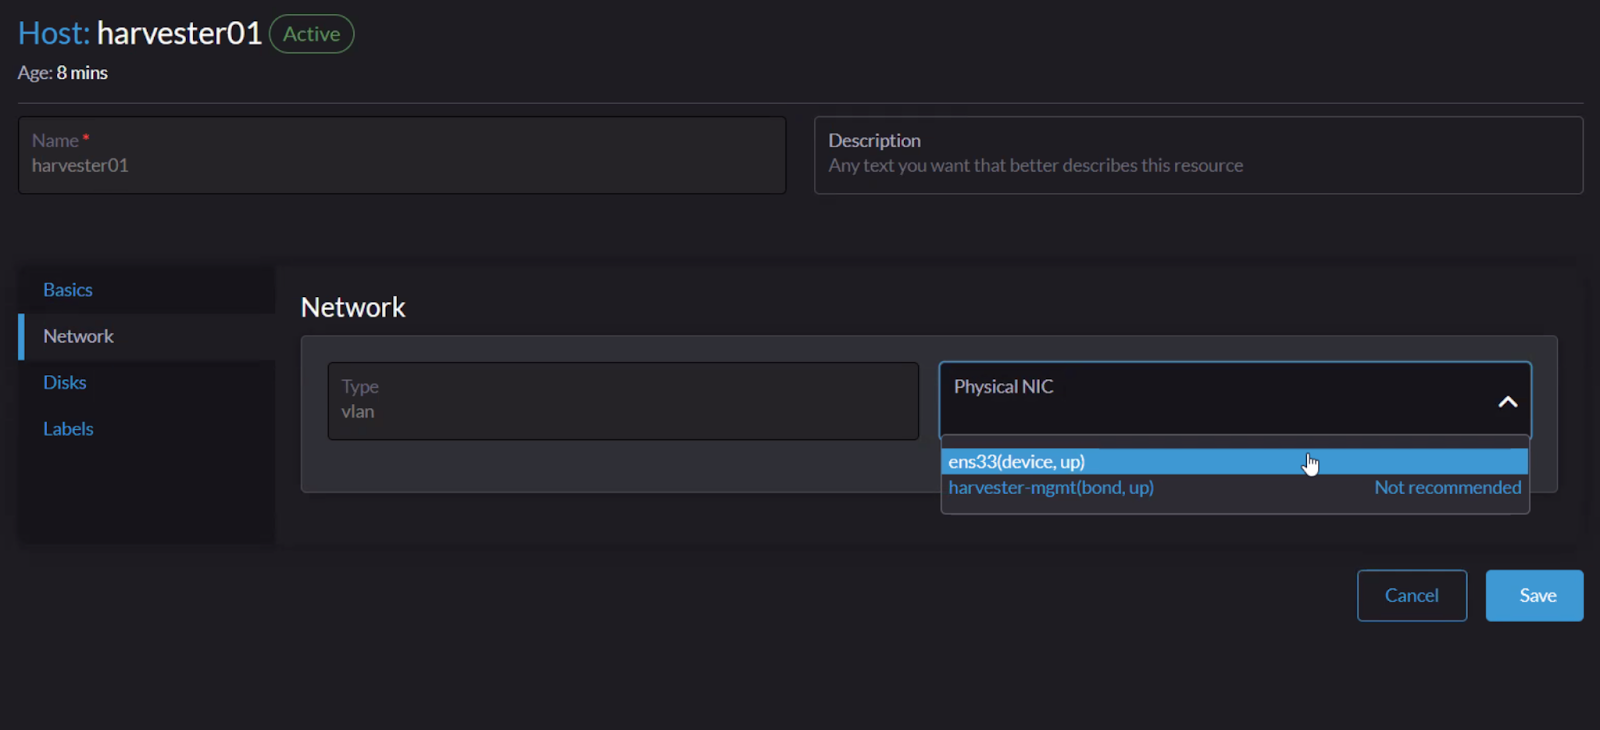
I will choose the Physical NIC and configure the required sections. Then I move on to adding VM Network configurations.
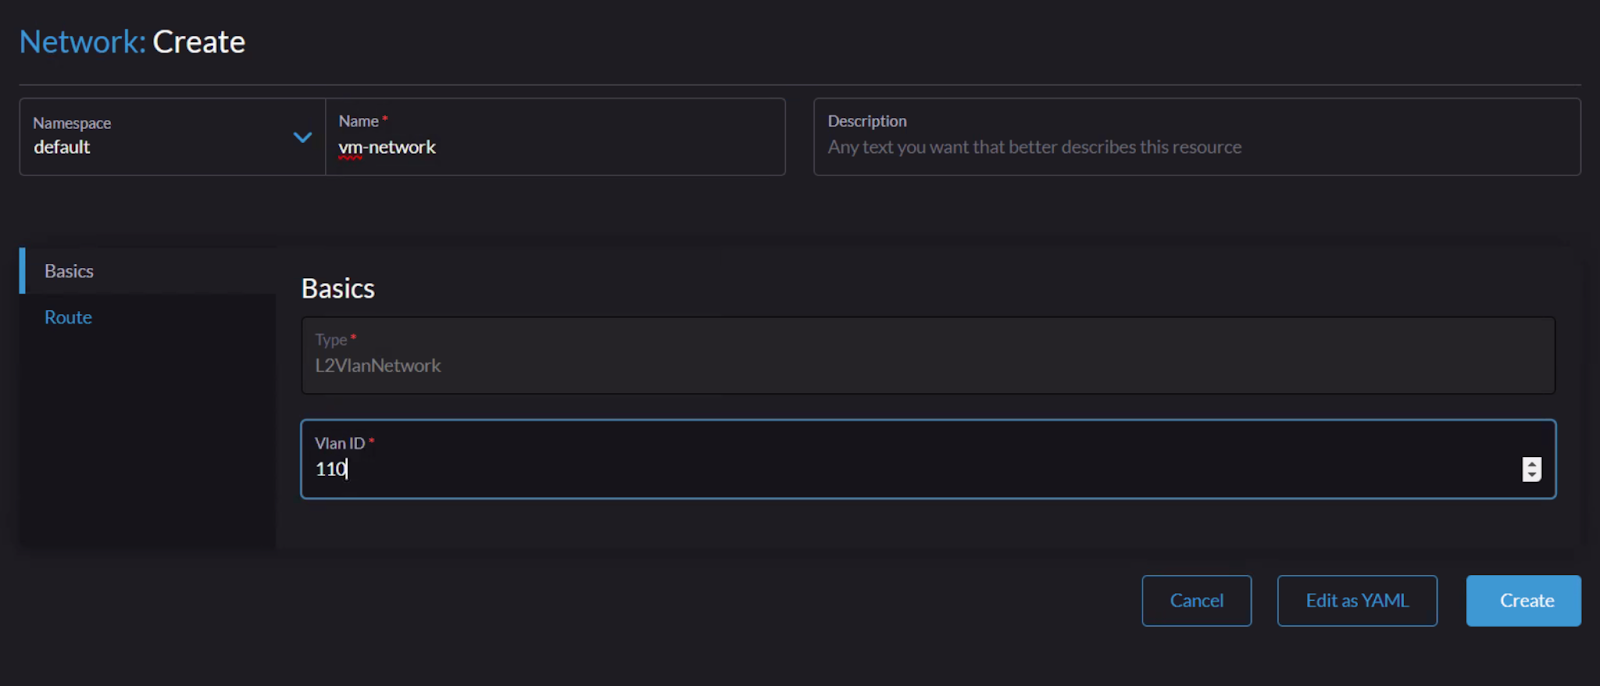
I have created one VM Network and chosen the Vlan ID of 110, but of course you can change it and add other networks.
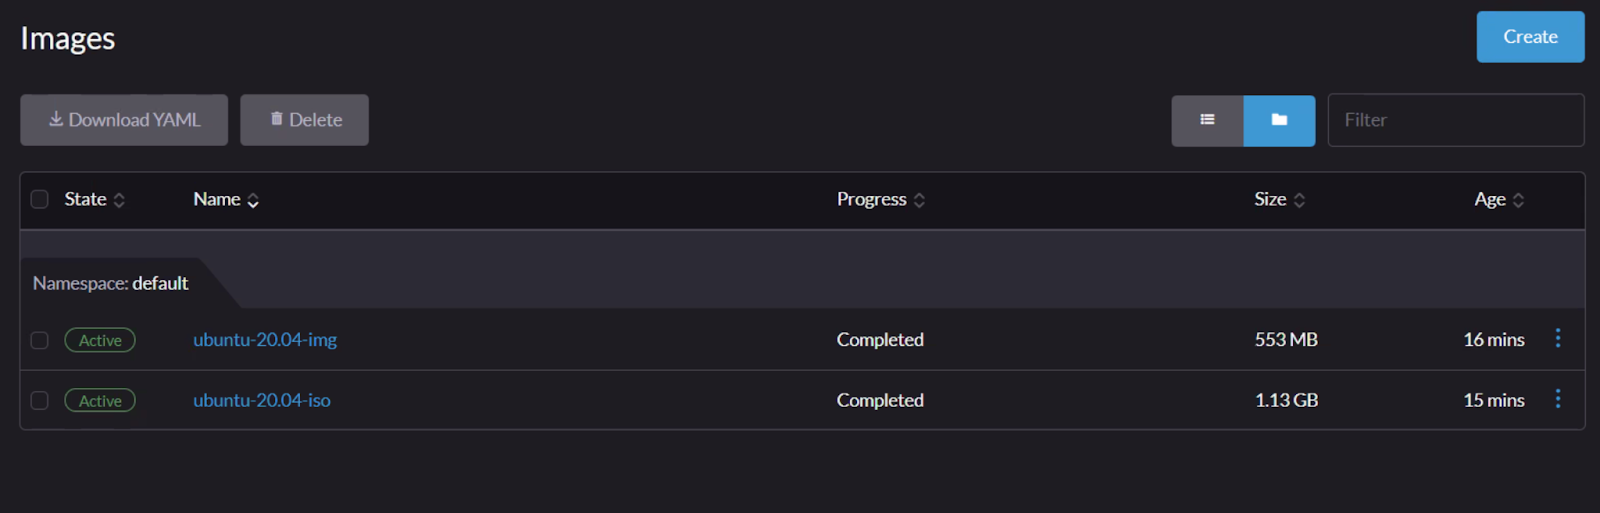
I will now add Images to the cluster. There are two options to choose from: URL and ISO File upload.
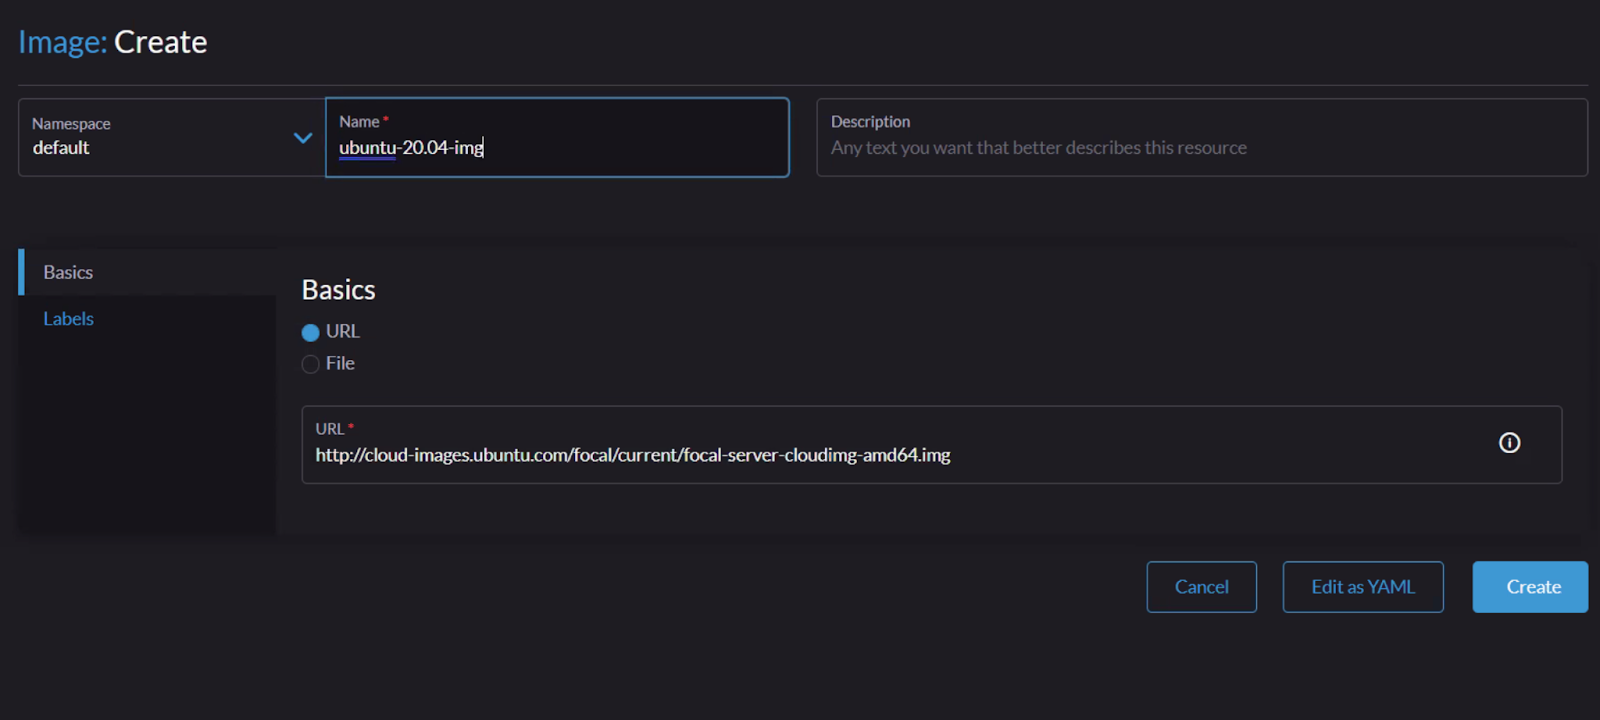
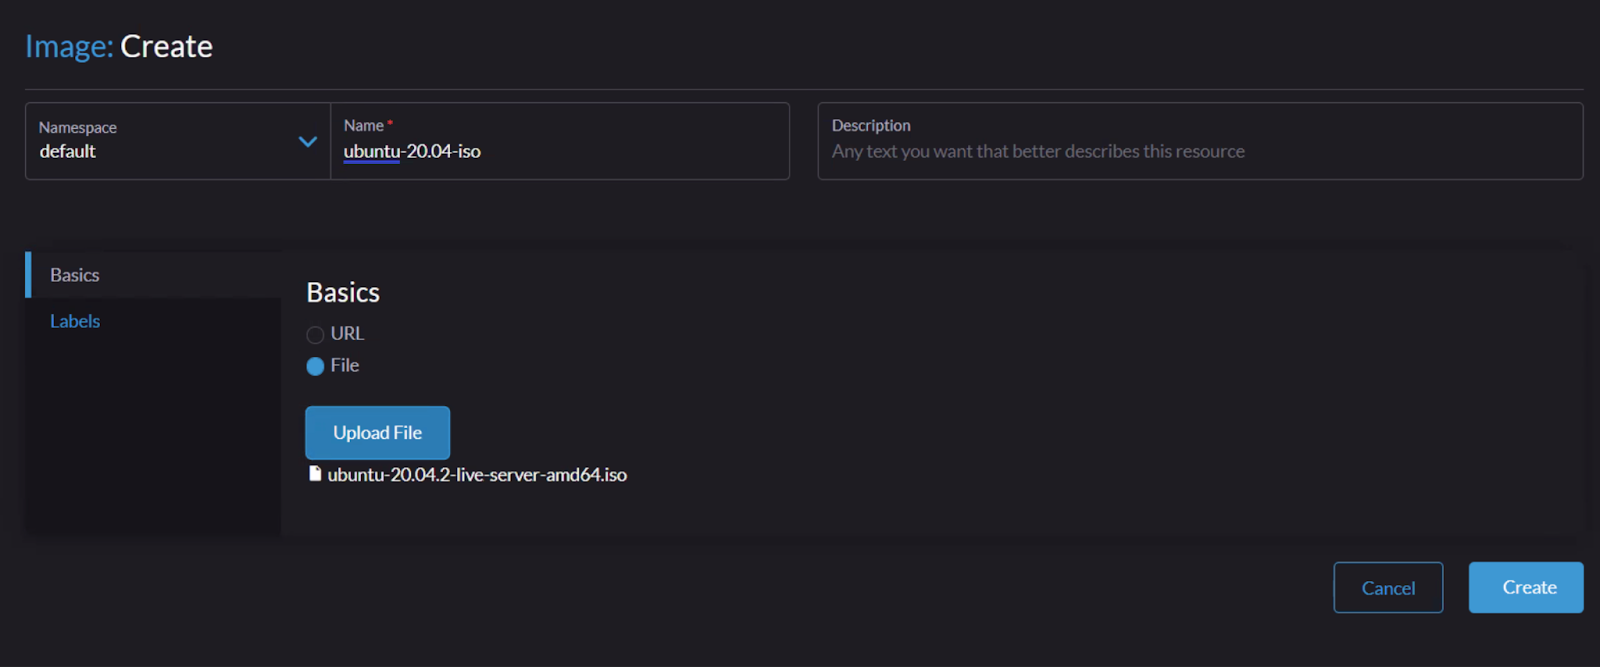
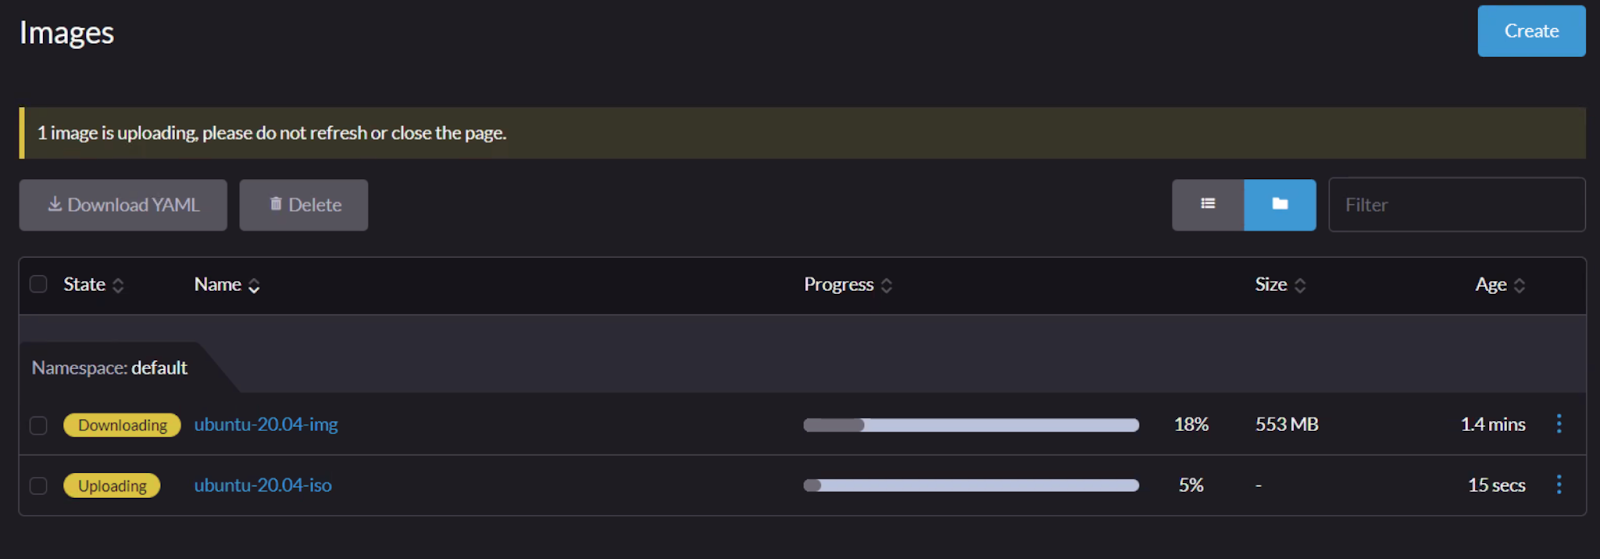
After creating the images, Harvester downloads the first image from the Global URL and uploads the local ISO file.
Now let’s move on to adding the other nodes to the Cluster. I will add the screenshots of the second node only but I will have a total of three nodes finally.

I am choosing the Join option and starting the process by configuring network options.

After network configurations, I am going to configure the cluster details like Management Host and Cluster Token options and after reviewing all the options I will start the installation.

After adding the nodes, I can now see the details of them in the UI as well.

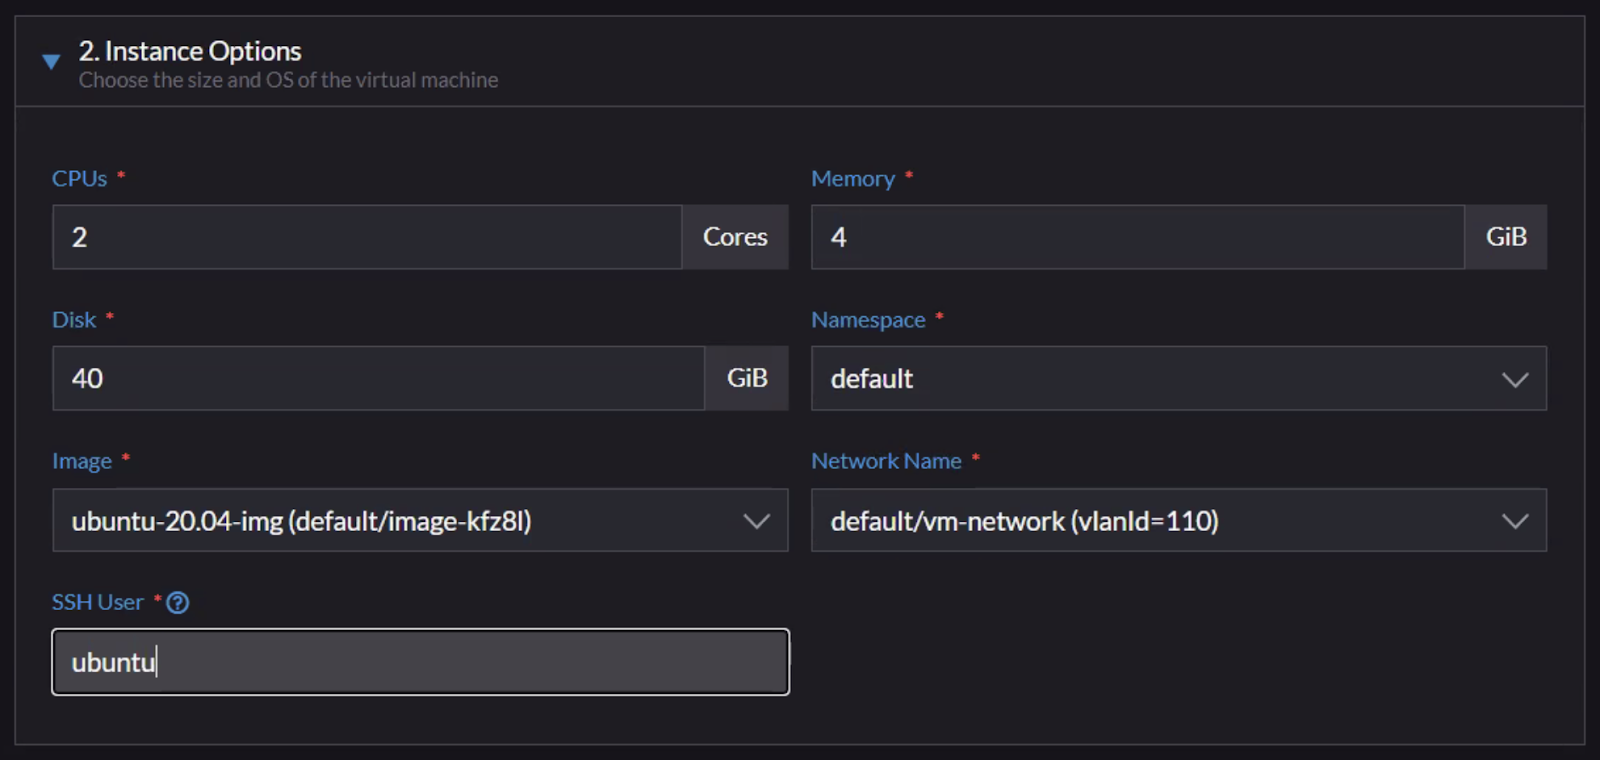
Now let me create a VM from one of the images I’ve created before.
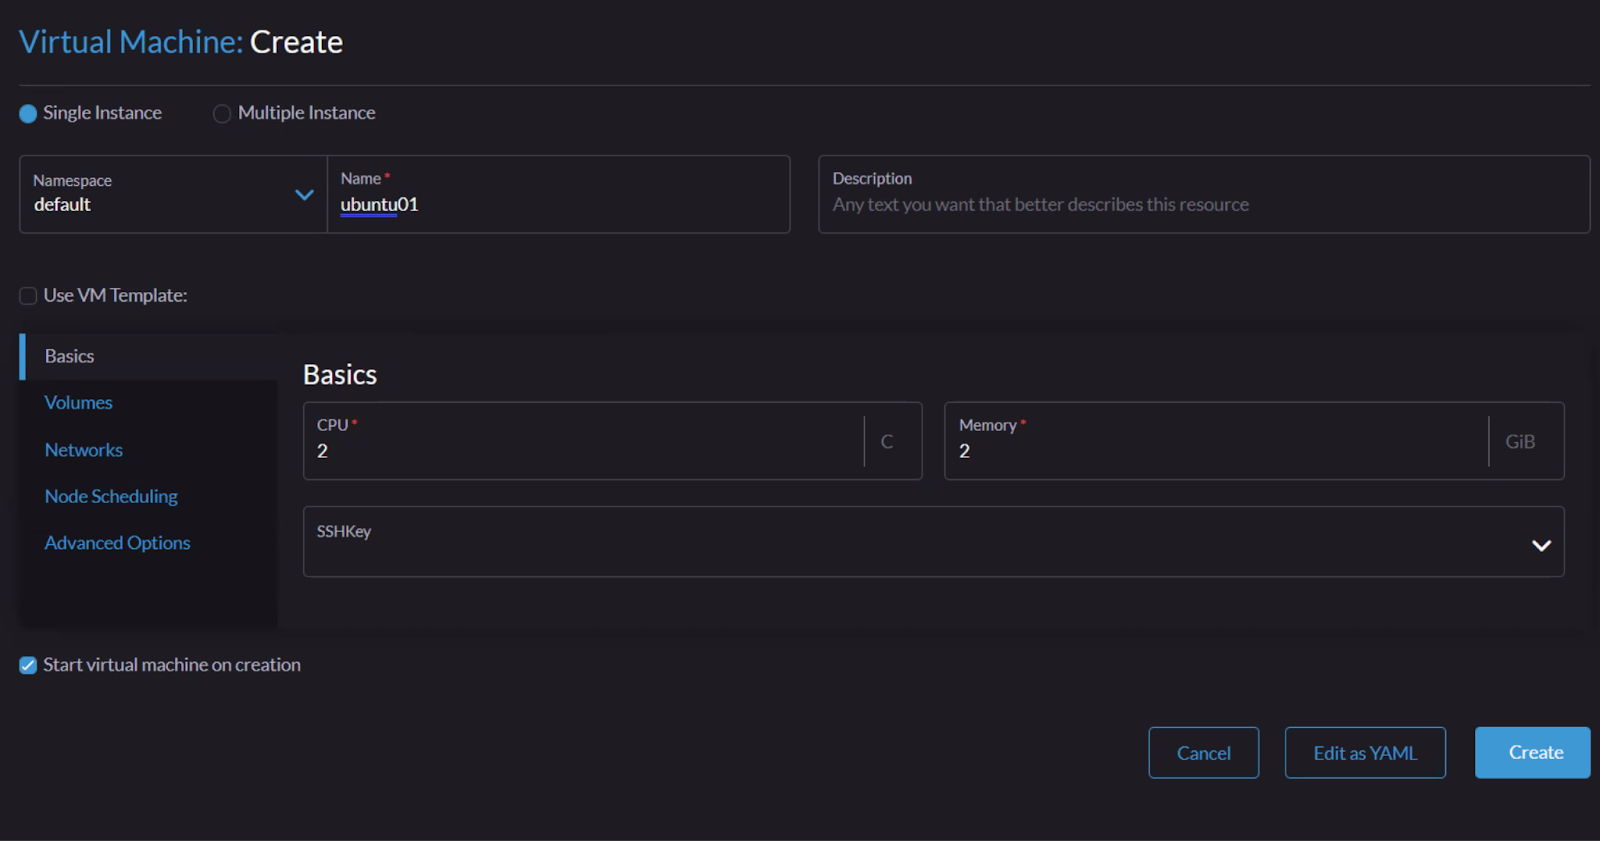
As you can see, I’m creating an Ubuntu VM with 2 CPUs and 2 GB of Memory. I will also add some cloud-config parameters to the VM from the Advanced Options section.
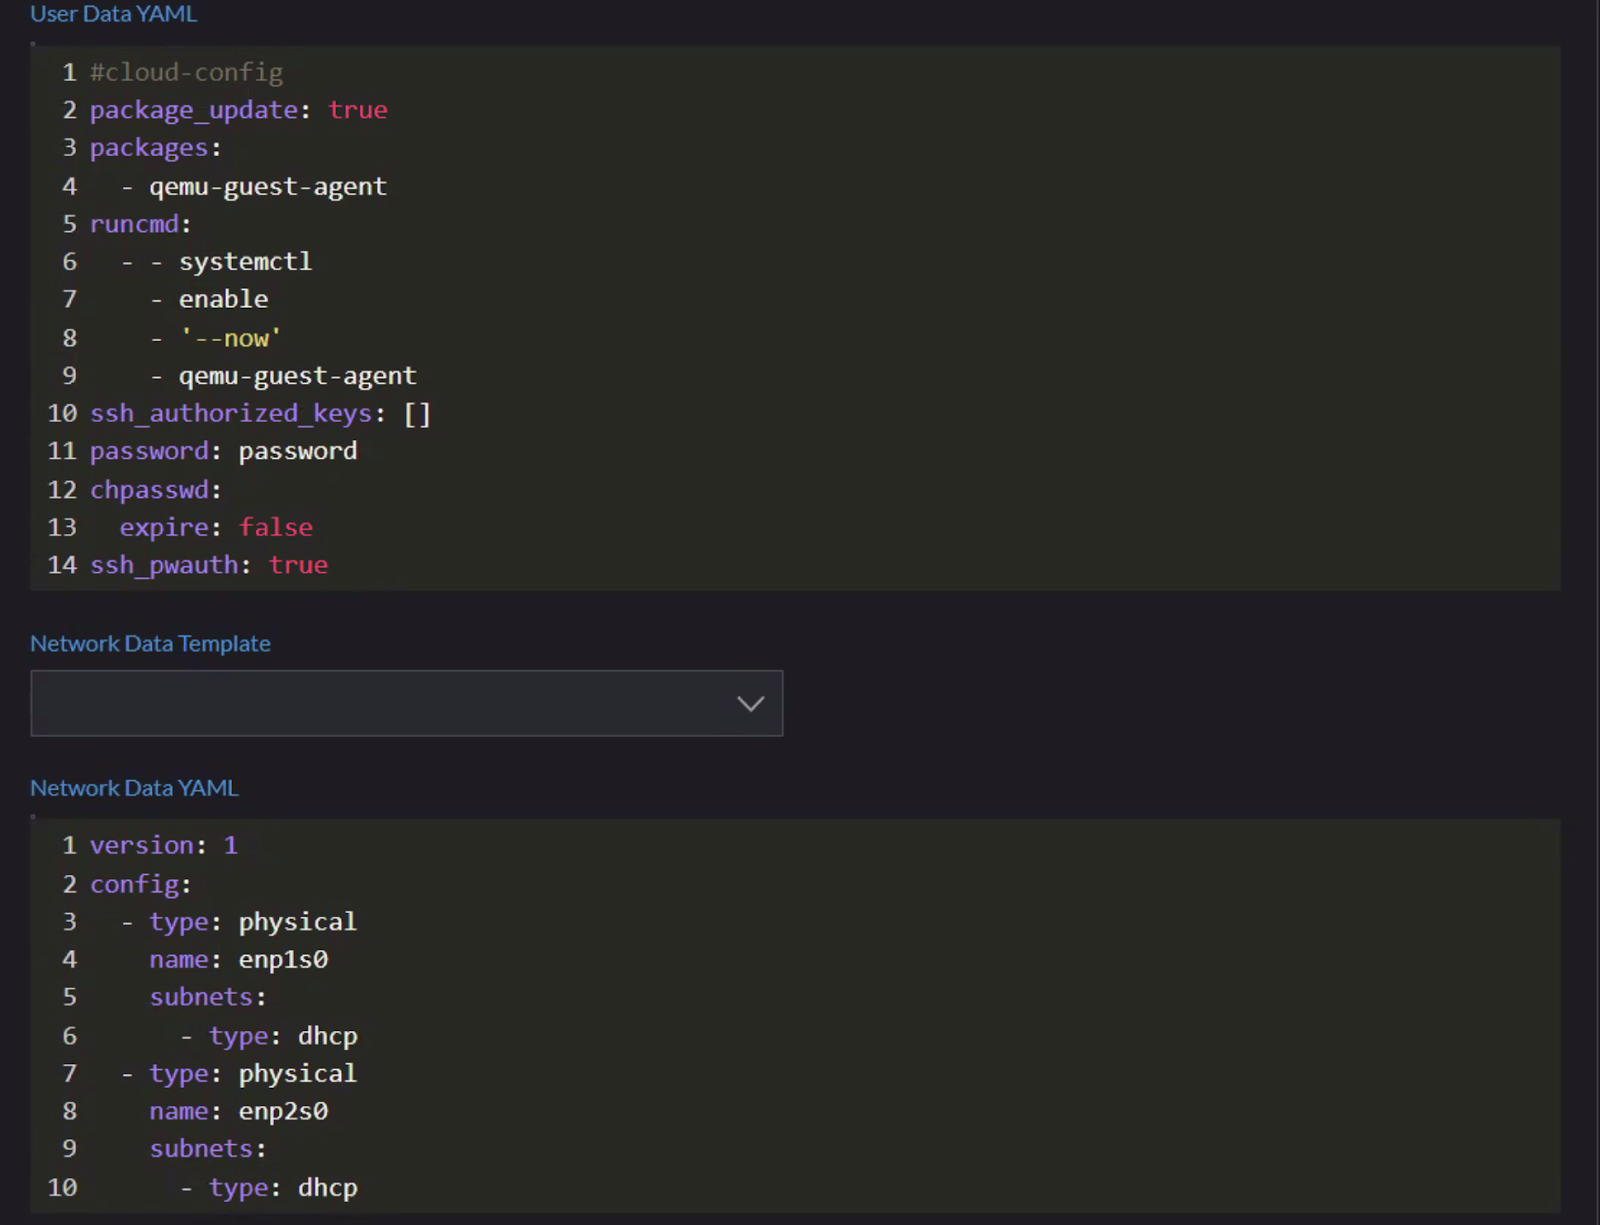
I’ve added some configurations to both User Data and Network Data sections. You can also create templates for these configurations and use them repeatedly.
After creating the VM it boots up and I can now connect to it. There are two options to connect the VM from the UI. The first one is the VNC Console and the second one is the Serial Console. Also, you can add SSH Key to your VMs to access them from the network but I haven’t configured it in this demonstration.
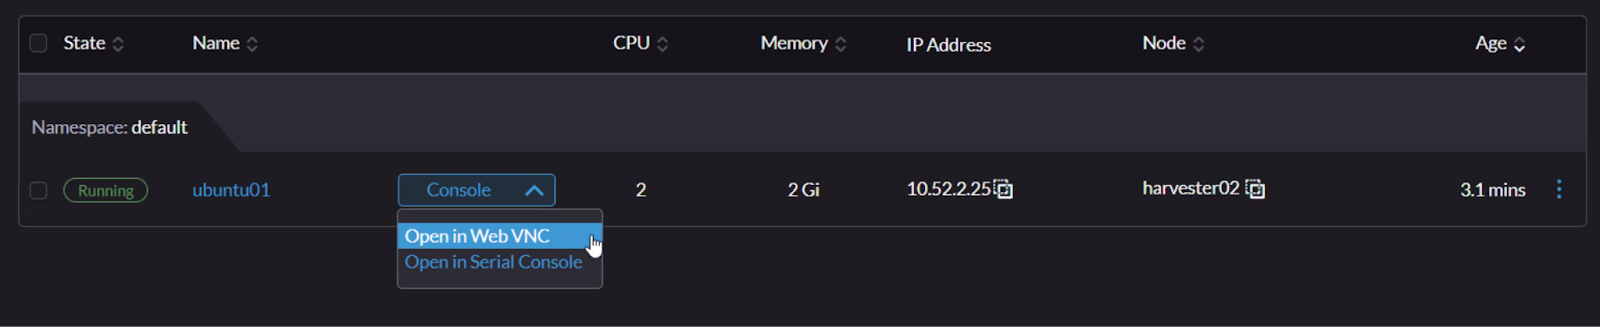
As you can see, it took an IP address from the DHCP and the VM is automatically placed on Node 02. Let me connect to the VM and test the internet connection.
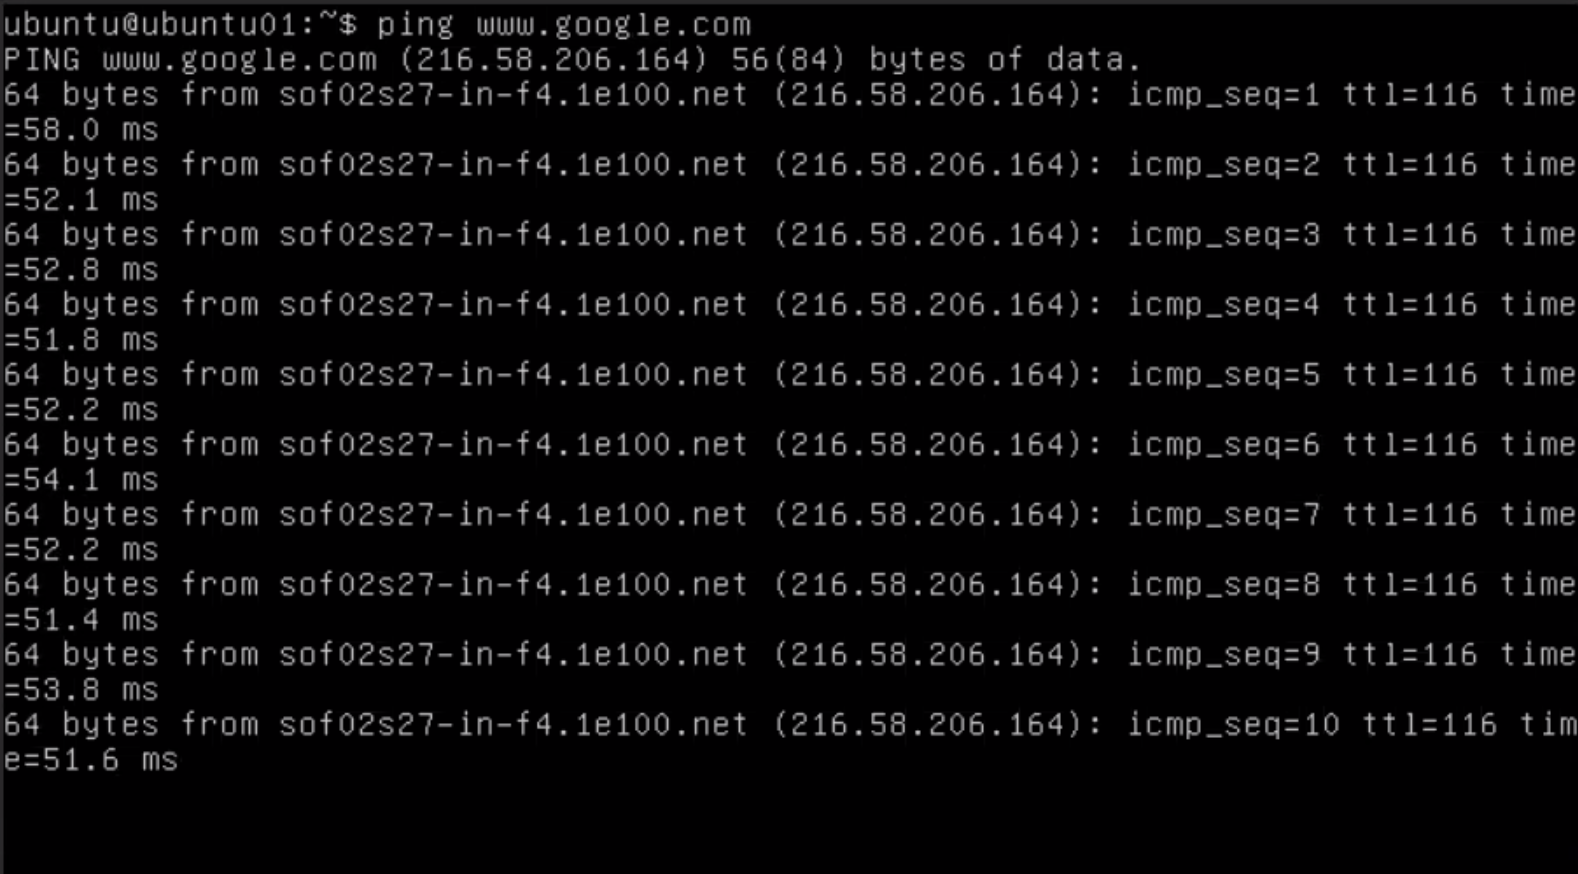
It works. Perfect!
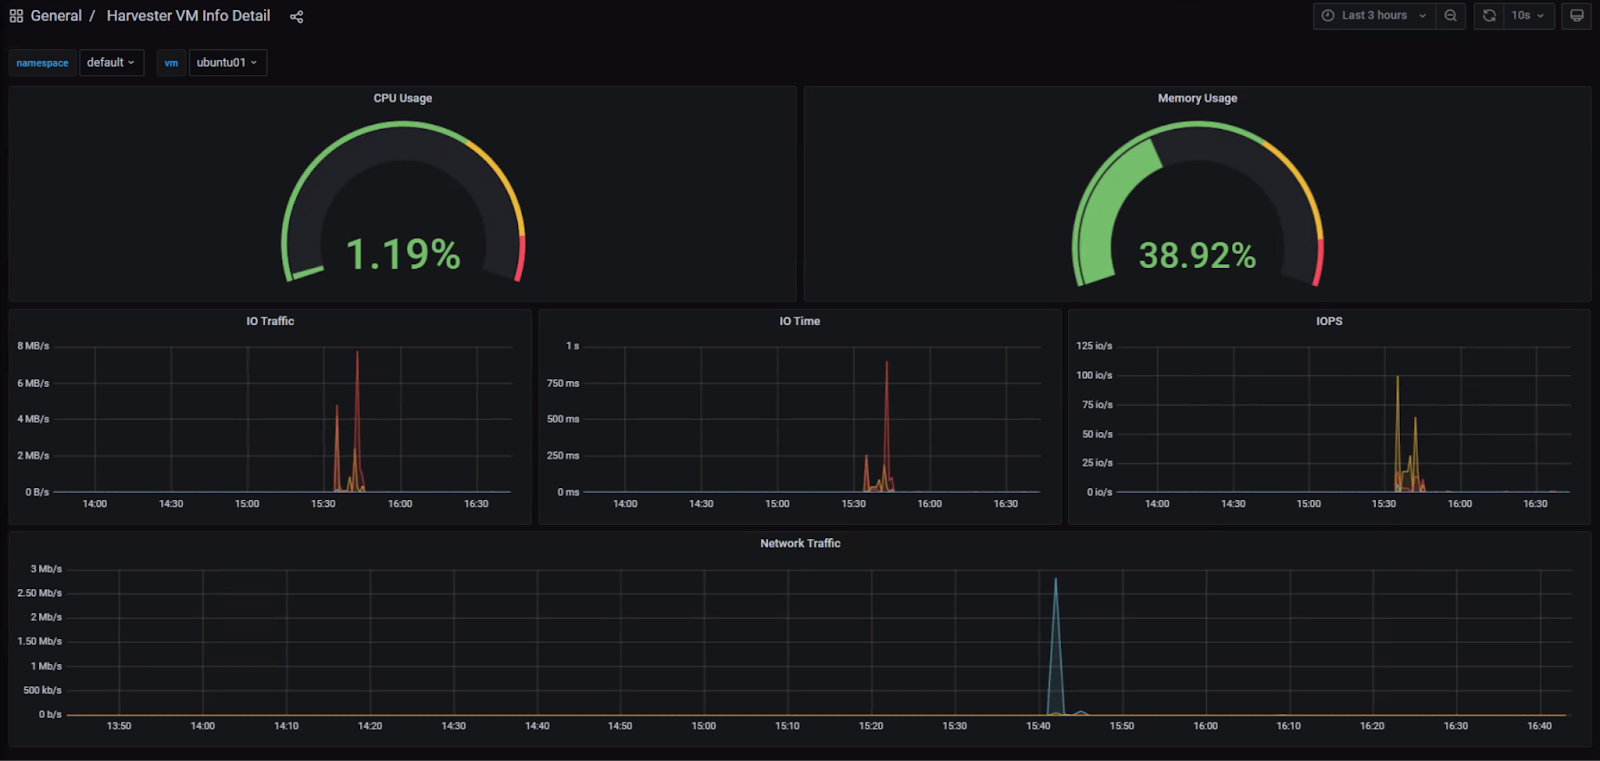
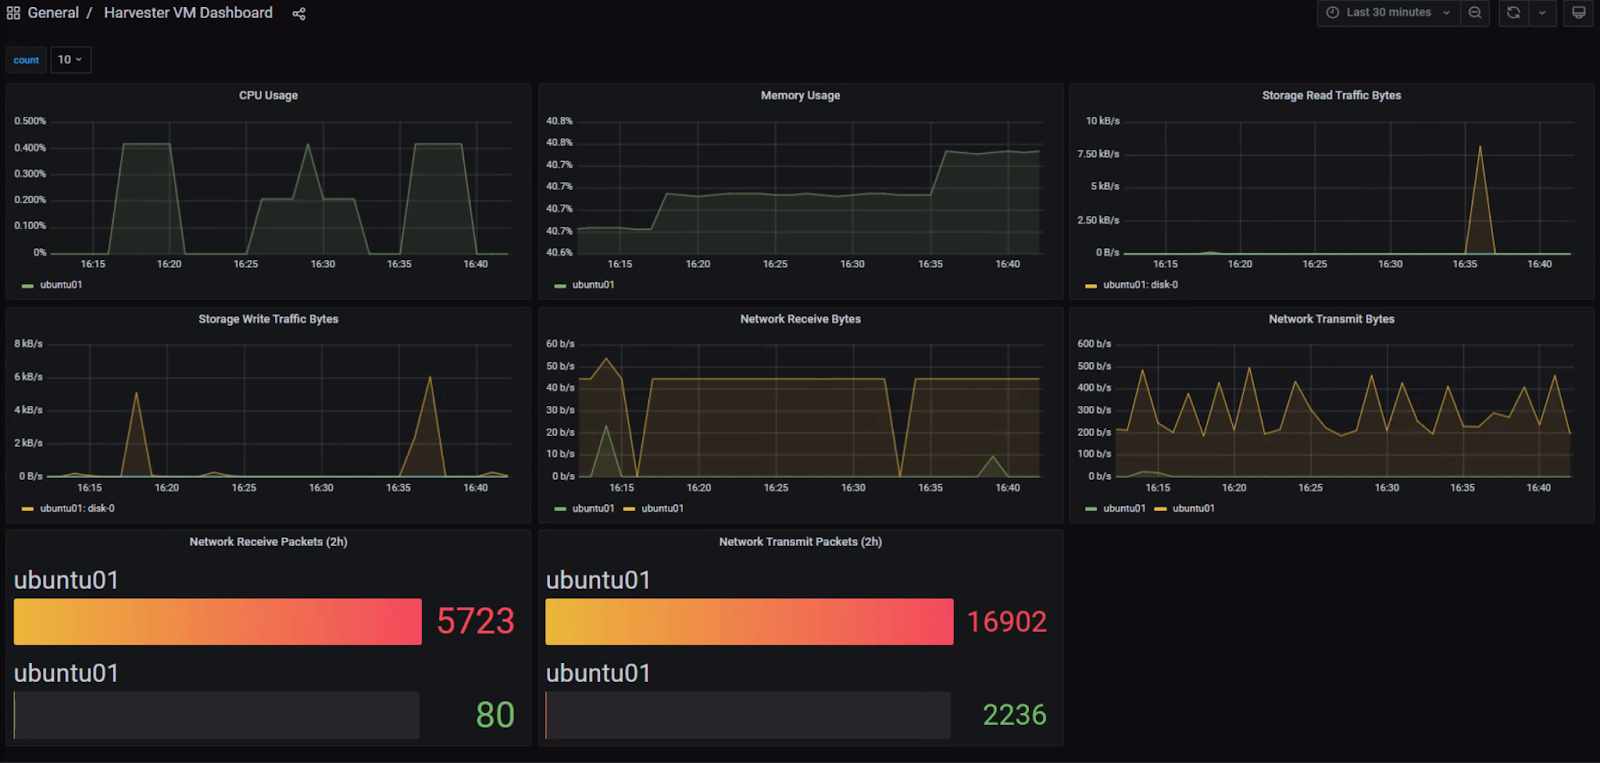
As I’ve mentioned before, Harvester comes with a preinstalled monitoring stack that includes Prometheus and Grafana. There are even preconfigured dashboards in Grafana and you can explore these from both Harvester’s and Grafana’s UI. You can also manage these dashboards and add some custom ones according to your needs.

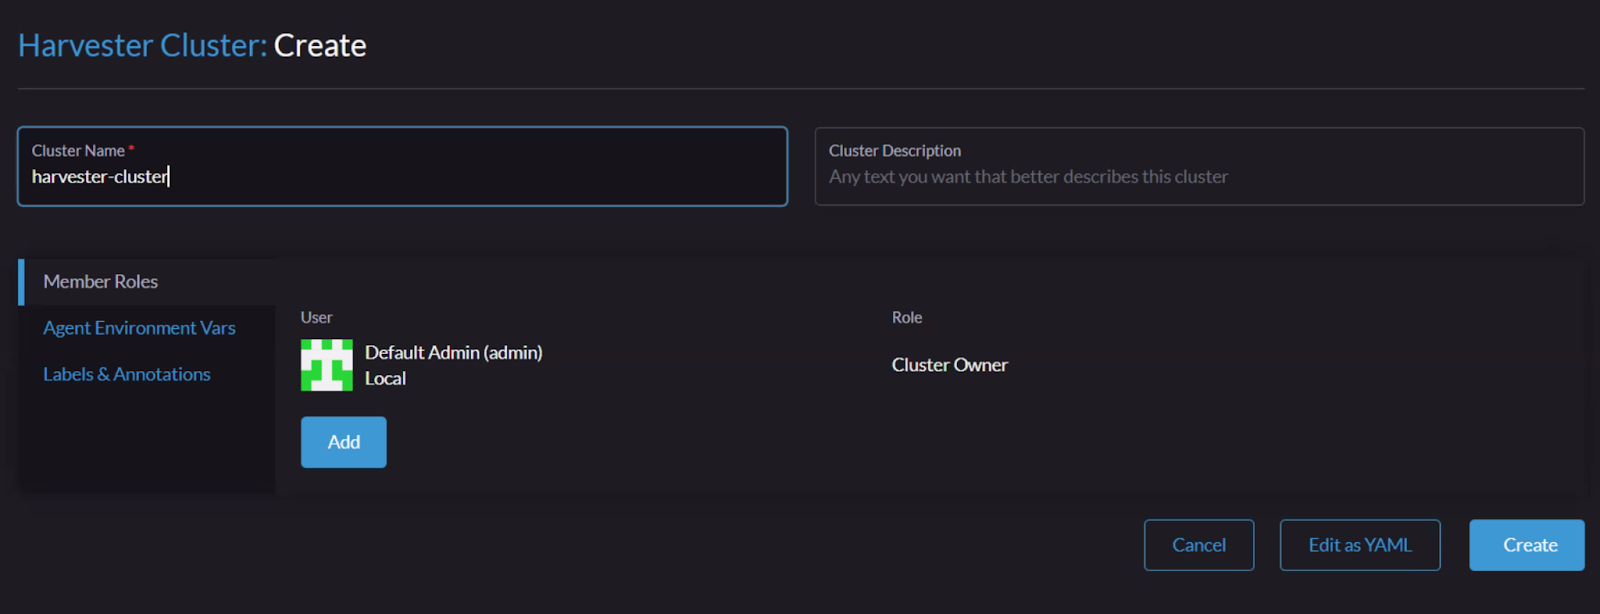
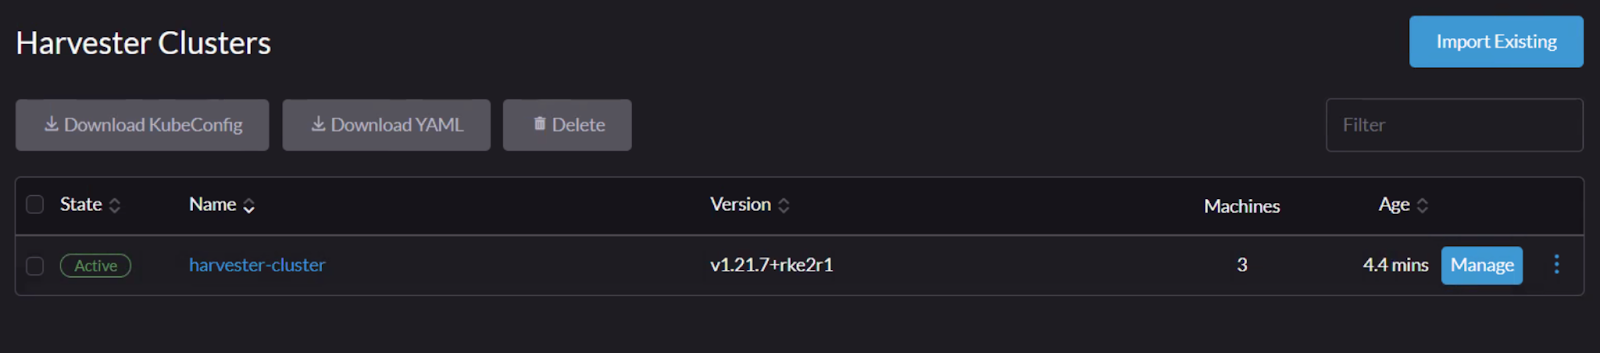
Now it’s time for the Rancher Integration. I have installed a single node Rancher Server for this demonstration. The first step of this integration is importing clusters. In the Rancher UI, there is a section called Virtualization Management that you can import the Harvester Clusters. I am going to import the cluster now.

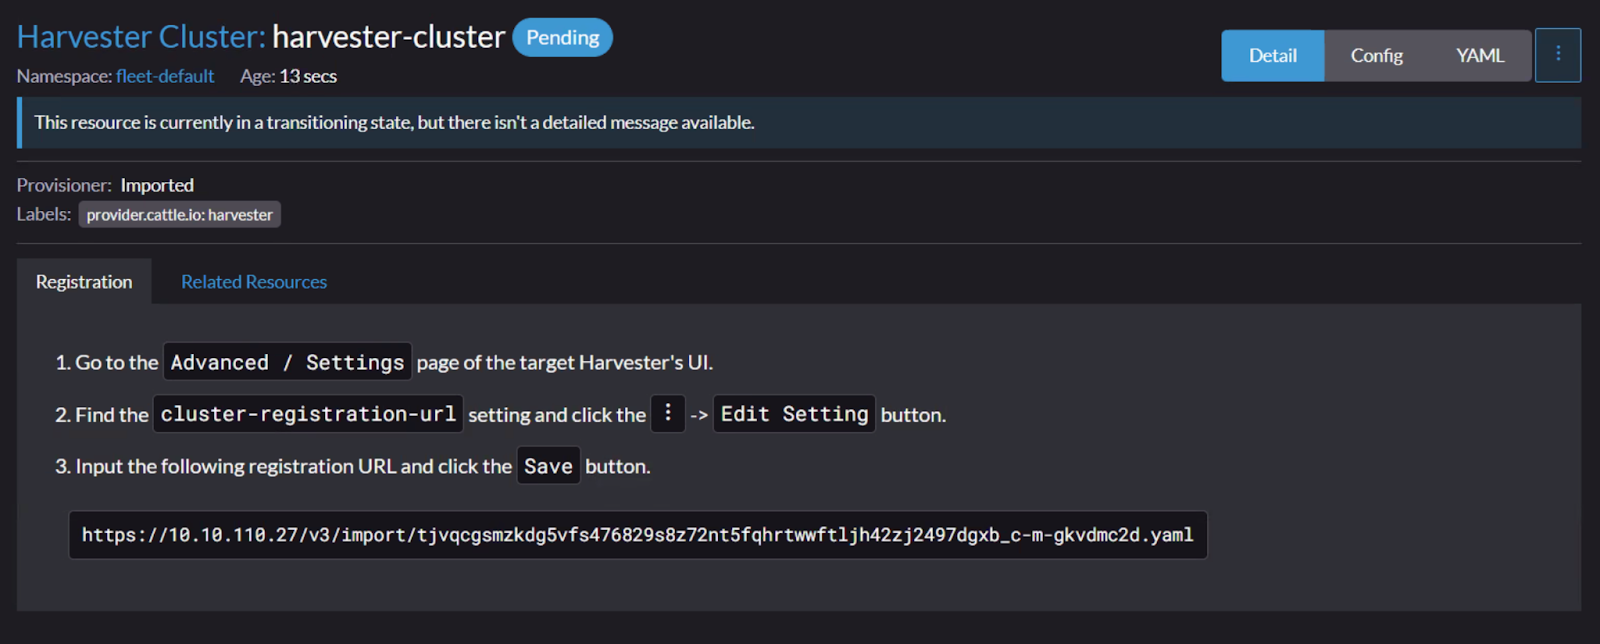
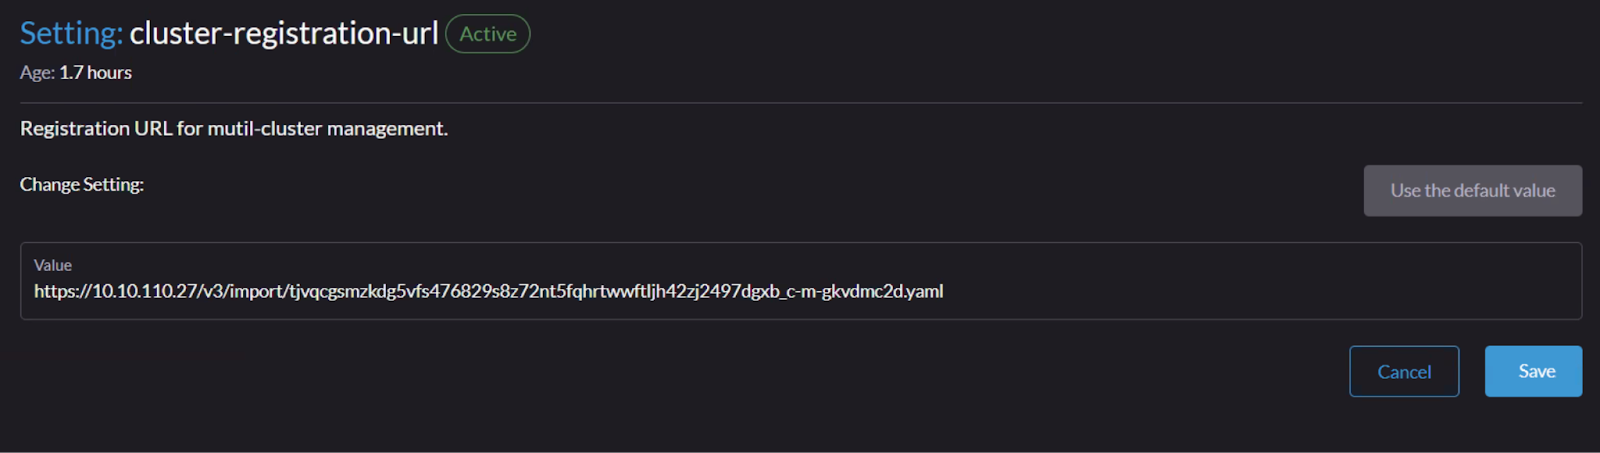
After creating the cluster from the Rancher UI, it pops up a Registration URL and shows me the steps I need to take to complete the process. From the Harvester UI, I will add the URL to the required section.
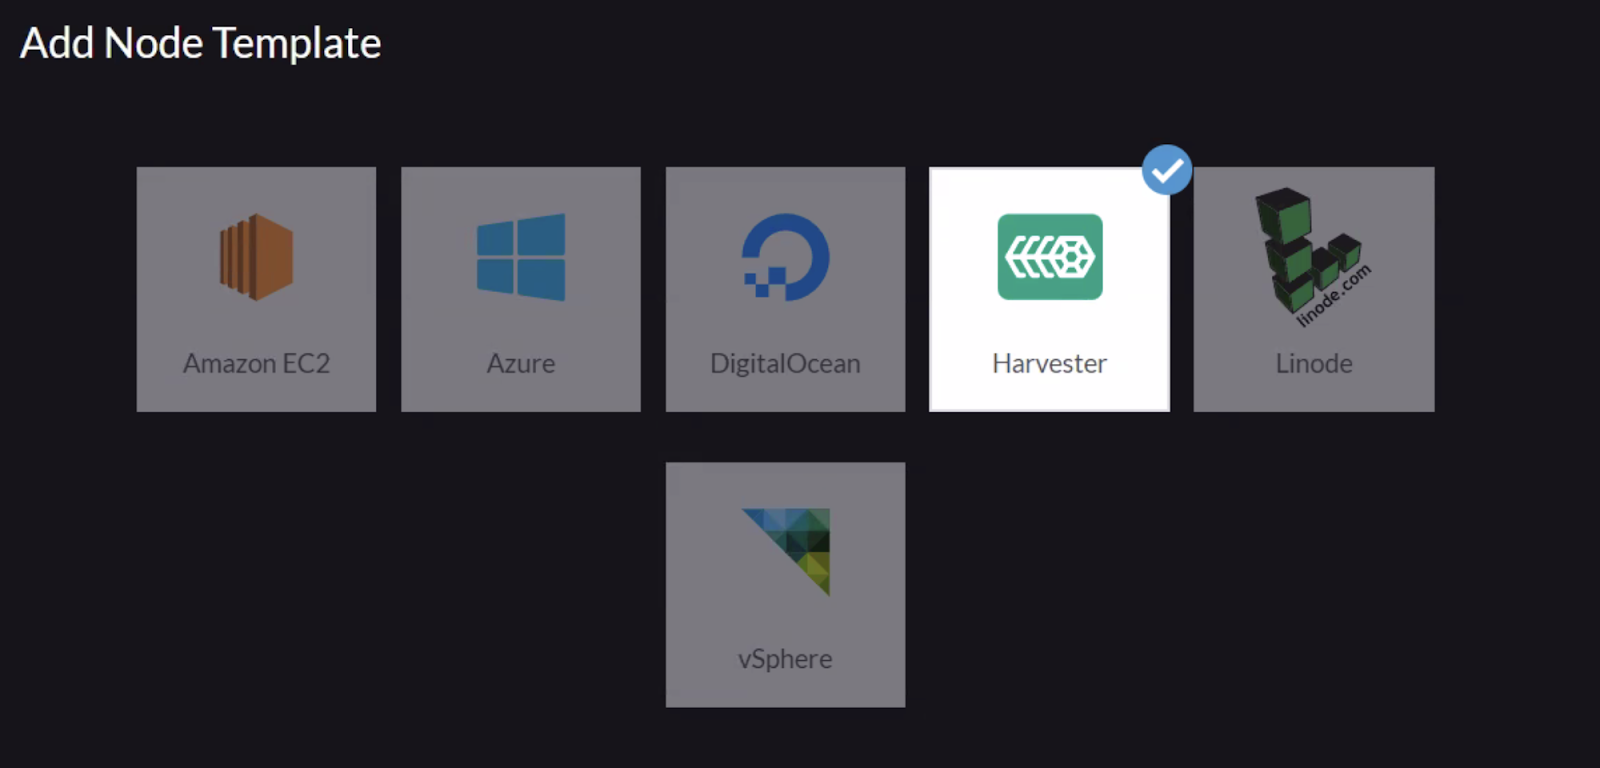
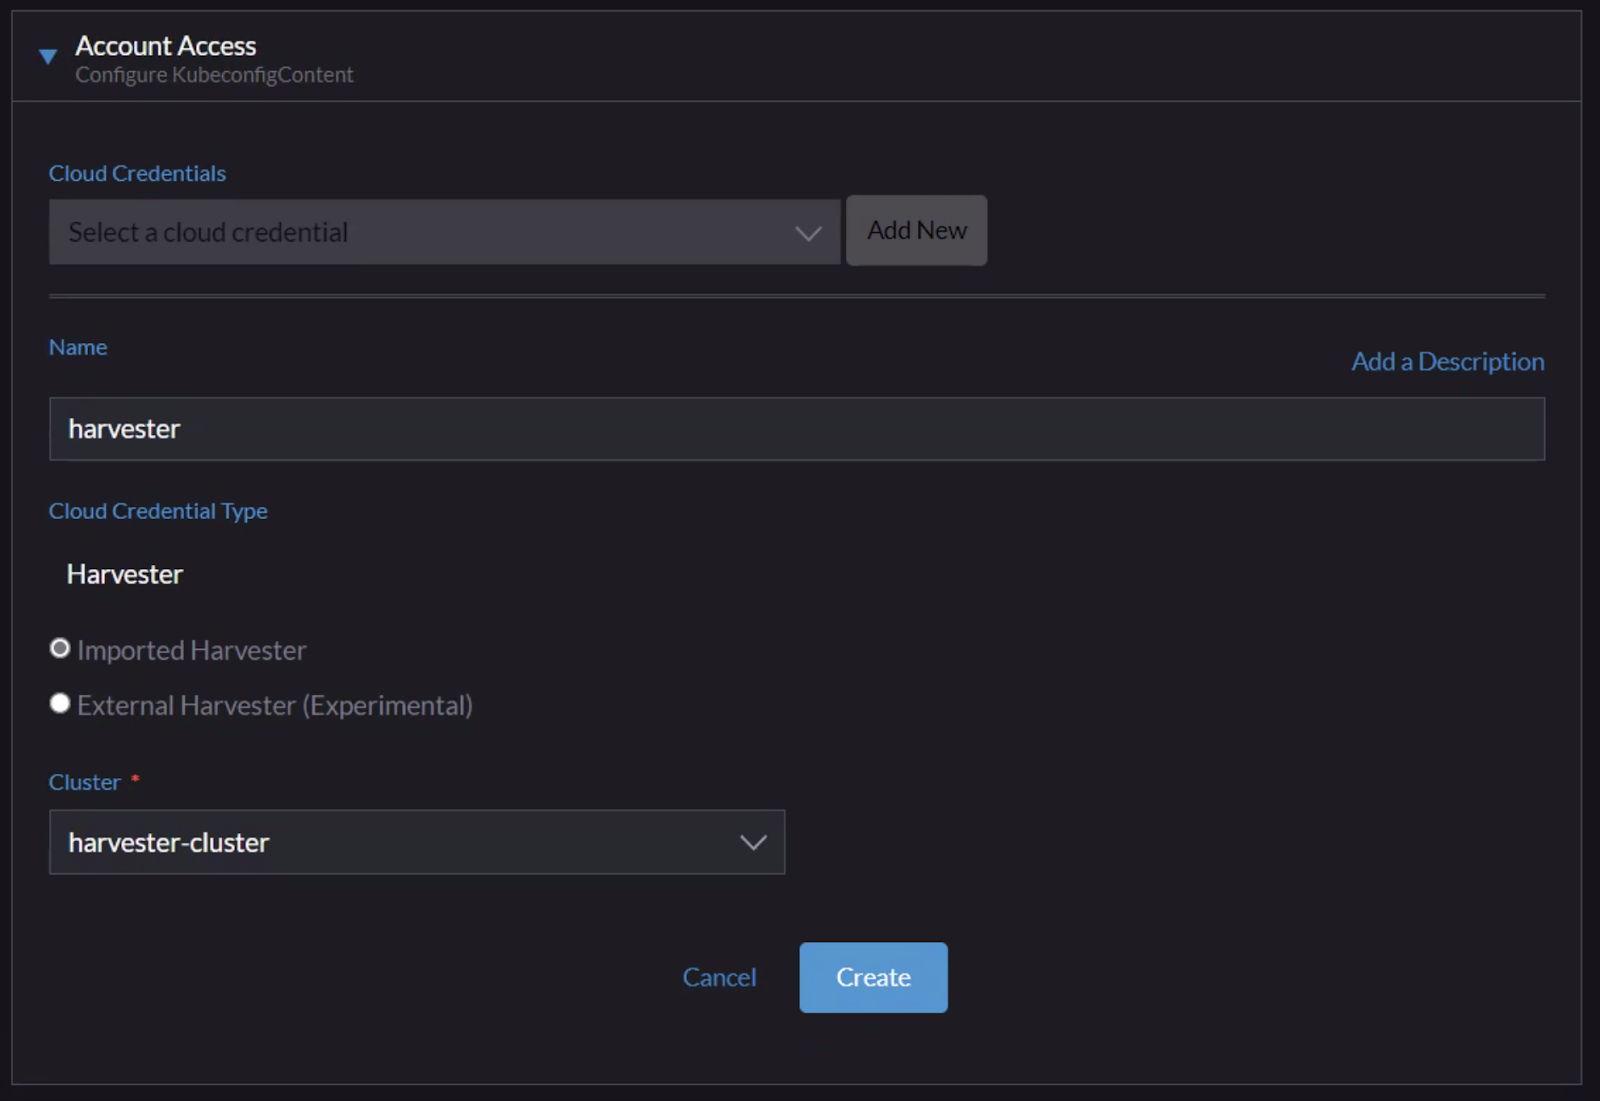
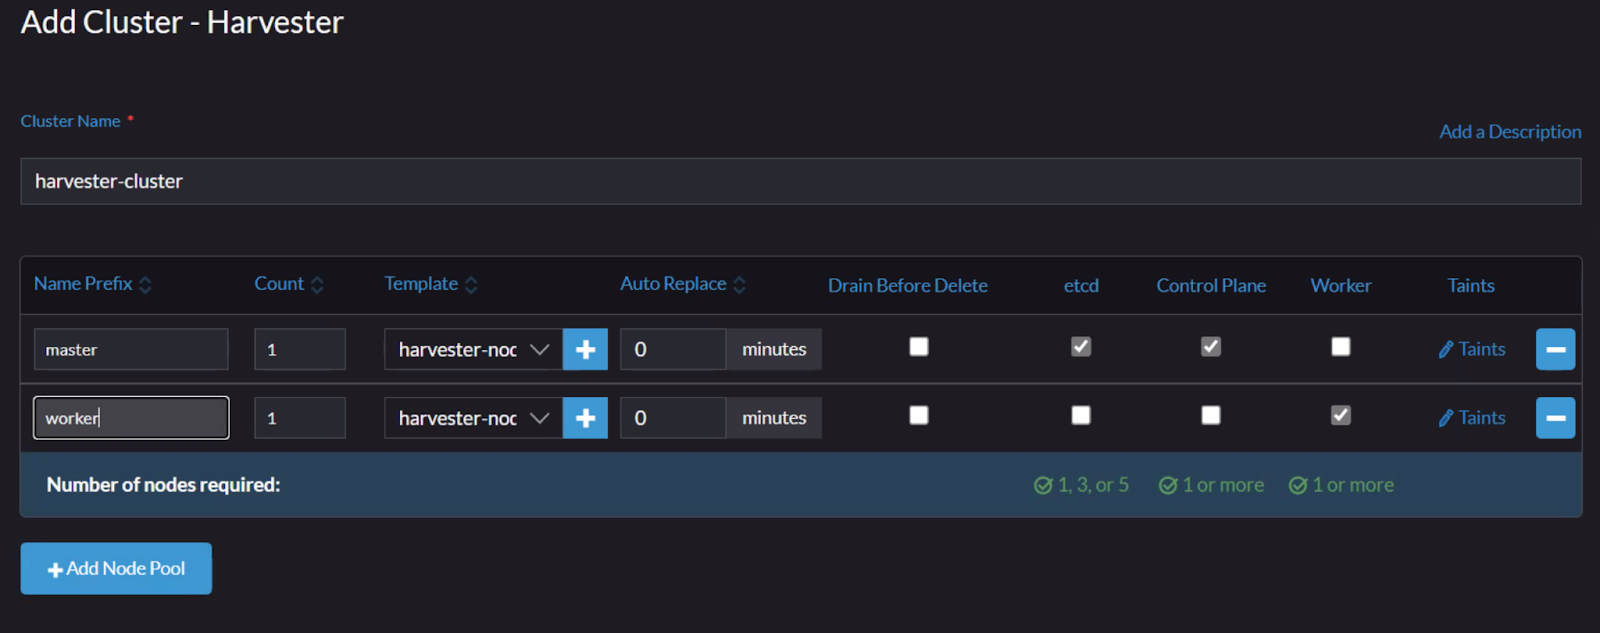
Now it’s time to create a Kubernetes cluster on the imported Harvester. I will use the built-in Harvester Node Driver to create a Node Template and create the cluster with these templates.
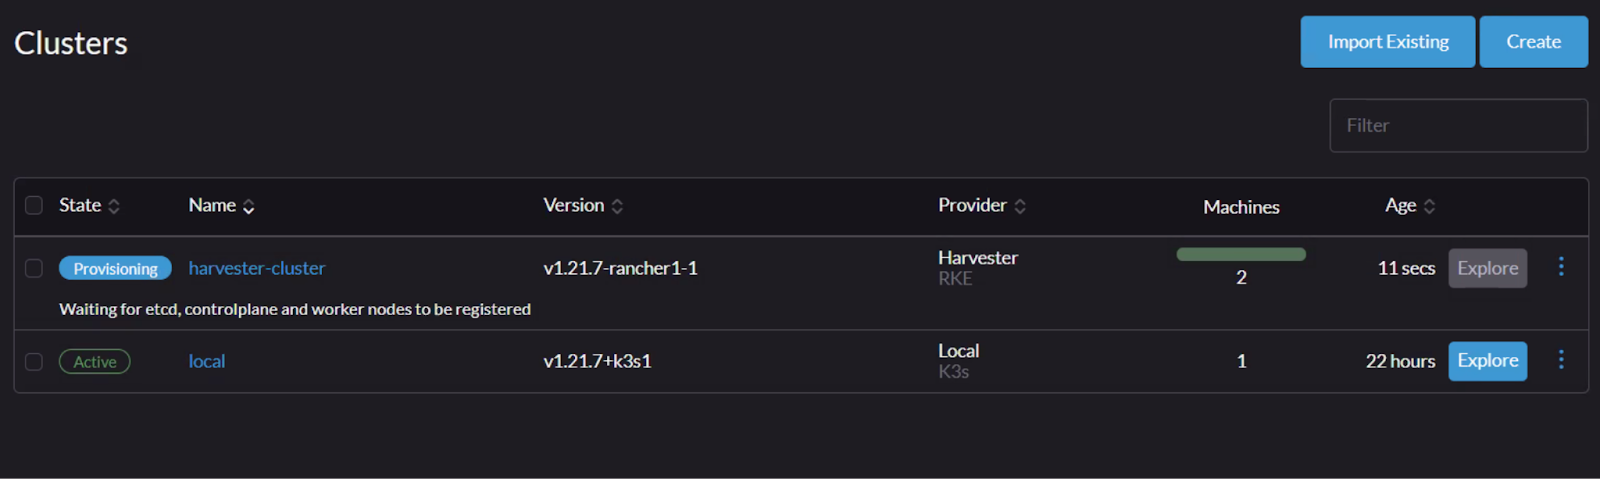
As you can see, it’s now provisioning the RKE Cluster from scratch on the Harvester Cluster.
With this integration, managing both VM and Kubernetes environments from a single platform is now possible and very straight-forward.
Conclusion
We are living in the Modernization Era right now and modernizing our infrastructure is at the core of this transformation. Having a cloud-native HCI solution like Harvester will really help with this. Harvester has huge potential and has benefits like being open source and %100 free. You can stop using the old, proprietary, expensive, traditional HCI solutions and start the innovation at the core of your platform with Harvester.

.png)
OpenShift vs Harvester: Choosing a VMware Alternative

CSI Performans Benchmark

No Comments Yet
Let us know what you think