This article is the second part of a series. If you haven't completed setting up your environment yet, you can follow the steps outlined on our blog.
Open your empty project folder in VSCode, install cucumber and other gems from command line consecutively or add them to a Gemfile in your current working directory then install all gems as a bundle with a single command.
# install cucumber gem
$ gem install cucumber
# Gemfile
source 'https://rubygems.org'

gem 'capybara'
gem 'cucumber'
gem 'debase'
gem 'rspec'
gem 'ruby-debug-ide'
gem 'selenium-webdriver'
# install all required gems from Gemfile
$ bundle install
Create a folder structure with a single command given below.
# initialize cucumber folder structure
$ cucumber --init
I recommend you to have a look at using cucumber for ruby
# more information of cucumber
$ cucumber --help
Let's configure empty project files!
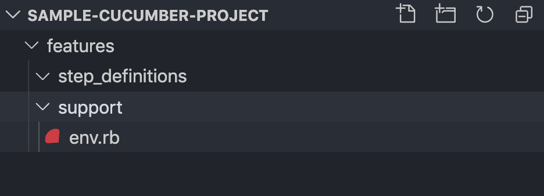
First, open the environment file "env.rb" under the “support” folder to register the driver. You can use this piece of code.
require 'capybara'
require 'capybara/cucumber'
require 'selenium-webdriver'
require 'rspec'

Capybara.register_driver :selenium do |app|
  Capybara::Selenium::Driver.new(app, browser: :chrome)
end

Capybara.configure do |config|
  config.default_driver = :selenium
  config.default_selector = :css
  config.app_host = 'https://kloia.com'
  config.default_max_wait_time = 10
end
After the env file is ready, create a file "example.feature" under the "features” folder and start writing a scenario. You can use the scenario given below:
Feature: Homepage navigation bar links checks

  Scenario: Check kloia.com has about page
    Given visit homepage
    When click "About" link
    Then page should contains "About Us" content
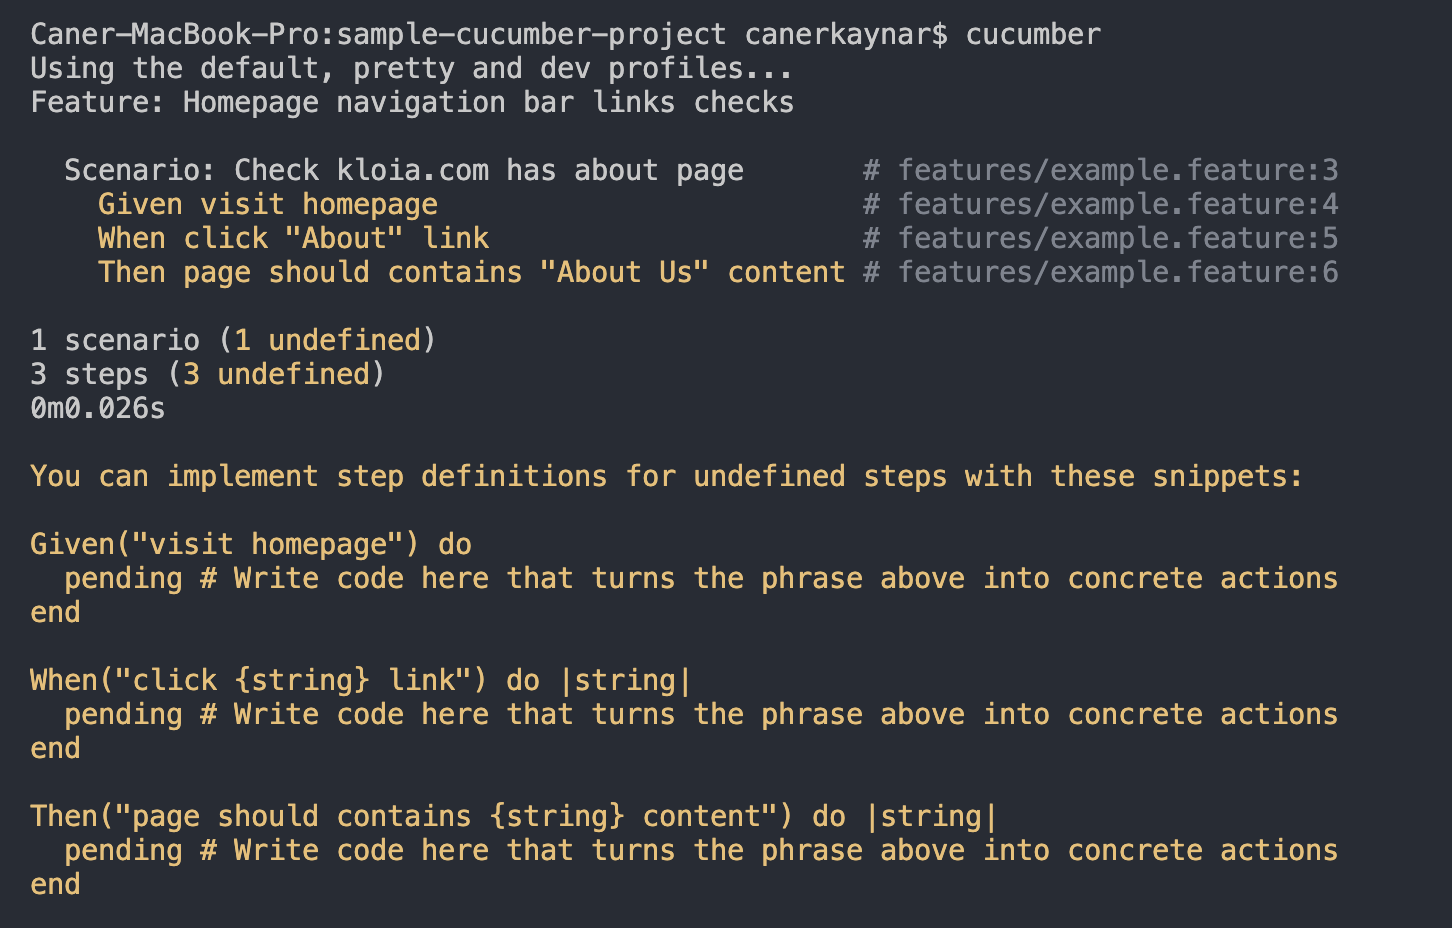
We haven't created any step functions yet, but anyway let's try to run the first scenario from the command line. We won’t give any args to our command because there is only one feature and scenario.
# run cucumber
$ cucumber
If there were more than one feature or scenario, we could use tags.
# run cucumber
$ cucumber --tags TAG_EXPRESSION
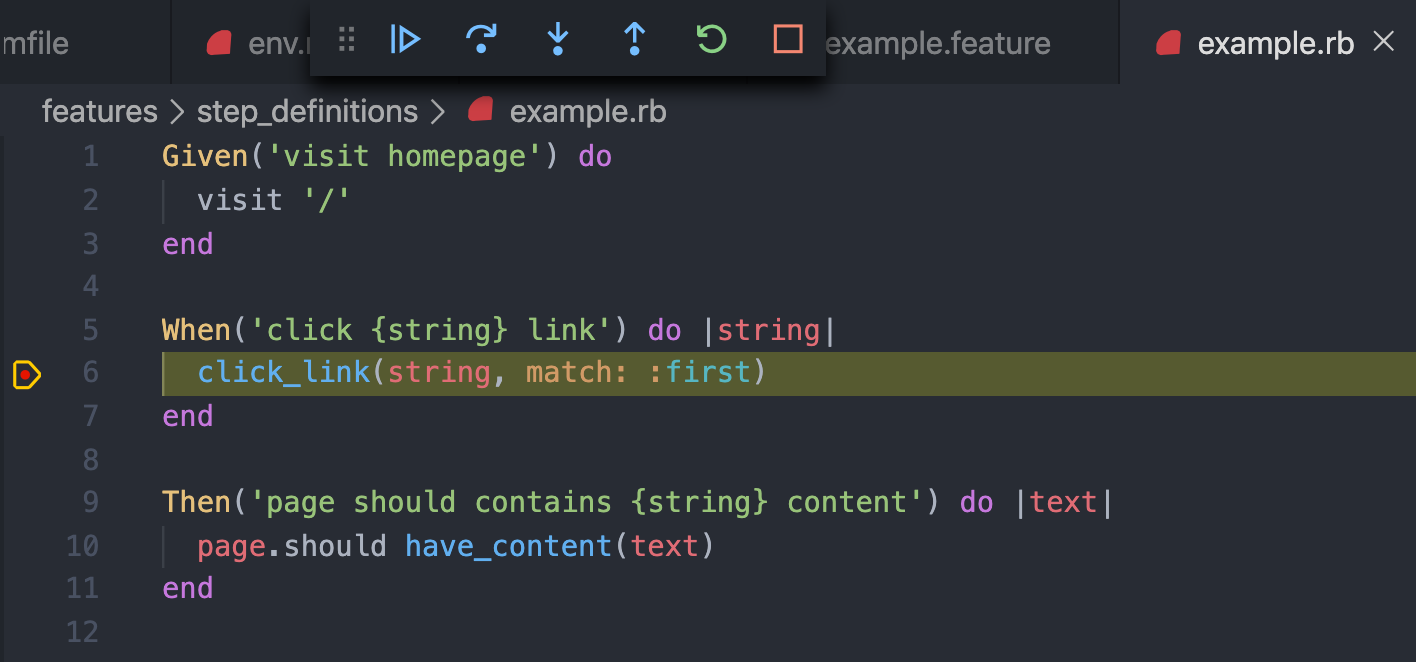
As you see, our scenario did not work and the terminal prompted some suggestions about implementing step definitions for undefined steps. It is okay! Next step is creating an "example.rb" file under the “step_definitions” folder and copy-paste the suggested step function snippets from the terminal. Then, fill the step definitions with correct codes.
Given('visit homepage') do
  visit '/'
end

When('click {string} link') do |string|
  click_link(string, match: :first)
end

Then('page should contains {string} content') do |text|
  page.should have_content(text)
end
Let’s try again to make sure everything works together correctly. If everything is okay on your project, Let's continue with task configurations and debugging.
Task Configurations and Debugging
VSCode provides two different settings as user and workspace. User settings are applied globally and each instance of VSCode has these settings. Workspace settings are specific configurations and they are applied only when the workspace is open. Debugging configurations will be located under the ".vscode” folder at project root as workspace settings.
First, create a “.vscode" folder at the root of the project with “settings.json". Then add required settings for navigation from feature file to step definition. You can browse through details from the "Cucumber Full Language Support” extension.
$ mkdir .vscode && touch .vscode/settings.json
{
    "cucumberautocomplete.steps": [
        "features/step_definitions/*.rb"
    ],
    "cucumberautocomplete.syncfeatures": "features/*feature",
    "cucumberautocomplete.strictGherkinCompletion": true,
    "editor.quickSuggestions": {
        "comments": false,
        "strings": true,
        "other": true
    }
}
After reloading vscode, open "example.feature" file and right click any step, check "Peek Definition" and "Go To Definition” are working or not!
Debugging configuration for ruby code
To configure debug settings, you need to create “launch.json" in the “.vscode" folder. When you click debug from the left activity bar, VSCode suggests creating it automatically. You just need to select the environment you want to work on. If you prefer to do it manually, copy and paste the code given below.
$ touch .vscode/launch.json
{
  "version": "0.2.0",
  "configurations": [
    {
      "name": "Debug Local File",
      "type": "Ruby",
      "request": "launch",
      "program": "${file}"
    }
  ]
}
Create a file at the root folder and then give debugging it a try.
Debugging configuration for cucumber
To debug cucumber features, you need additional configuration. Open "launch.json" and add the codes given below manually or do it automatically by selecting ruby:cucumber after clicking “Add Configuration” from debug and run button. After that you need to generate binstubs (executable files of gems). We need them because the “program” key requires to get executable or file to run when launching the debugger.
{
  "version": "0.2.0",
  "configurations": [
    {
      "name": "Cucumber",
      "type": "Ruby",
      "request": "launch",
      "cwd": "${workspaceRoot}",
      "program": "${workspaceRoot}/bin/cucumber",
      "args": [
        "exec",
        "cucumber",
        "-t",
        "@debugger"
      ]
    }
  ]
}
# generates binstubs for all gems in the Gemfile
$ bundle install --binstubs
# generates binstubs for a single gem (recommended)
$ bundle binstubs cucumber
As you can see above, there is a way to use tags for organizing scenarios and features. Whenever you run the tests in debug mode, you may put the "@debug" tag above the desired Gherkin element. Otherwise all your scenarios will be run consecutively. Tags may be placed above “Feature”, “Scenario”, “Scenario Outline”, “Examples”.

It is time to place debugs at step definition lines and run test at debug mode.
While the configuration takes many little steps, I believe that this investment will save a lot of time in your testing and increase the quality of your product. I will cover linting your Ruby code in my next blog post.