Amazon EKS (Elastic Kubernetes Service) has been used widely for running Kubernetes clusters on AWS. It is a managed service, so you don’t have to manage everything manually. When using Amazon EKS, AWS creates and manages controlplane nodes for you and allows you to focus on your applications.
At re:Invent 2020, AWS has preannounced a new deployment option for Amazon EKS that allows you to run Amazon’s Kubernetes distribution on on-premise environments: EKS Anywhere. It is now generally available. With this new announcement, you can start deploying this distribution. Within EKS Anywhere, you don’t have to pay for the control plane, which you normally do. It is completely open-source, free to download and install, and you have the option for a support subscription. You don’t even need an AWS account to use EKS Anywhere. This deployment option is extremely useful in case there are Data Protection Laws in a country where there is no AWS region.
Another announcement is called EKS Connector. It allows you to connect your Kubernetes clusters to Amazon EKS console, including self managed clusters on EC2, EKS Anywhere clusters running on your infrastructure, or any other cluster you self manage. With EKS Connector you can have central visibility for all your Kubernetes clusters on EKS Console. This feature is now available as a public tech preview in all regions where Amazon EKS is available.
EKS Anywhere uses open-source EKS Distro, which was already available for use. As of today, this release only supports creating development clusters locally with Docker and production clusters on VMware vSphere environments. There will be some other options, including bare metal installation in the future.
Cluster creation workflow includes a cluster specification file with configuration parameters. With this approach, you can create clusters declaratively.
For creating production clusters on vSphere virtual machines, you need to consider High Availability. Because of that, having 3 nodes for the controlplane and having a minimum 3 VMs for worker nodes is going to be a better approach.
For development clusters, you can even use your local computers with Docker. You can try out EKS Anywhere on your local machine before using it on production environments.
Before going into the installation and other concepts, I should include this table from the official release blog that compares EKS installation options.
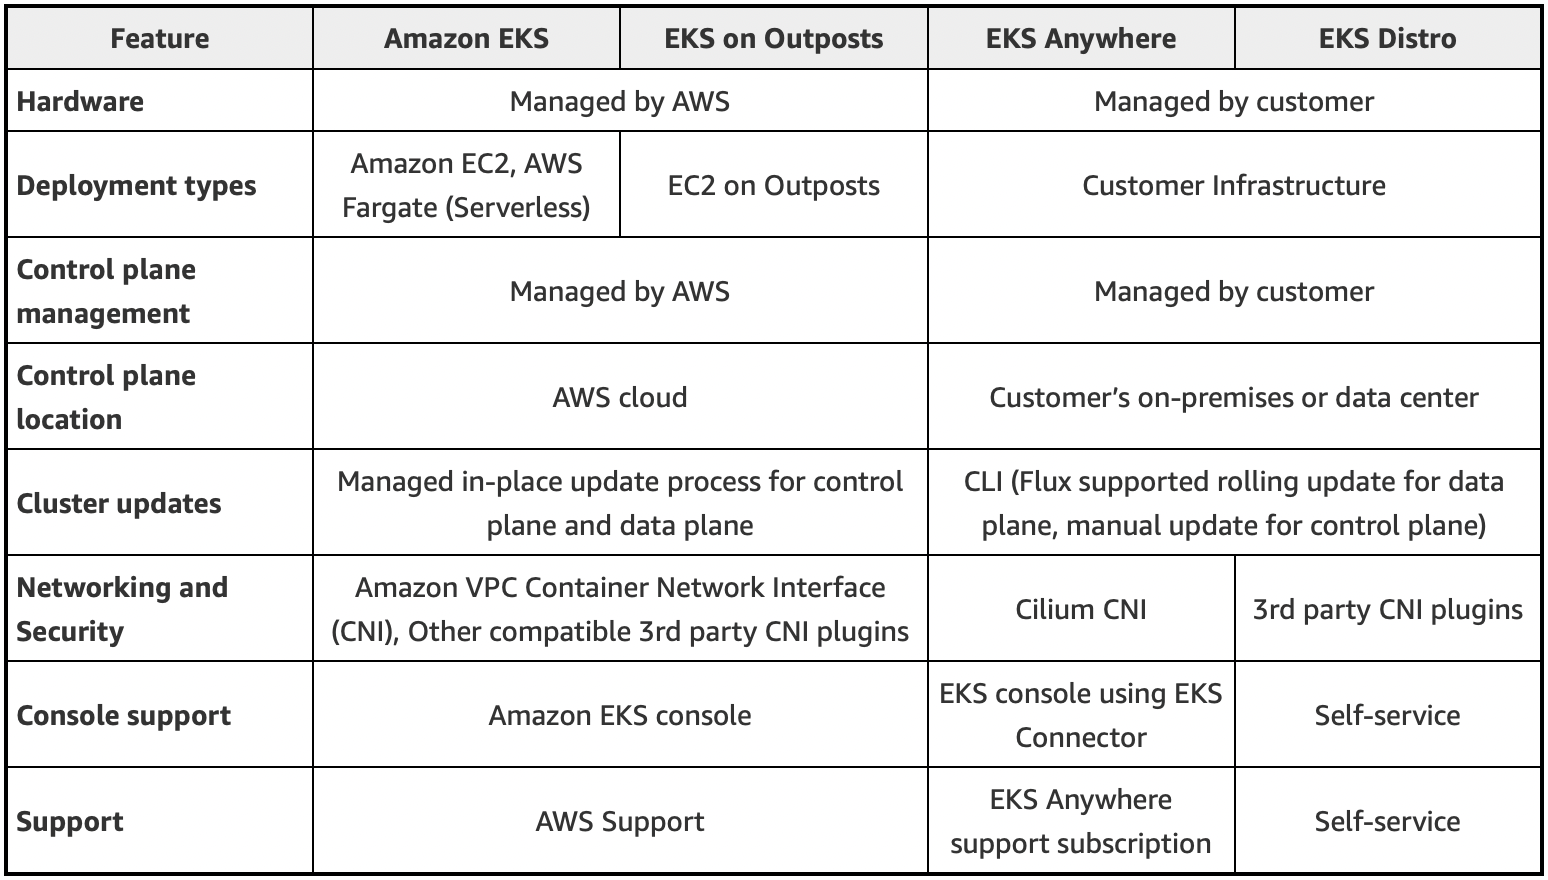
EKS Deployment Options Comparison Table
Note that there are some important differences between these options. For example, on Amazon EKS and EKS on Outposts you don’t need to manage the control plane, but on EKS Anywhere and EKS Distro you need to manage the control plane too.
Let’s move on to the demonstration.

EKS Anywhere in Action
First, I am going to install EKS Anywhere to a local environment. There are some requirements for this installation. For example, you need to have MacOS or a Ubuntu 20.04.02 LTS Operating System, Docker 20.xx.xx version installed on the machine. Right now, the M1 Apple chipsets or ARM-based CPUs are not supported, unfortunately.
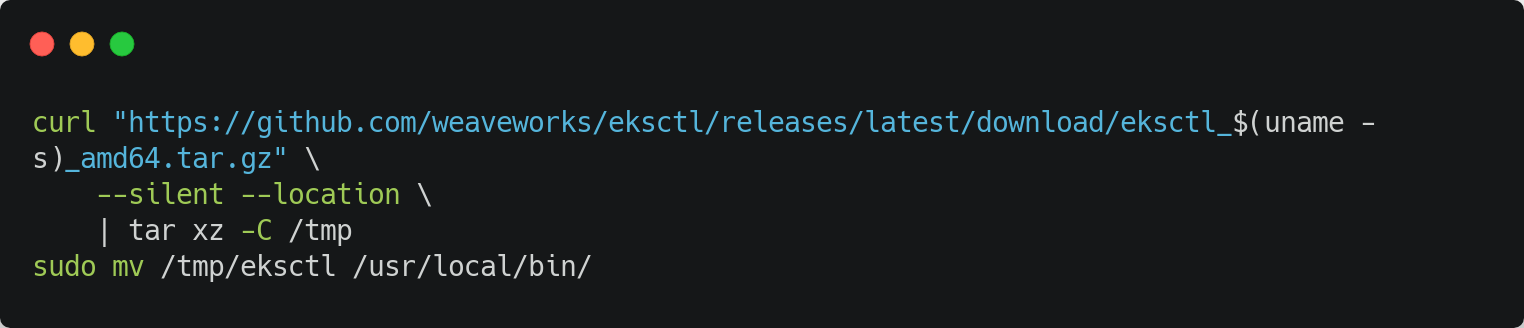
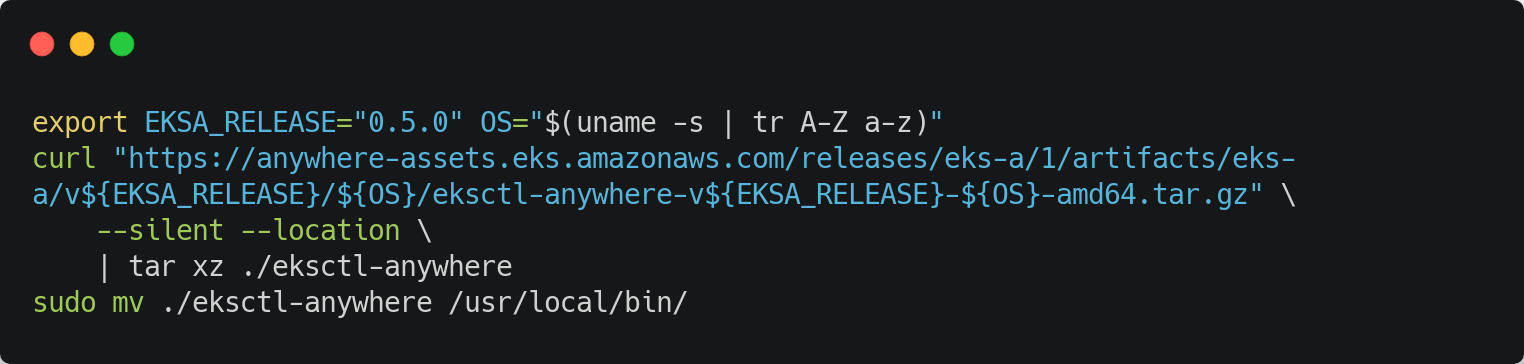
I start the installation by installing ‘eksctl’ and ‘eksctl anywhere’ binaries.
After installing those CLI tools, I am going to create the cluster configuration file with this command.
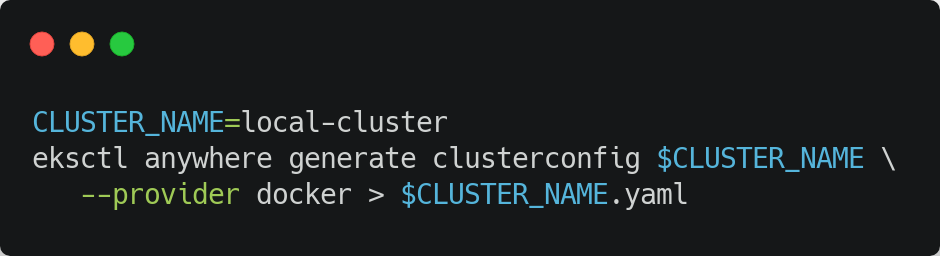
This creates a yaml file with the cluster information.
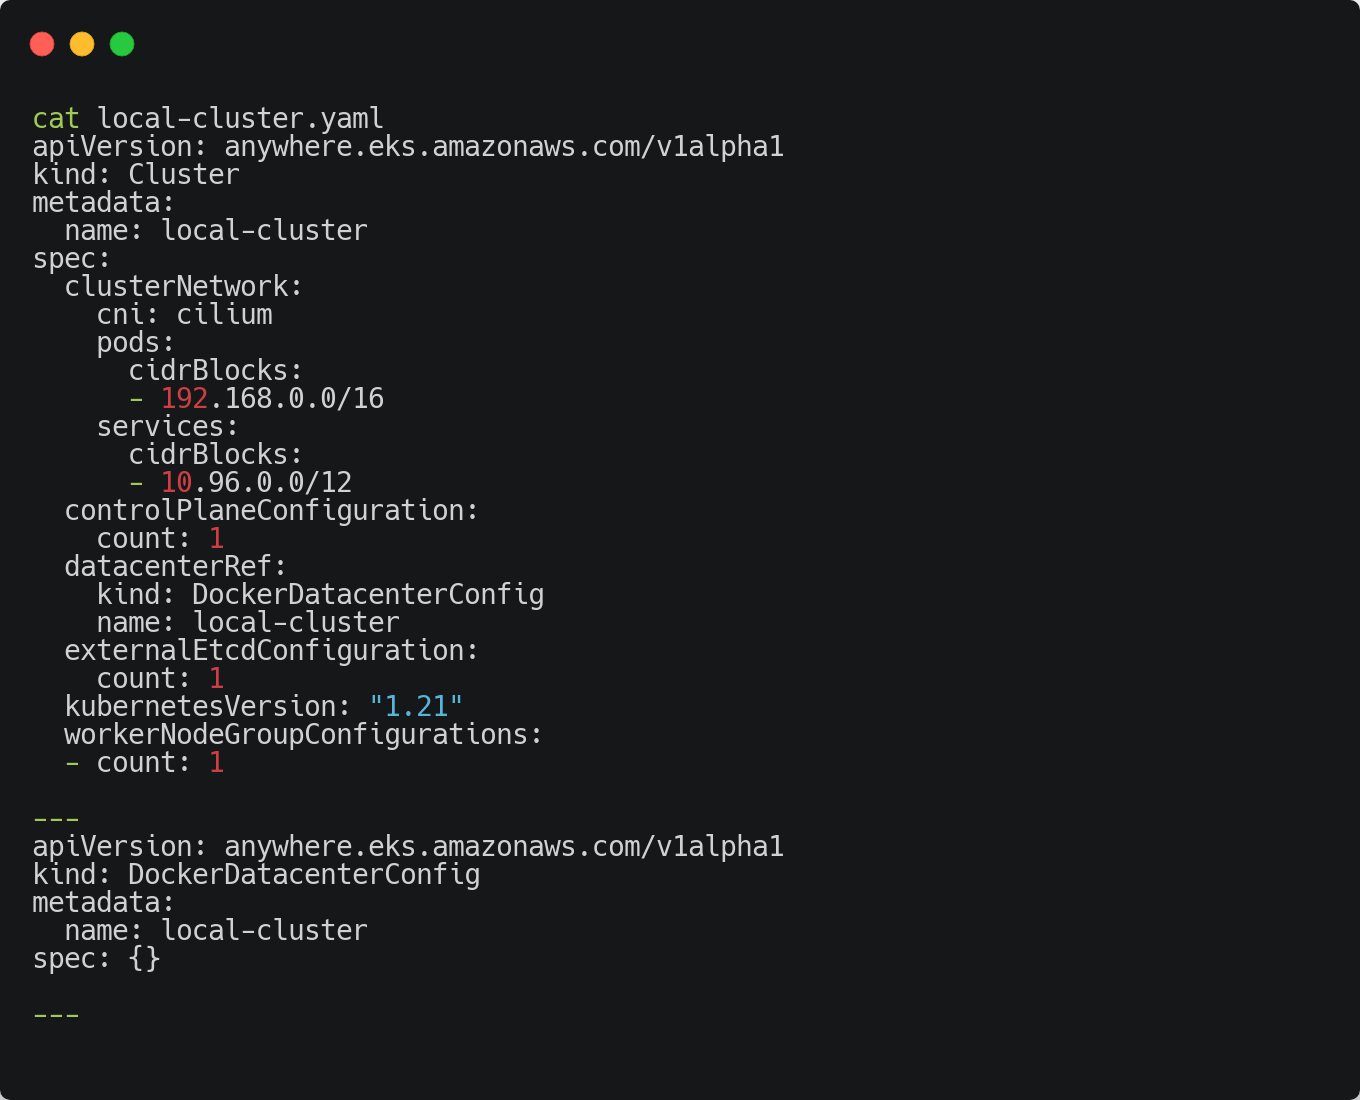
You may need to change ‘cidrBlocks’ parameters according to your machine configuration.
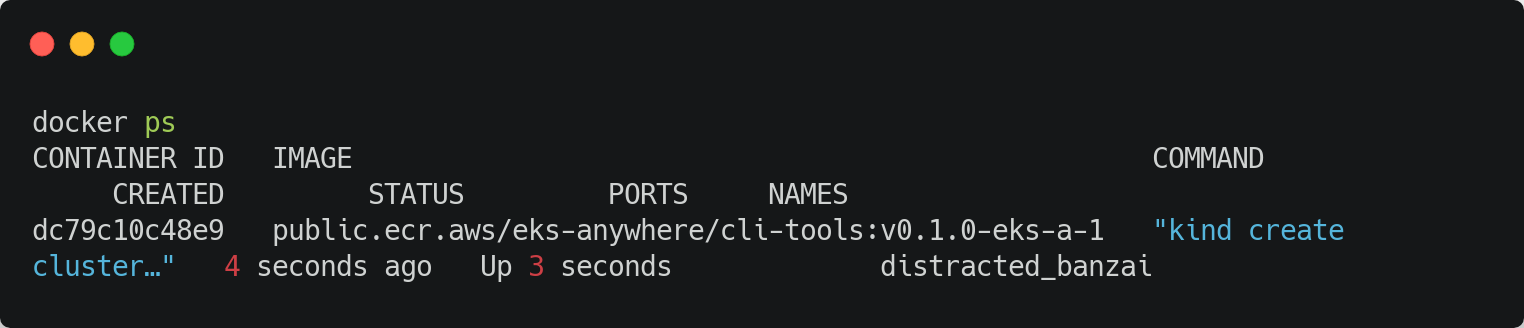
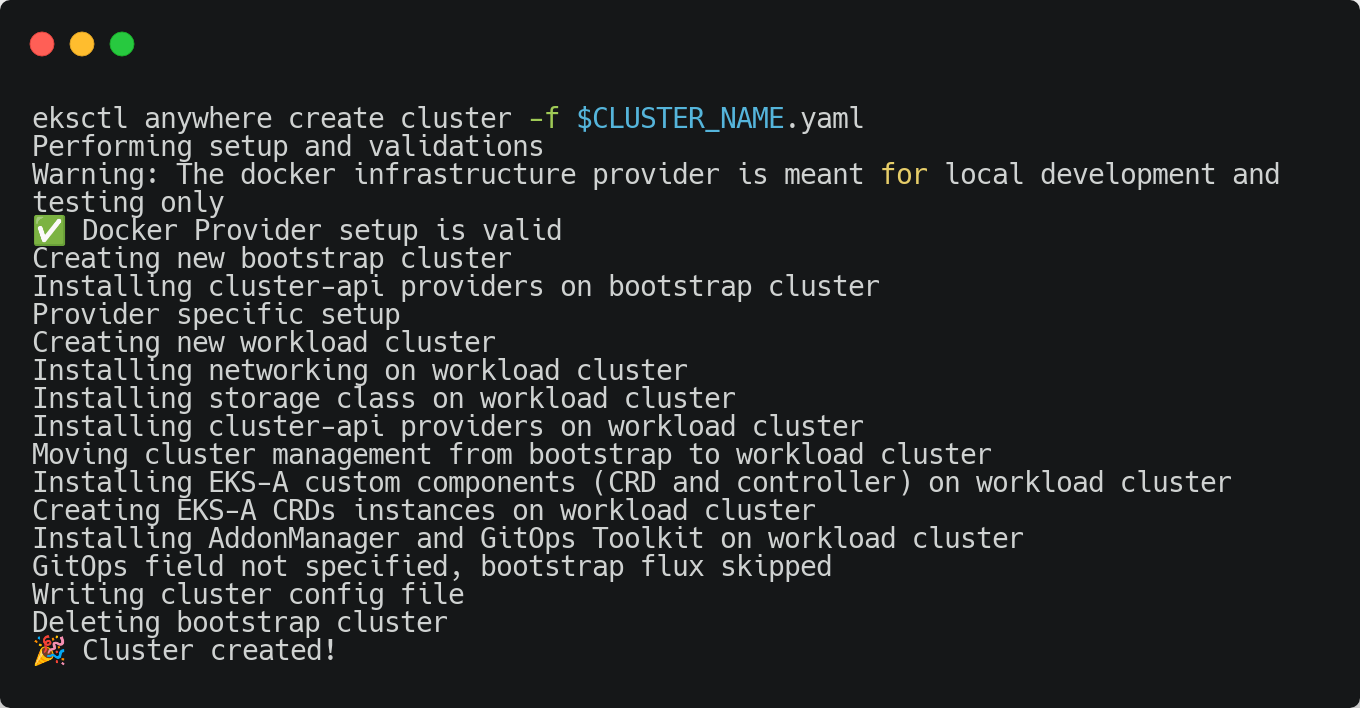
Now I can run the installation command for cluster creation.

When I check the local Docker containers information, I can see the steps about cluster creation.
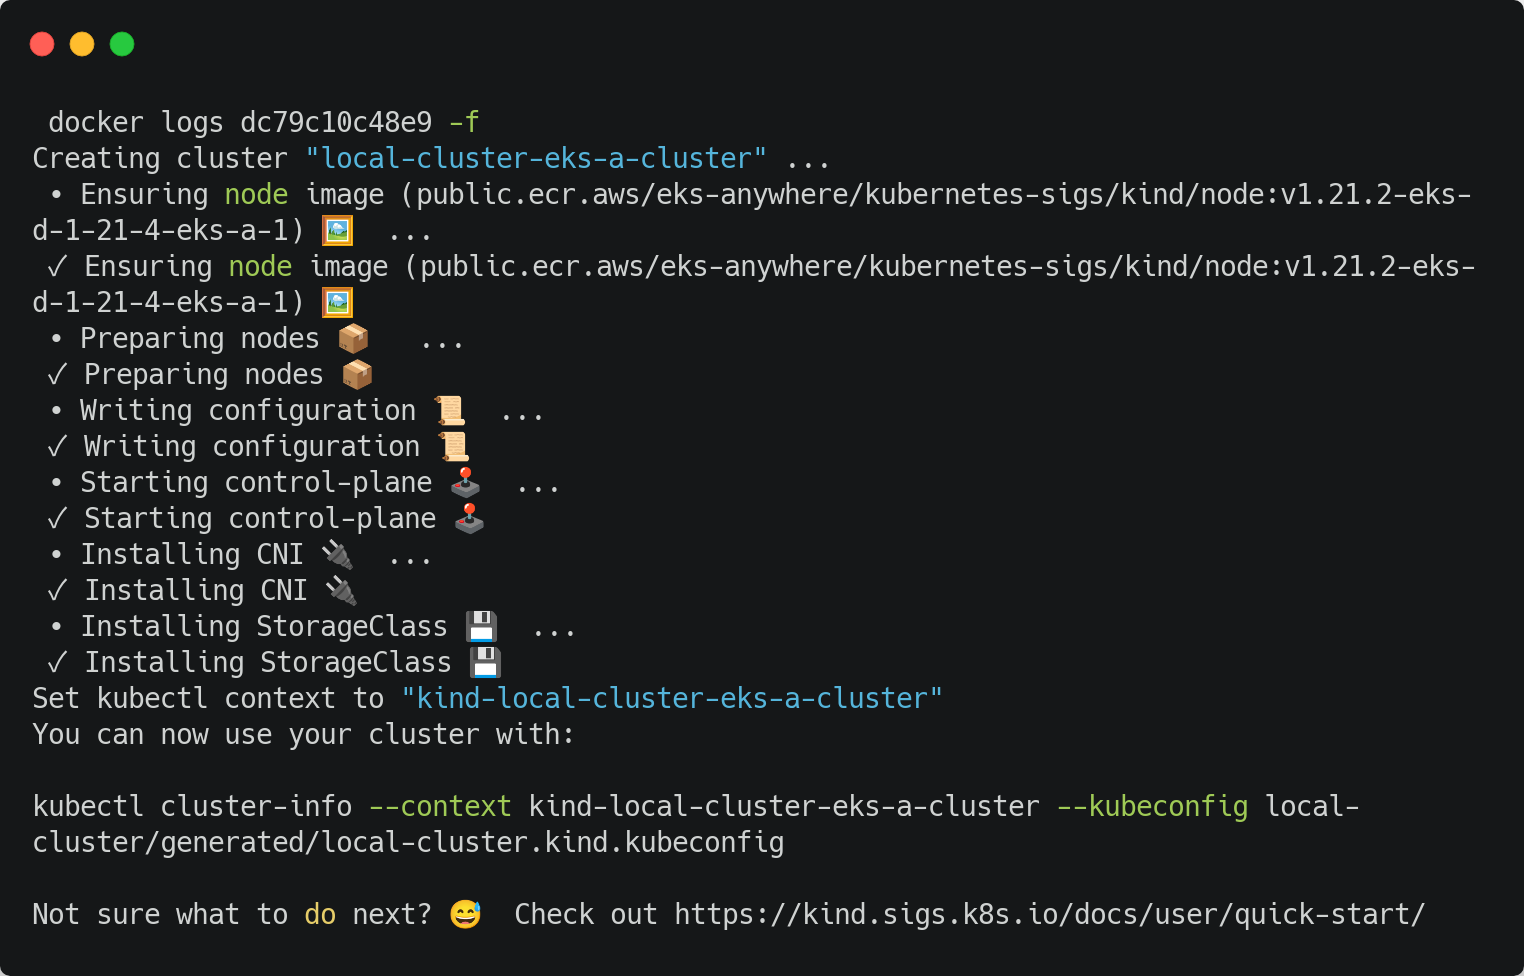
The process first starts a Kind cluster that acts as a bootstrap cluster and moves onto the process with creating Management Cluster.
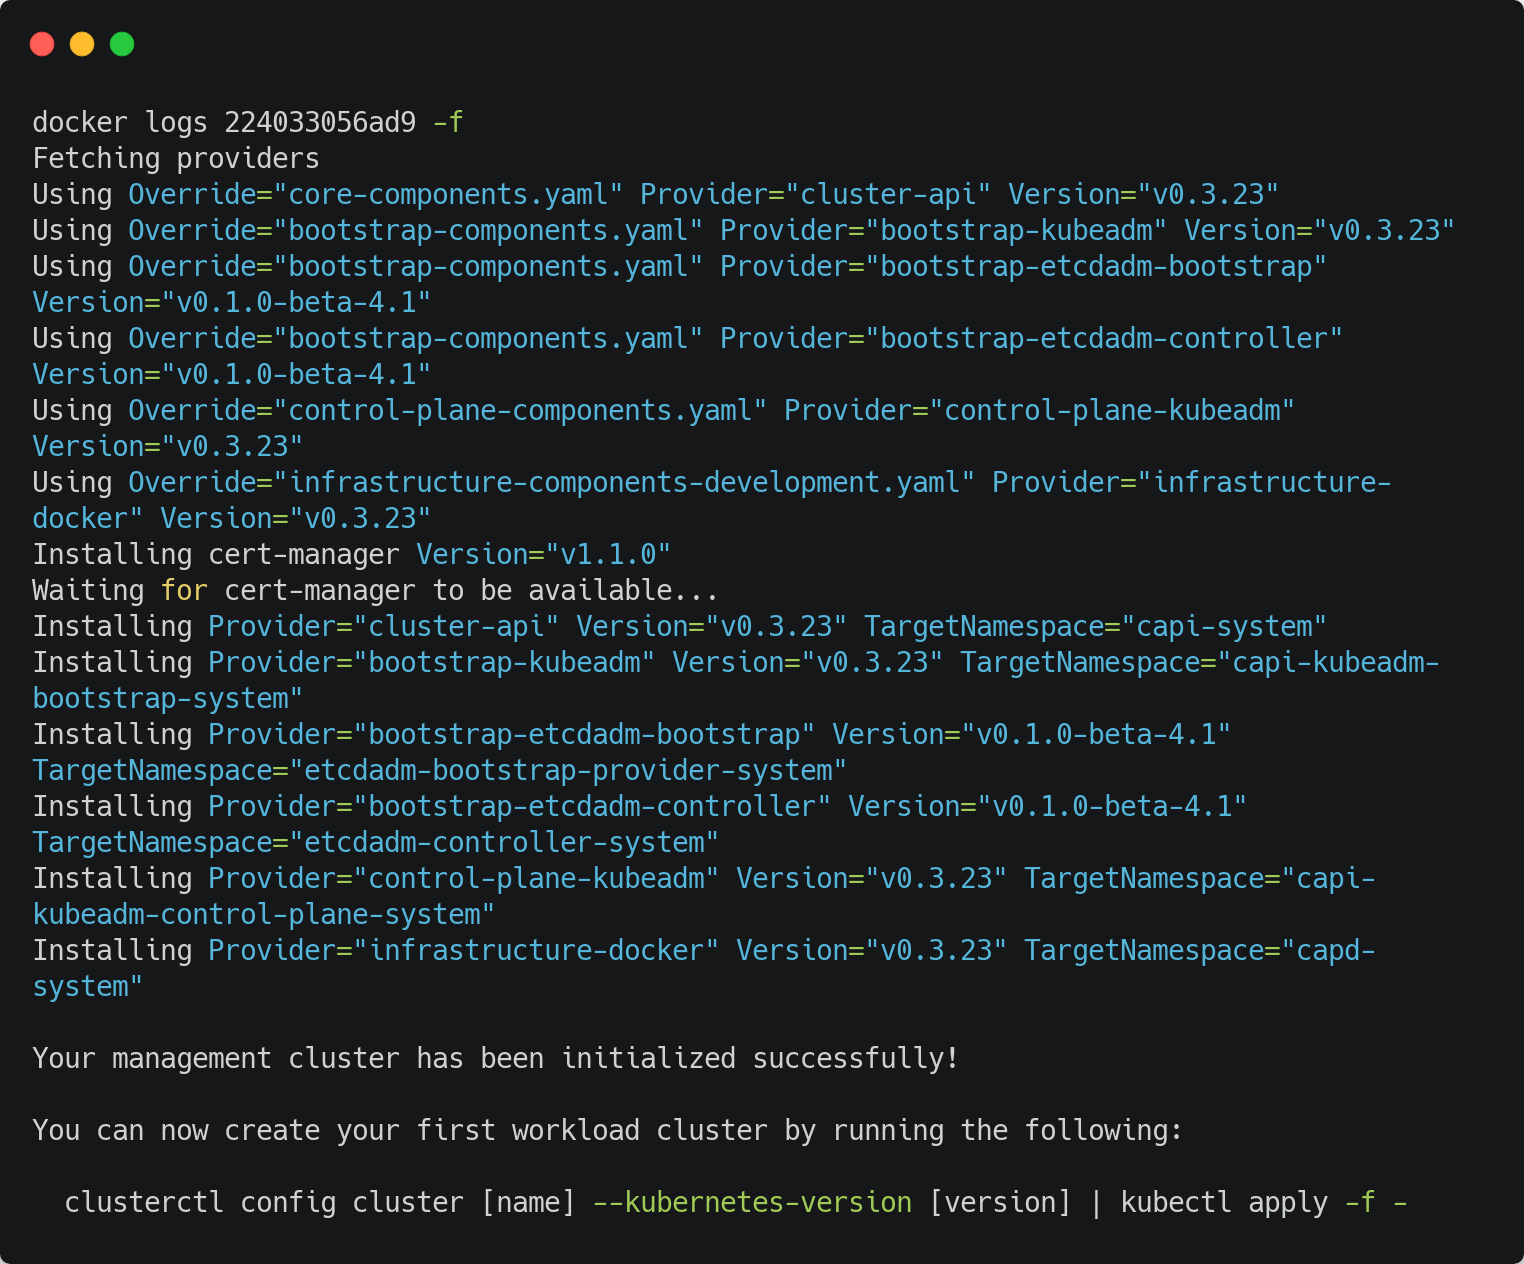
After creating the Management cluster, command moves on to creating a Workload Cluster.
Finally, I can see my cluster is now created and the output of the first installation command is like this.
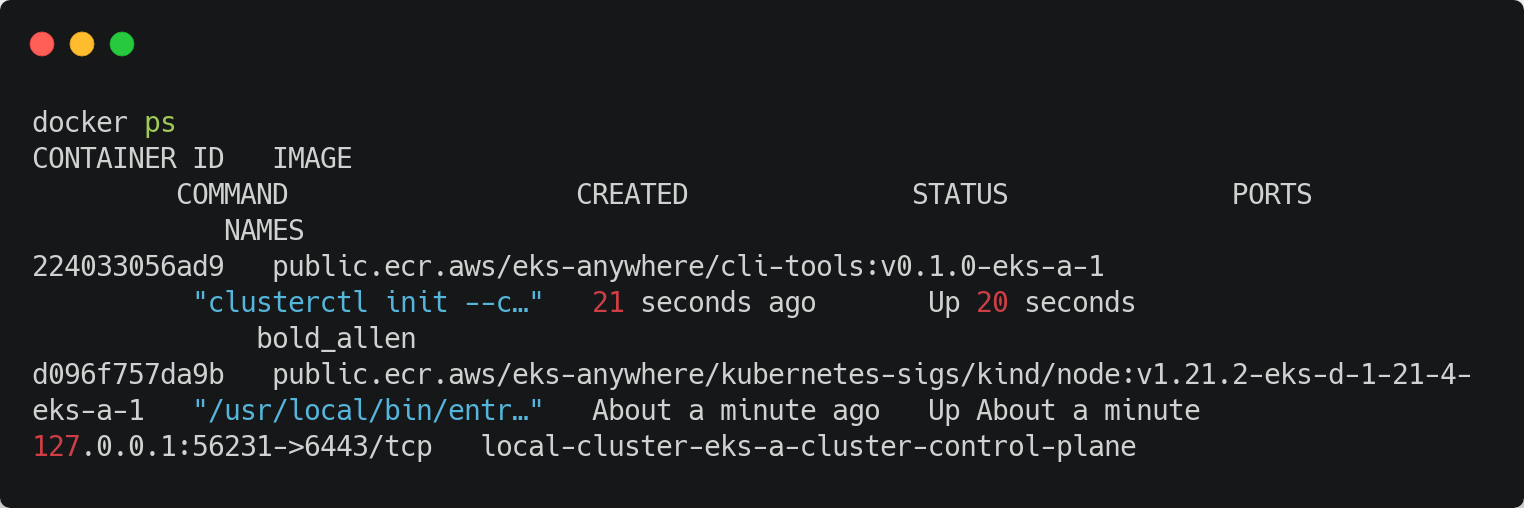
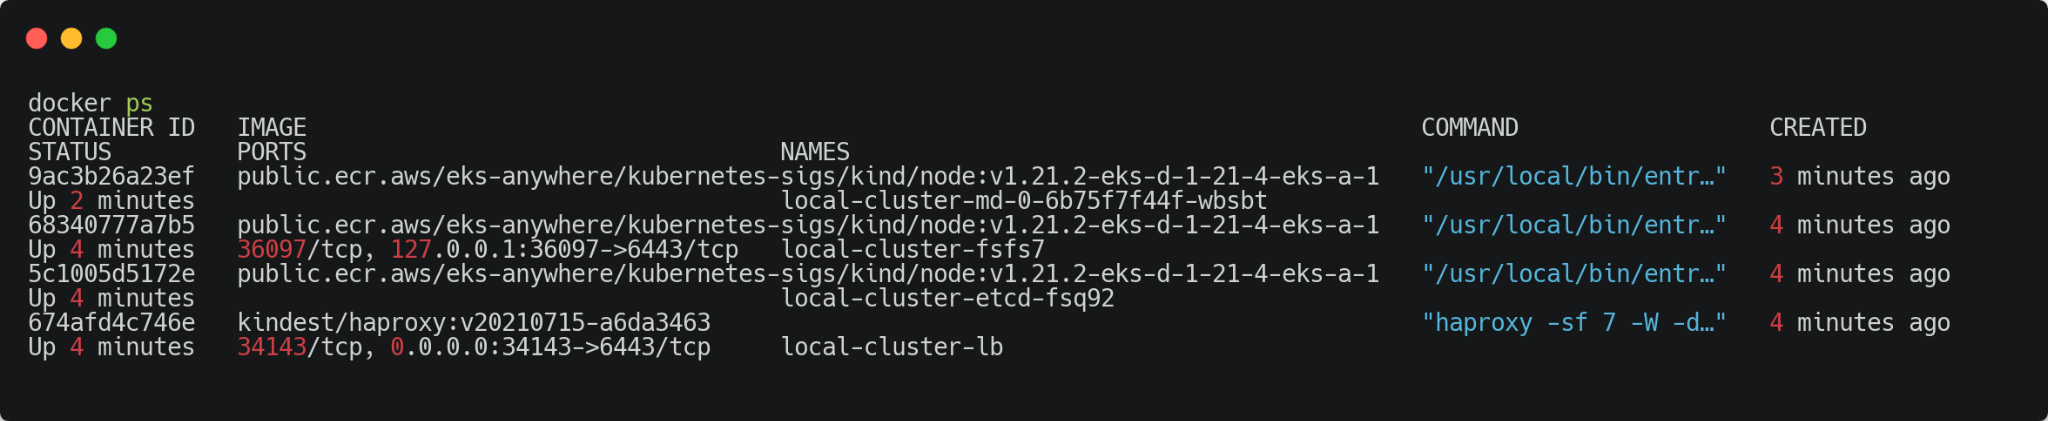
By the way, I can see the final Docker container list running on the machine as well.
Now, it is time to interact with my new cluster. The installation creates a folder with our cluster name, and inside this folder you can find the kubeconfig file. I can use this kubeconfig and connect to my cluster.

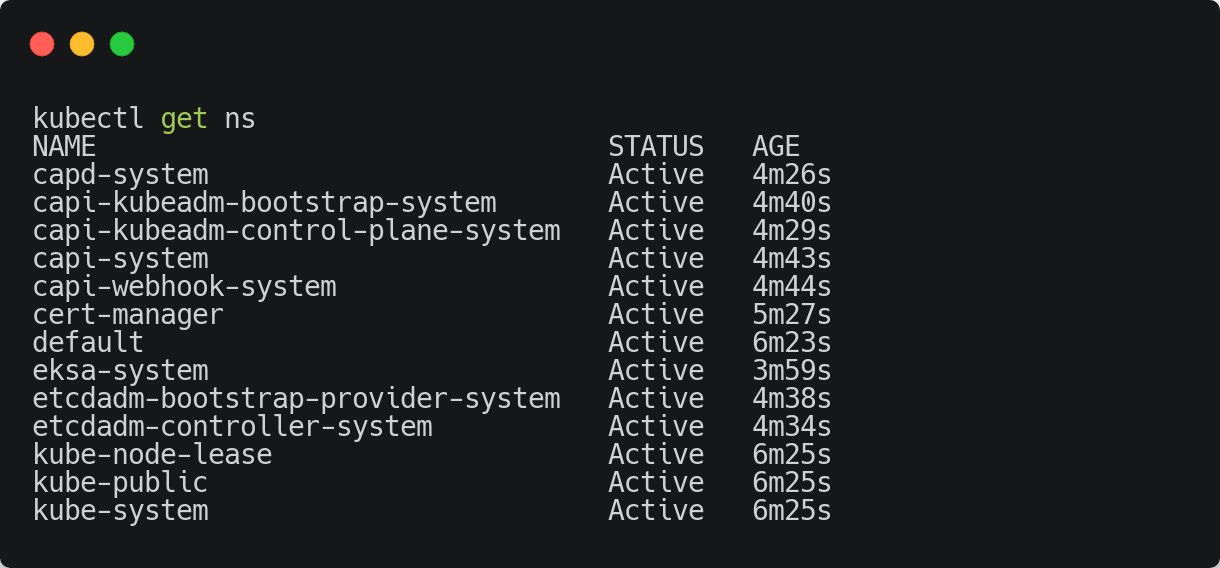
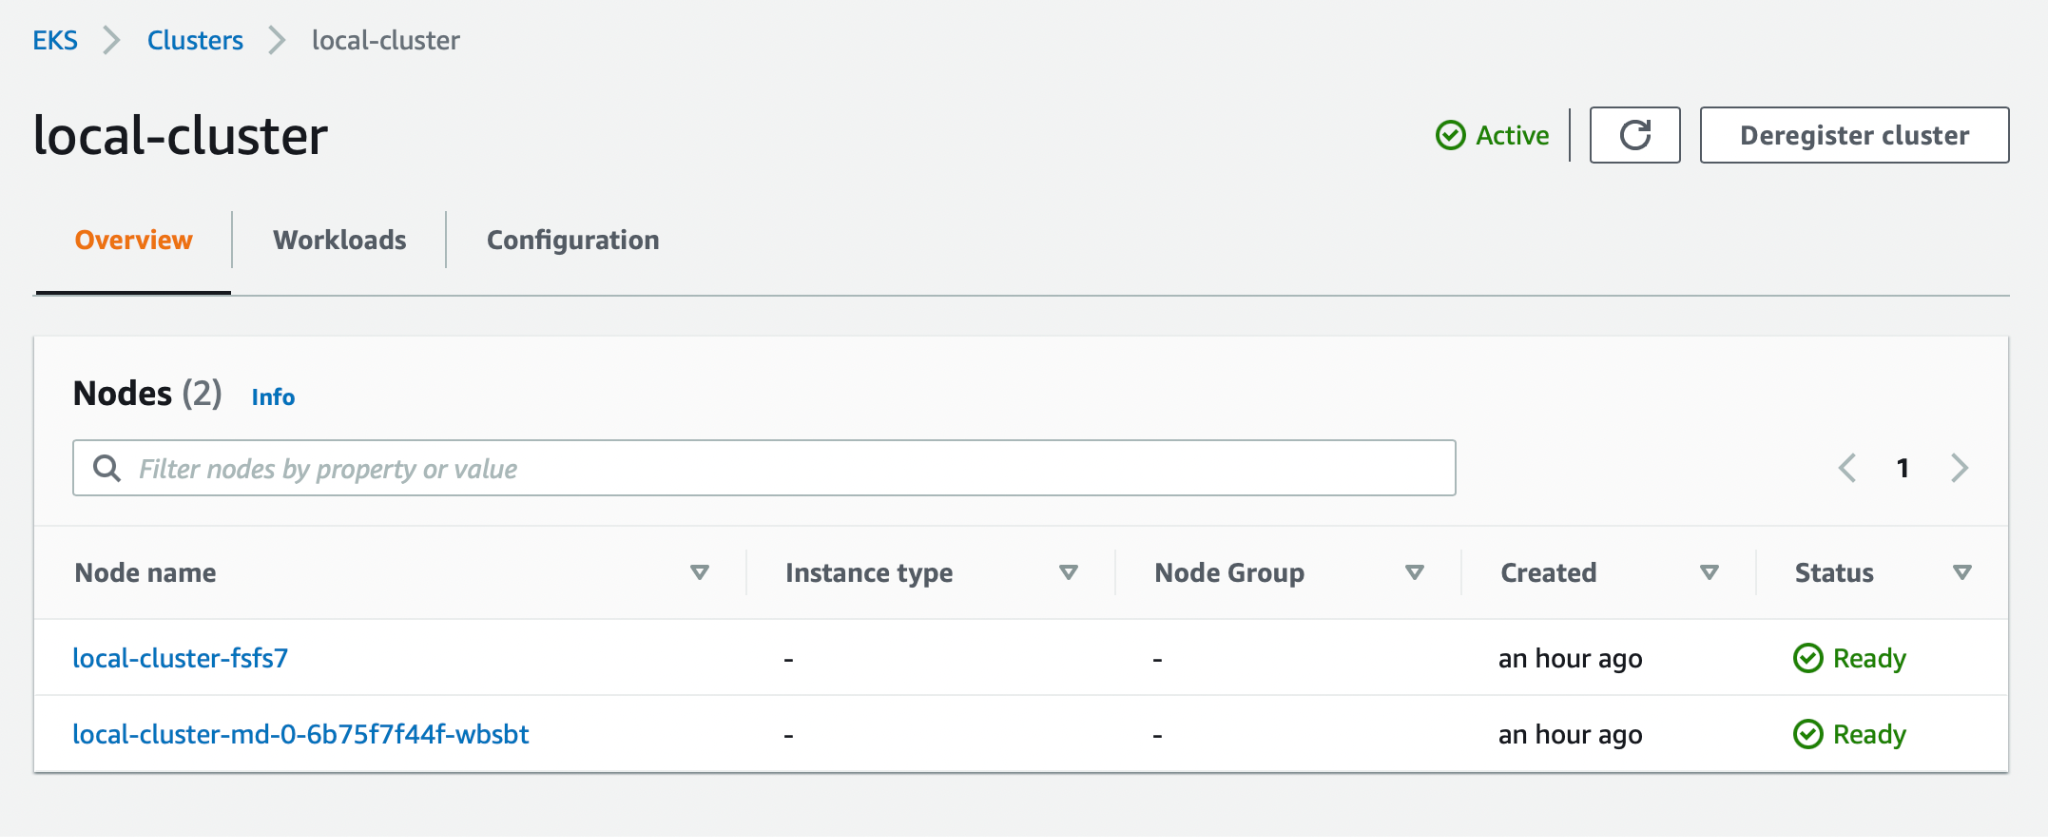
I can see my nodes, my namespaces, system workloads with of course, usual kubectl commands.

There is only one machine actually, but the Controlplane and Worker roles are running on separate Docker containers.
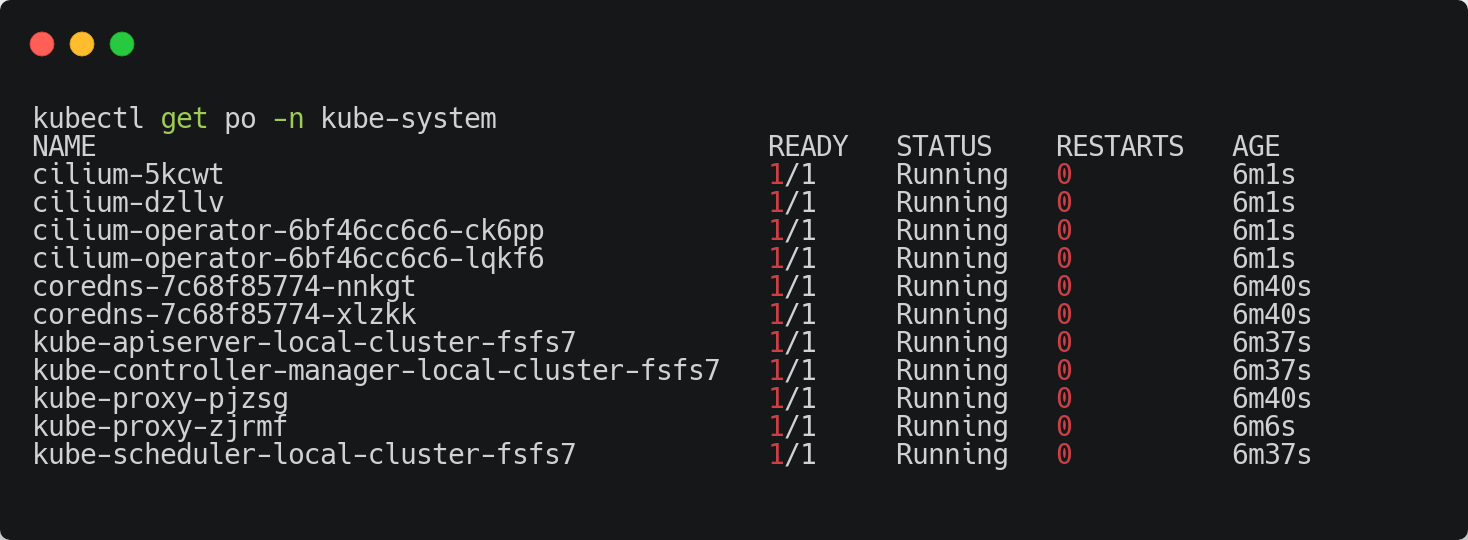
As you can see from the output, within EKS Anywhere, Cilium is used as the CNI Provider. With Cilium as CNI Provider and automatic installation of Cilium, users can benefit from the powers of eBPF. You can also add some extra layers of security to your environments. eBPF is a technology with origins in the Linux kernel that can run sandboxed programs in an operating system kernel. It is used to safely and efficiently extend the capabilities of the kernel without requiring to change kernel source code or load kernel modules.

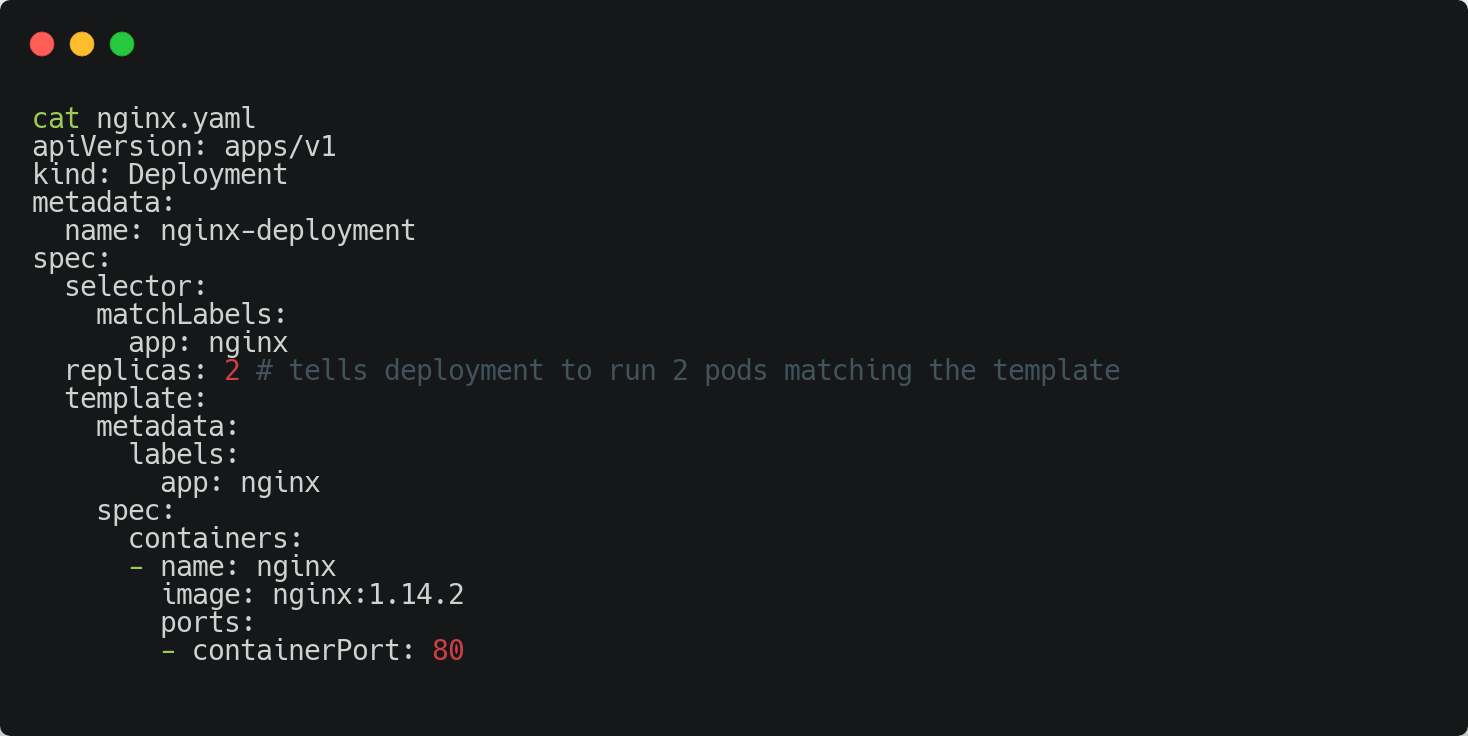
Now let’s deploy an example application to this new cluster. Let me just create a simple Nginx deployment.
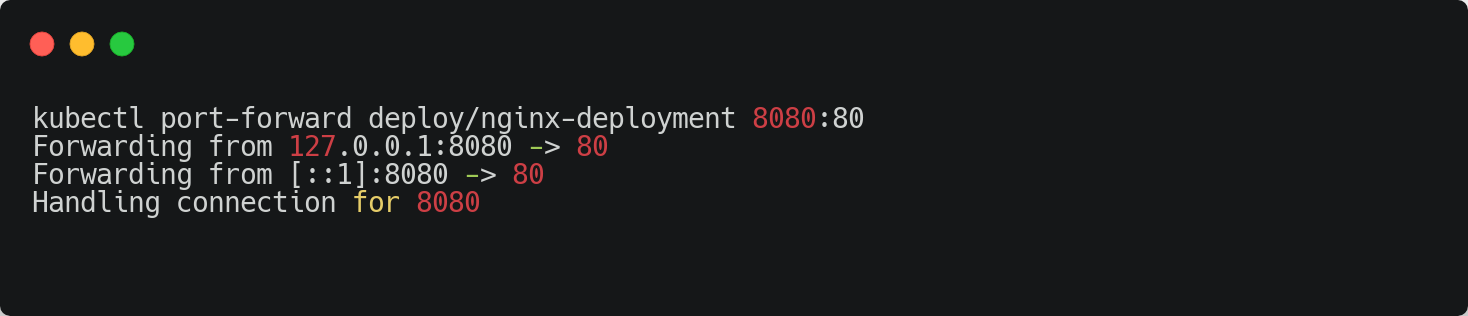
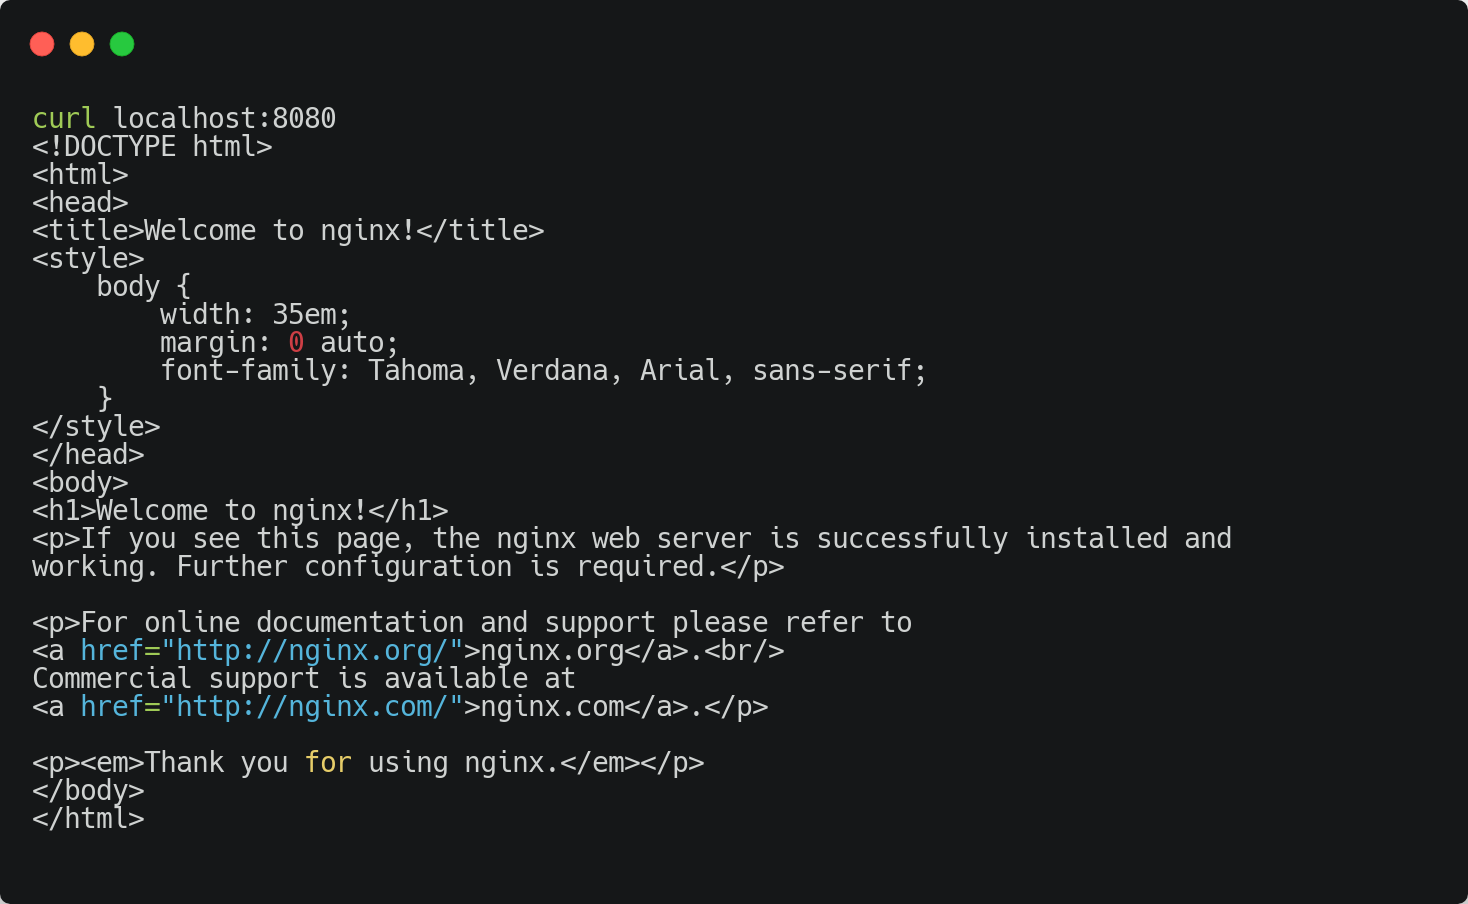
After deploying the workload, I can access the workload.
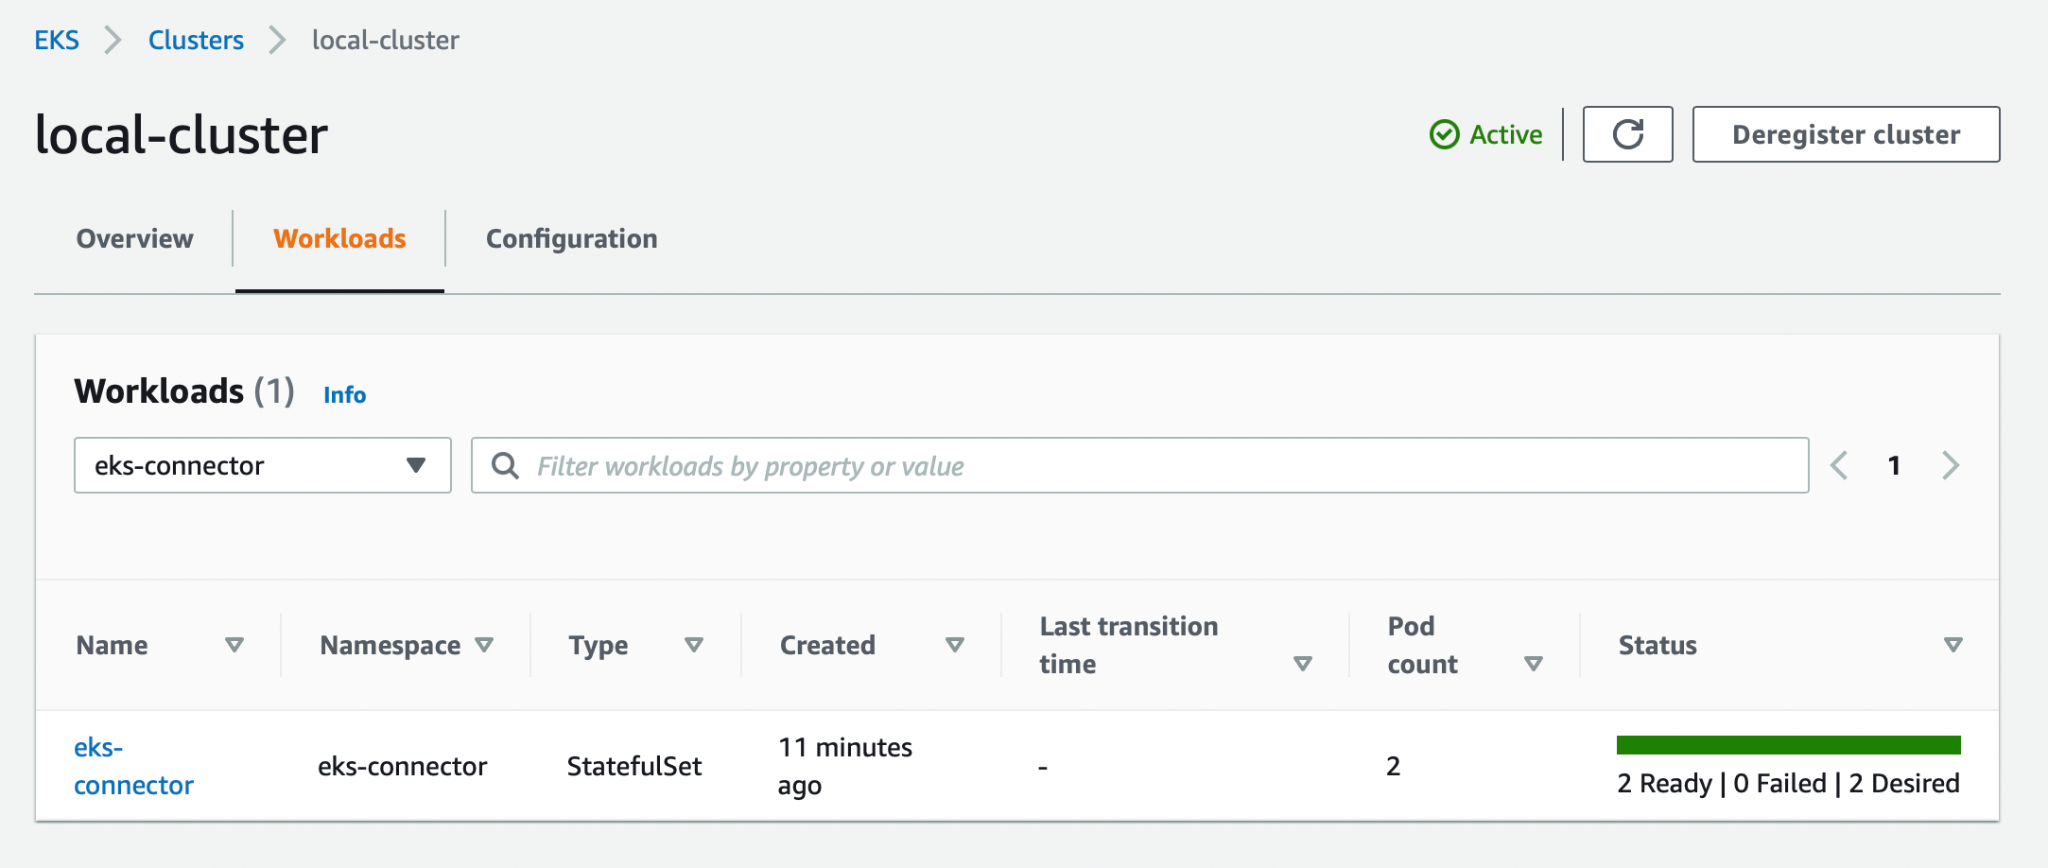
Finally, I will register my cluster to EKS Console using EKS Connector. For that, I will use the AWS Management Console.
First, let’s go to EKS Console and choose Register Cluster Option.
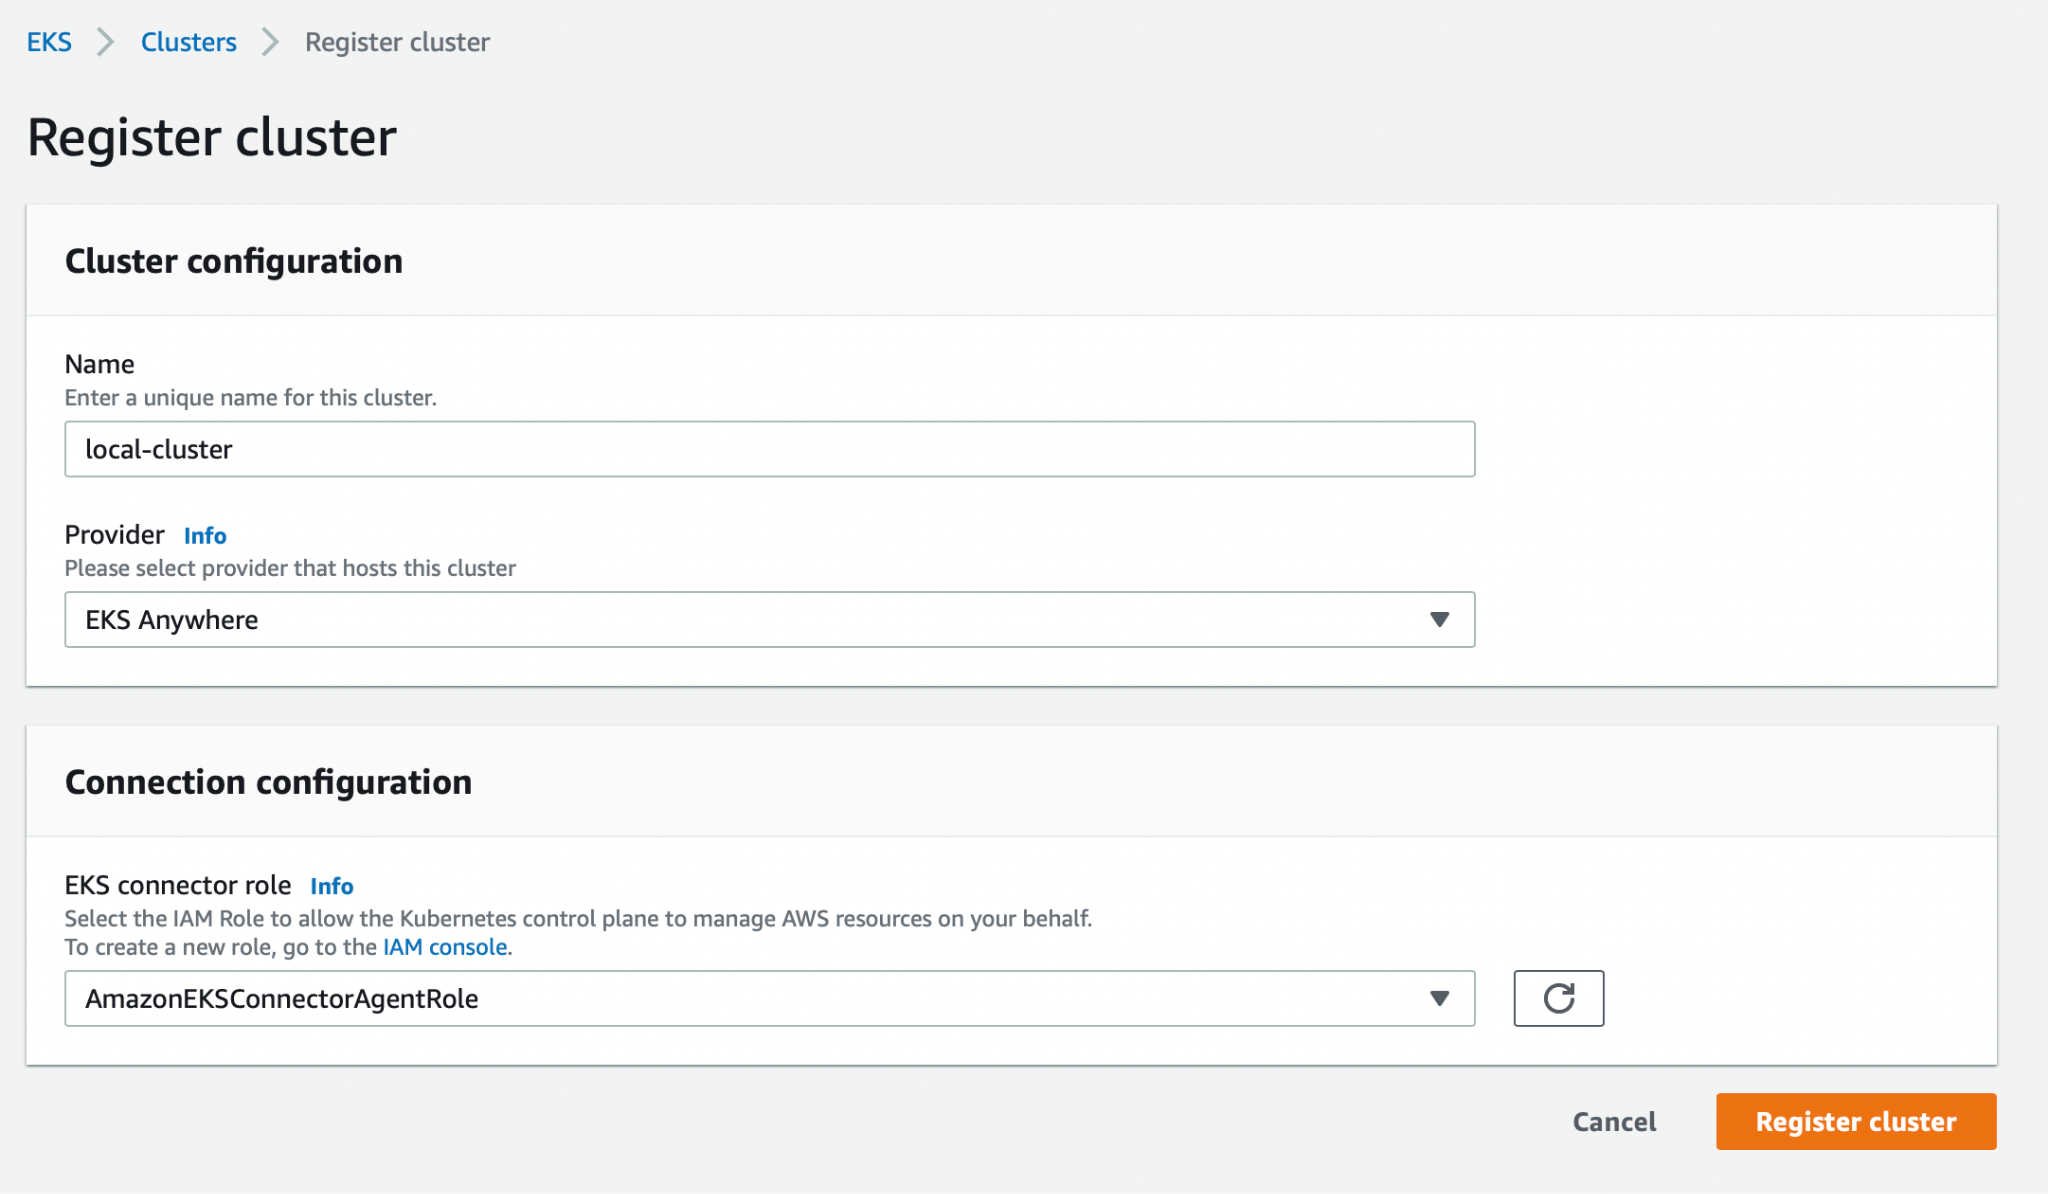
You need to have an IAM Role for this access. You can find the related information about the role and permissions from the documentation.

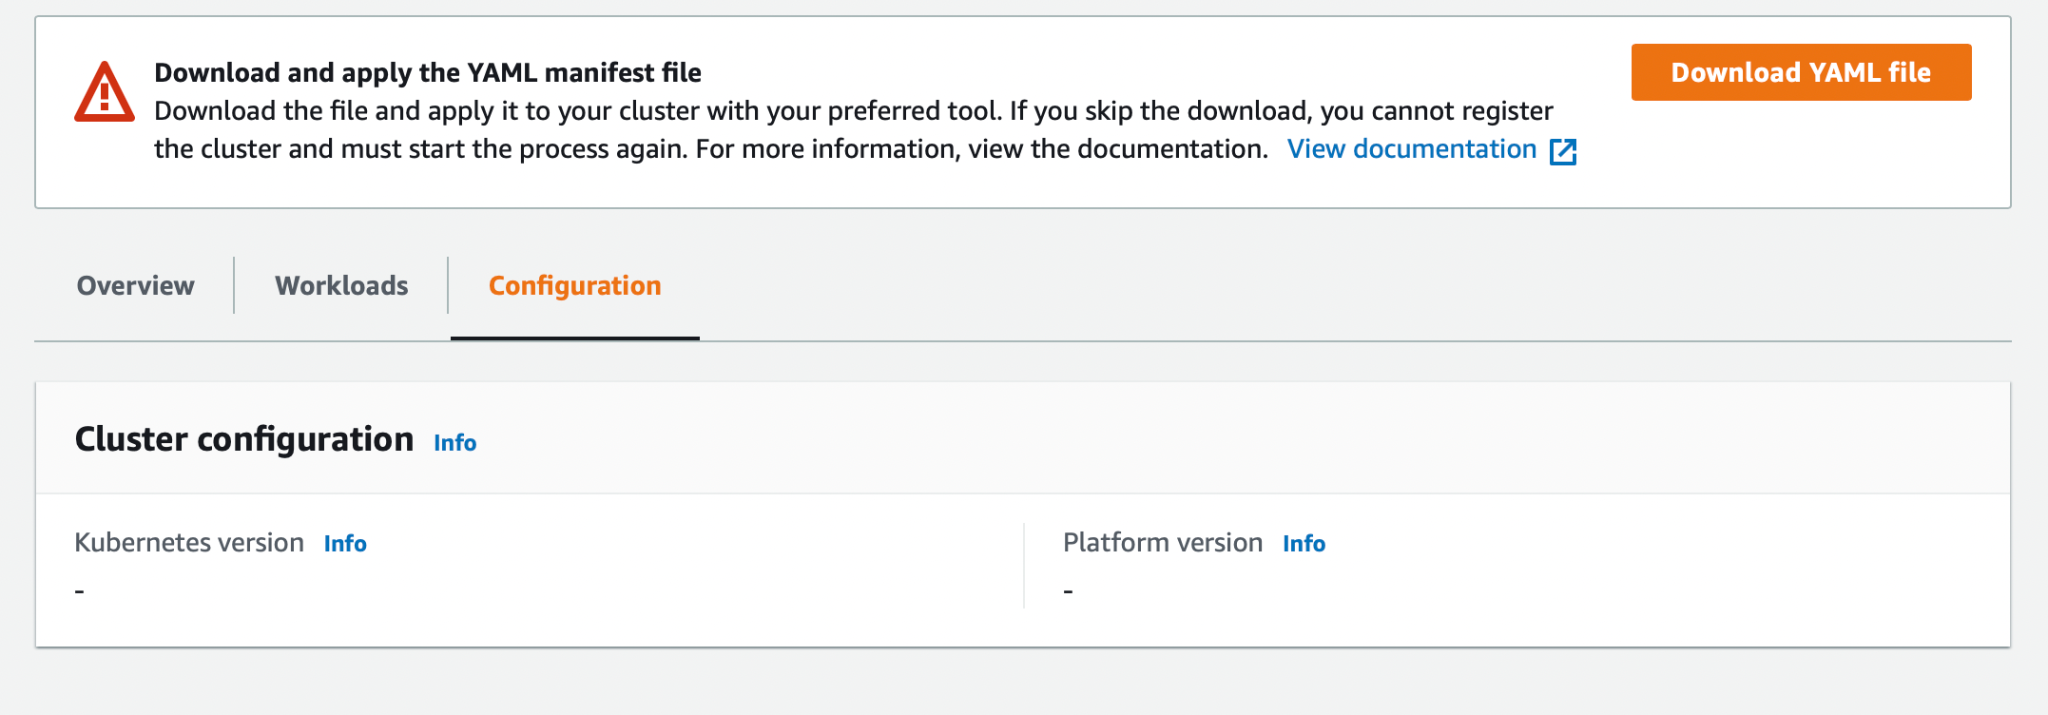
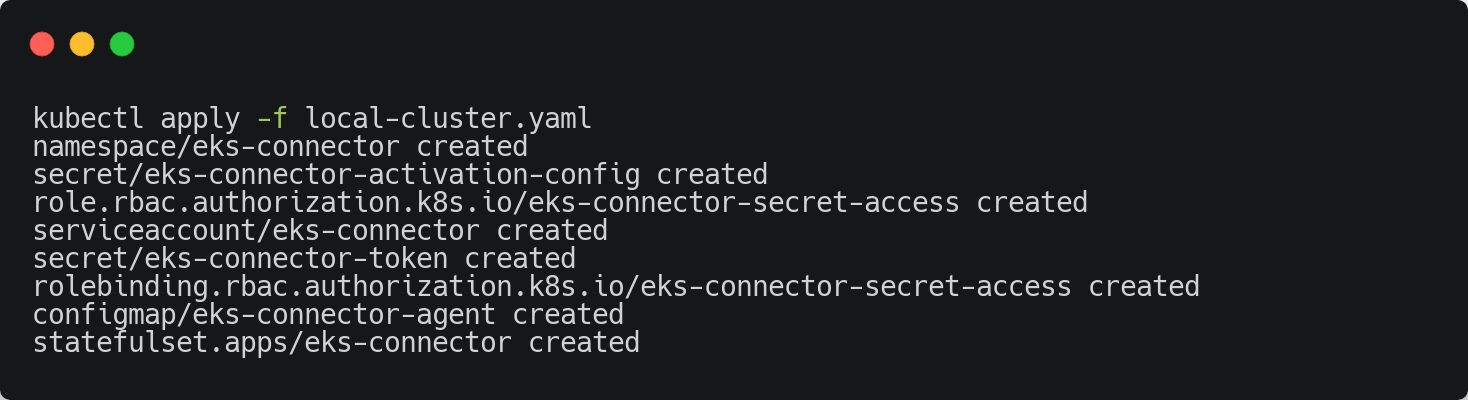
After this step, I download the configuration file to my machine and apply it to my Kubernetes cluster.
I can now describe my cluster using AWS CLI.
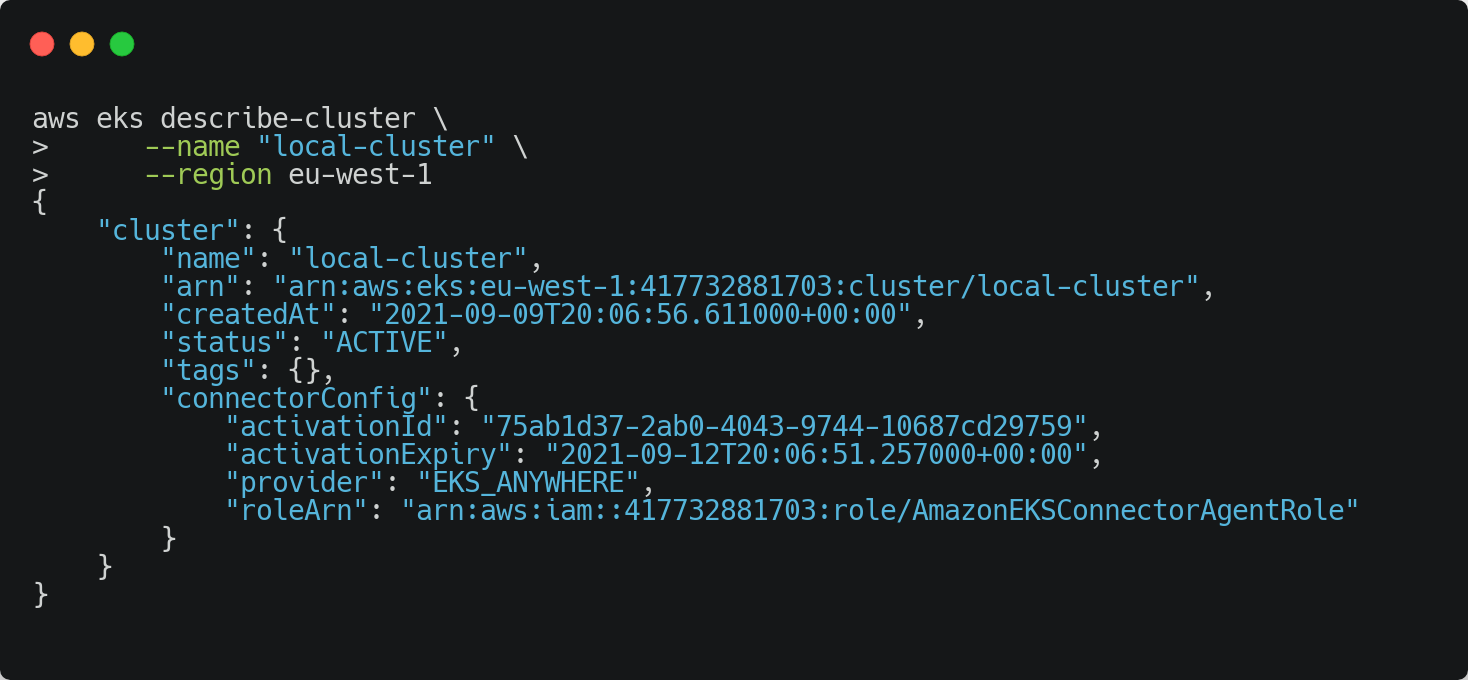
Finally, I can see information about my local cluster on the EKS Console too.
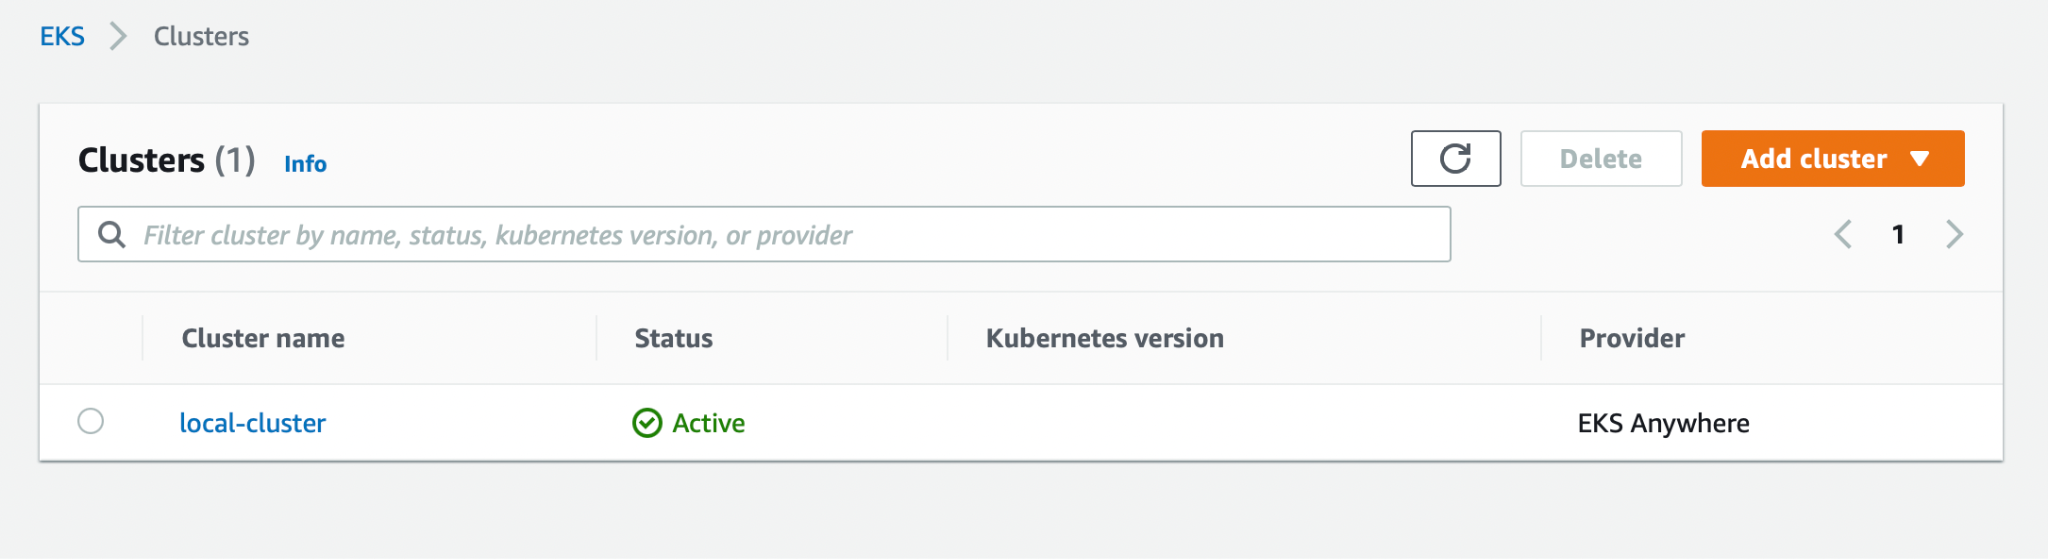
You can now register other Kubernetes clusters to EKS Console for centralized visibility.
Start With EKS Anywhere Today
You can give EKS Anywhere a try. Start small, deploy it locally, try it and move on from there.
In this blog post, I explained what EKS Anywhere is and installed a test cluster on a local machine. After creating the cluster I registered it to EKS Console for centralized visibility.
If you want to use Amazon’s Kubernetes Distribution on your own on-premise environments, you can easily install it on Linux or MacOS local machines or you can install EKS Anywhere on virtual machines running on VMware vSphere infrastructure. If you have any regulatory restrictions or if you want to use this distribution in your environments, this can be the right solution. EKS Anywhere is a great option for Kubernetes on on-premise environments. We look forward to seeing new features from this deployment option.