By Emre Oztoprak on Feb 24, 2022 12:04:29 PM
OpenID Connect: Authentication between AWS and Bitbucket
Not using CI/CD practices is impossible in today’s software development world. Automating all testing, build, and deployment processes ensure that the products we develop are produced faster with better quality and fewer errors. We use various tools to automate these manual processes. But when you automate everything, you should not forget one thing: Security!
We define access to these tools so that they can perform the necessary operations, and we grant these permissions through access and secret keys. Although their access is limited, these keys grant access to many services and environments and we don’t want them to be exposed! We rotate the keys at certain intervals and keep them in safe places to prevent this. These operations may be easily done in small environments, but you have a big problem if your environment is growing and you have hundreds of keys to manage. Here OpenID Connect or OIDC for short comes to our rescue.
Authentication vs Authorization
.webp?quality=low&width=624&height=395&name=image%20(2).webp)
OIDC works by adding an extra layer on the OAuth 2.0 protocol. OAuth 2.0 is an authorization protocol, and OIDC is an authentication protocol. We need to understand the distinction between these two.
- Authentication is the stage when you log into a system, server or website. You use your username, password, 2fa code, or ssh key file to log in. The system either accepts or rejects you by making a validation here.
- Authorization is what you can do after logging in. In other words, the permissions granted to your user. For example, you can view only certain pages on a portal or access only a specific directory in a server.
OAuth 2.0 handles authorization process, on the other hand OIDC handles authentication process between applications. Of course, OIDC and OAuth 2.0 don’t use user credentials in any way. They handle this process with the tokens it produces.
Bitbucket Pipelines
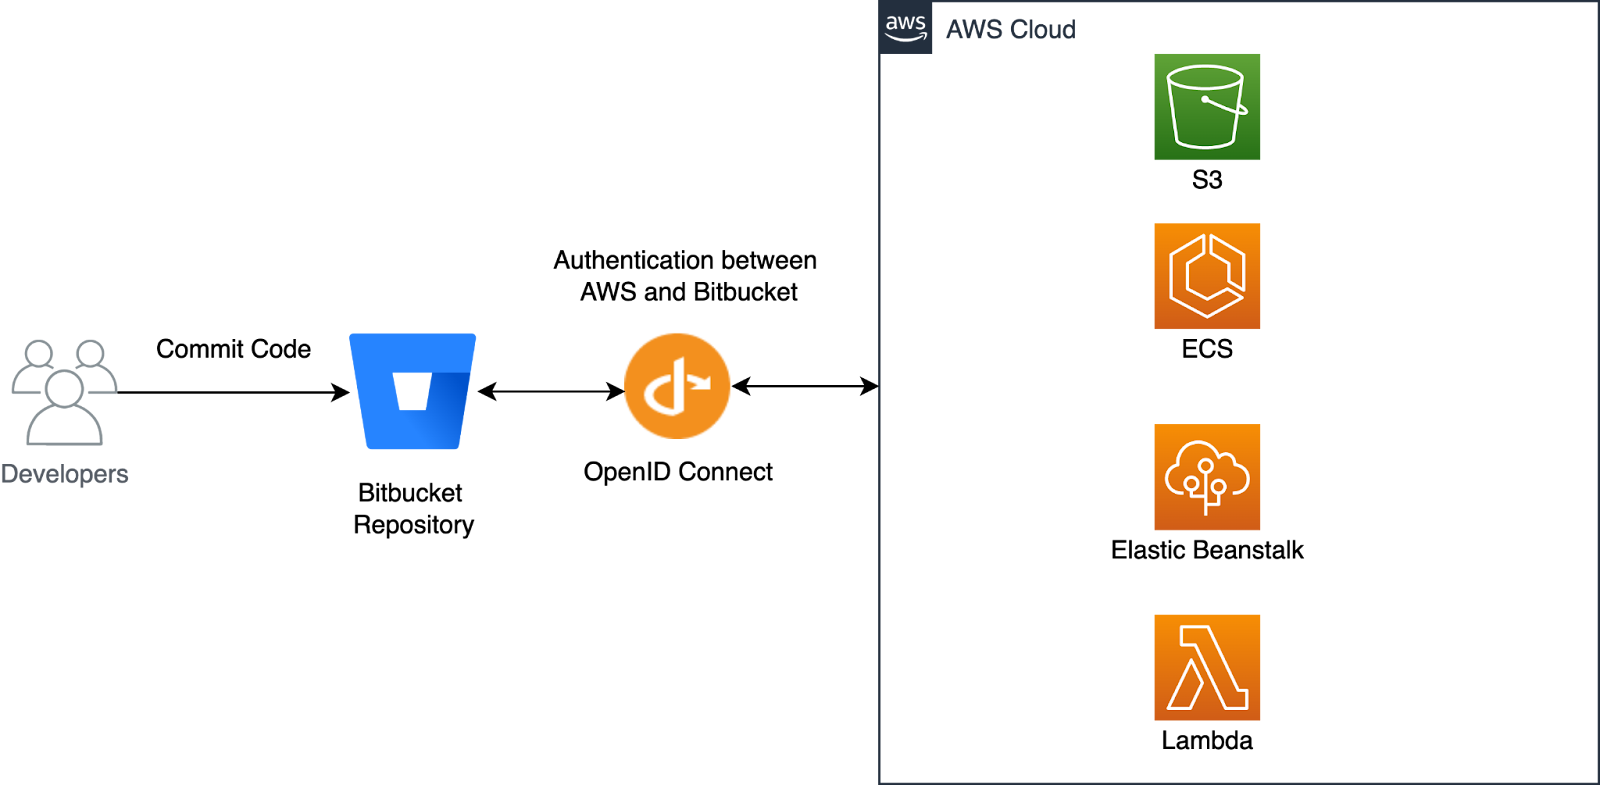
Now that we have understood the OIDC protocol let’s see how to use it. I use Bitbucket Pipelines for deployment, and Bitbucket has OIDC support. I will make this deployment to AWS with OIDC.
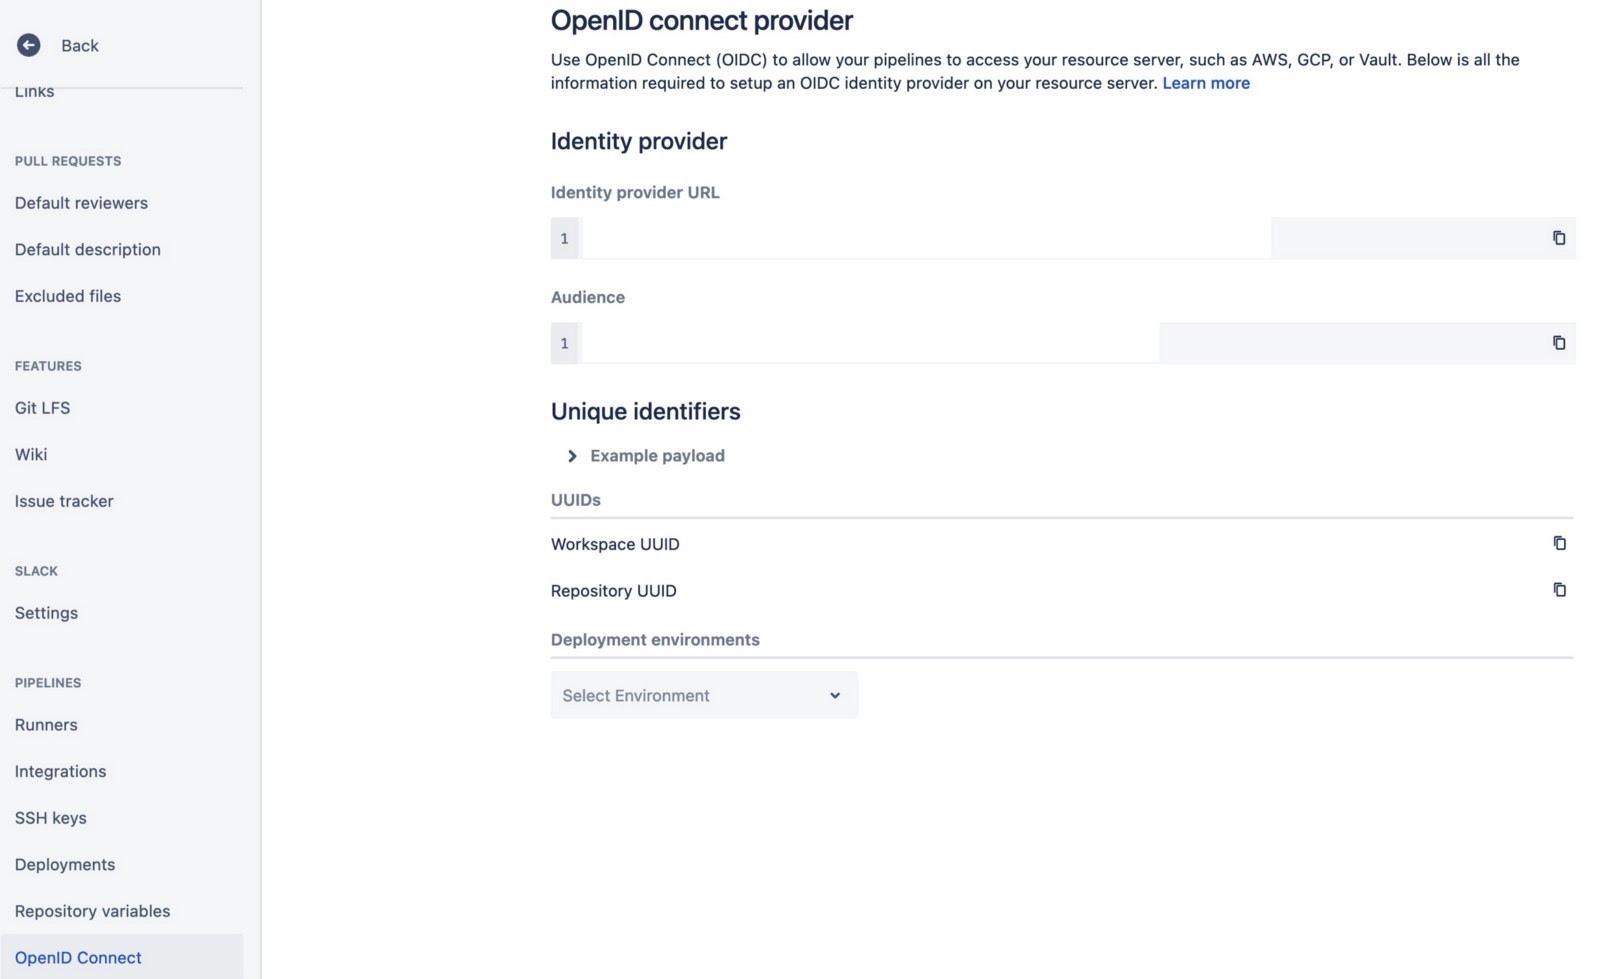
In my Bitbucket repo, I select the repository settings and OpenID Connect at the bottom. This is the information needed to establish trust between my AWS account and my Bitbucket repo. I take note of the provider URL and the Audience variable on that screen. Since this information is private to you, you should not share it.
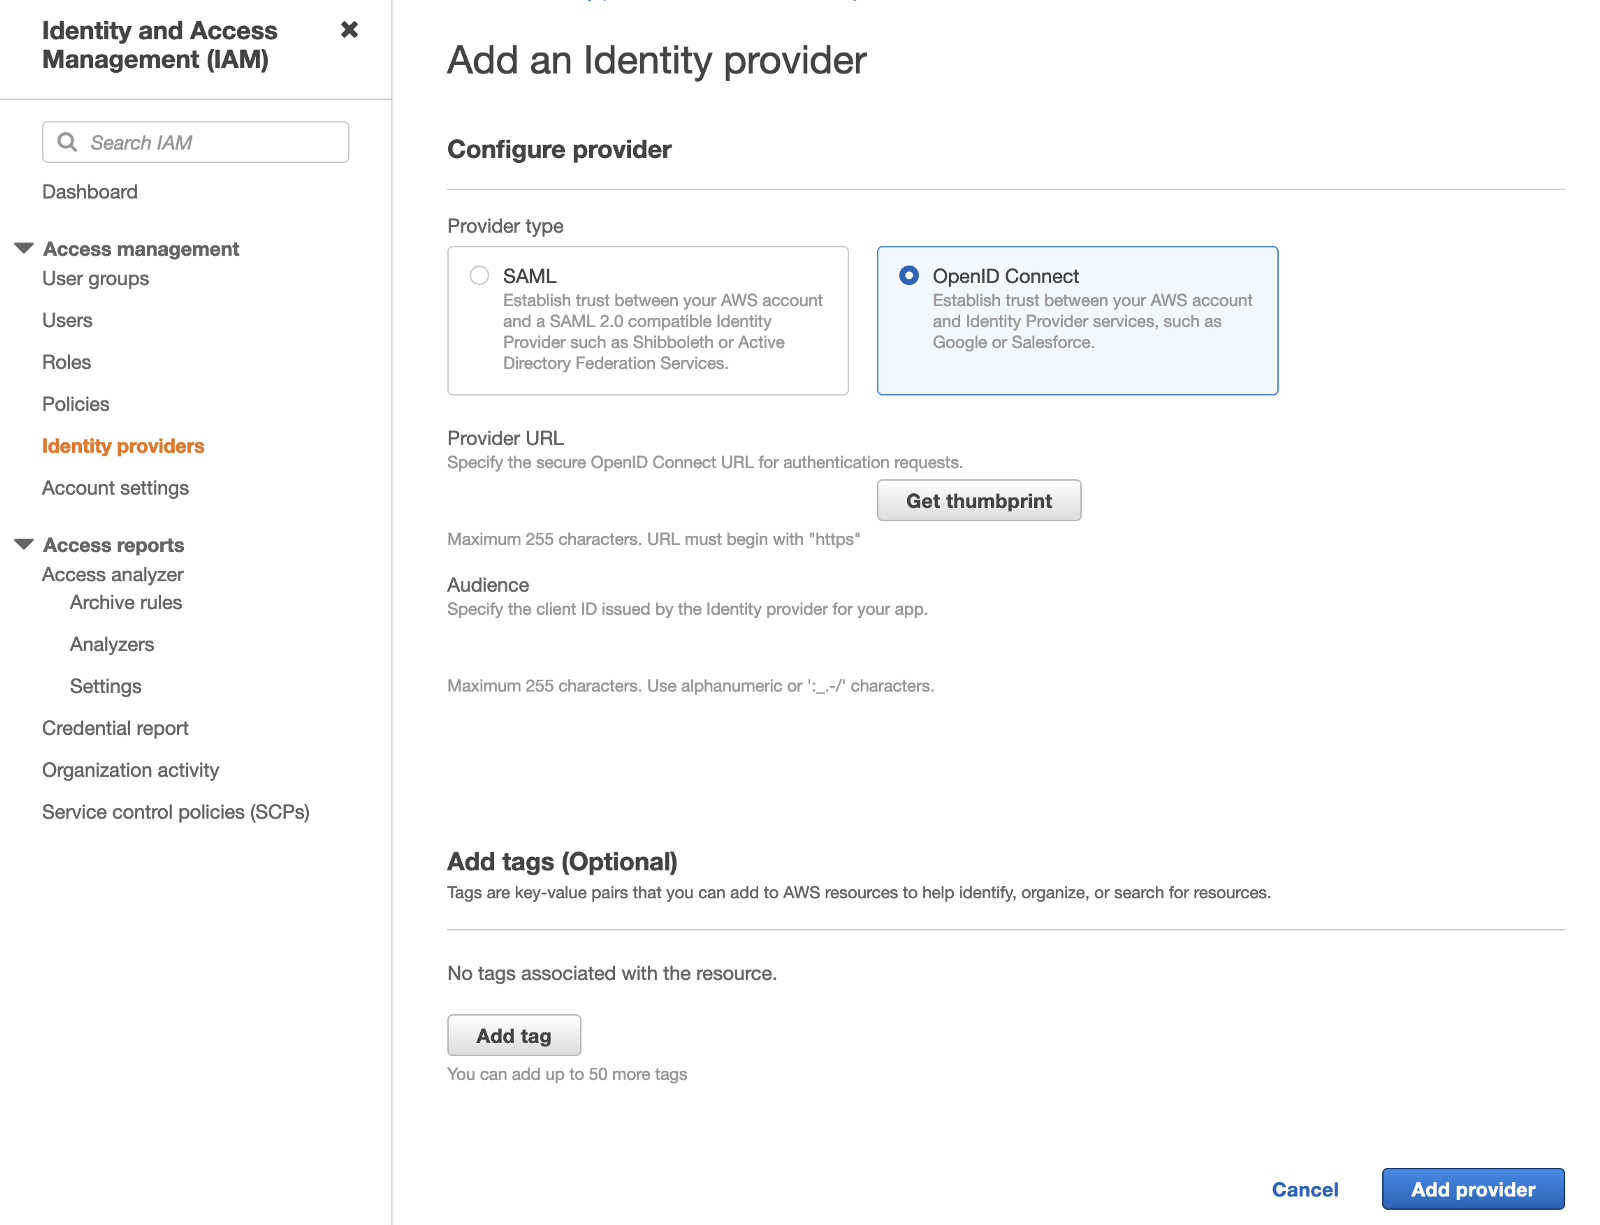
After that, I log in to my AWS account and navigate to Identity providers > Add provider in IAM.

I choose OpenID Connect as the type and paste the Identity provider URL, Audience that I just got from the repository settings. I perform the verification process by clicking Get thumbprint and completing the process by clicking Add provider.
I created trust between my AWS account and my Bitbucket repo by adding the identity provider. Now I need to assign a role to this identity provider for the necessary permissions.
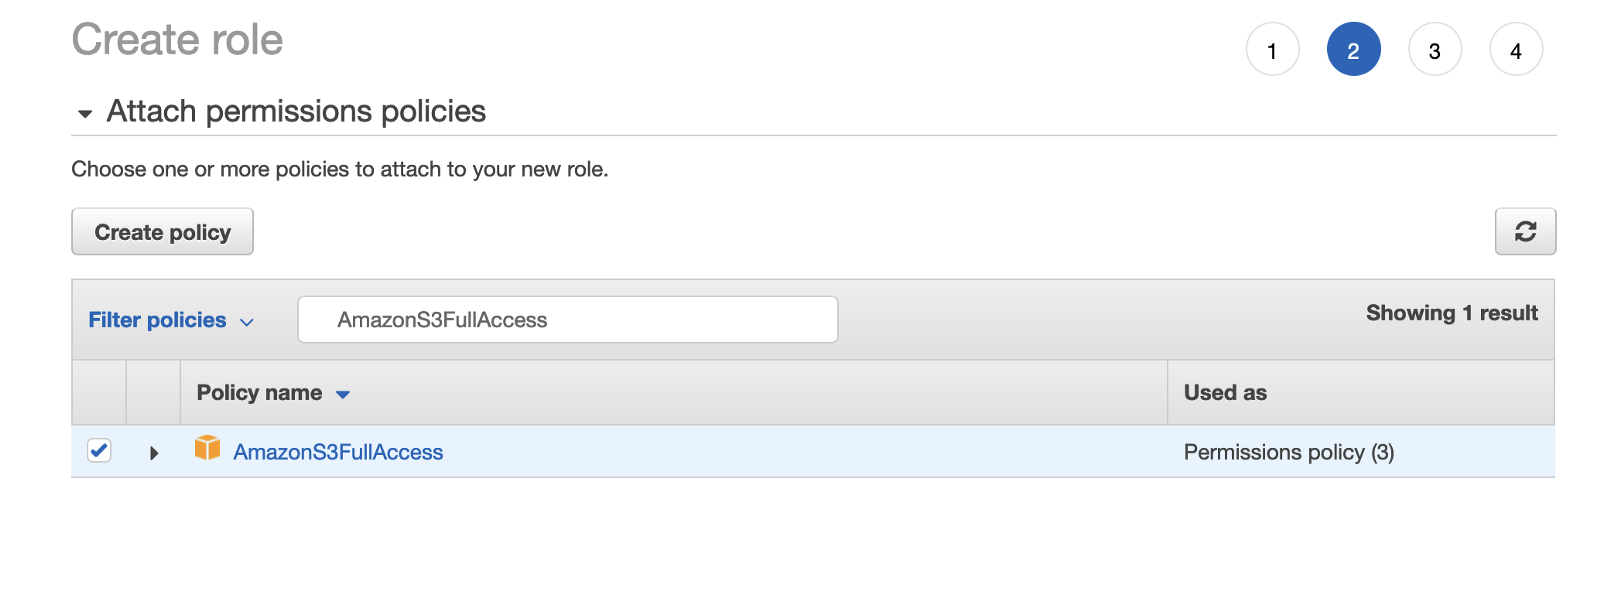
After clicking on the identity provider I created, I select the Assign role. I switch to the role creation screen by clicking Create a new role. Web identity will be selected as the Select type of trusted entity, and the identity provider I just created will be selected. After selecting Audience, I move on to adding Permissions.
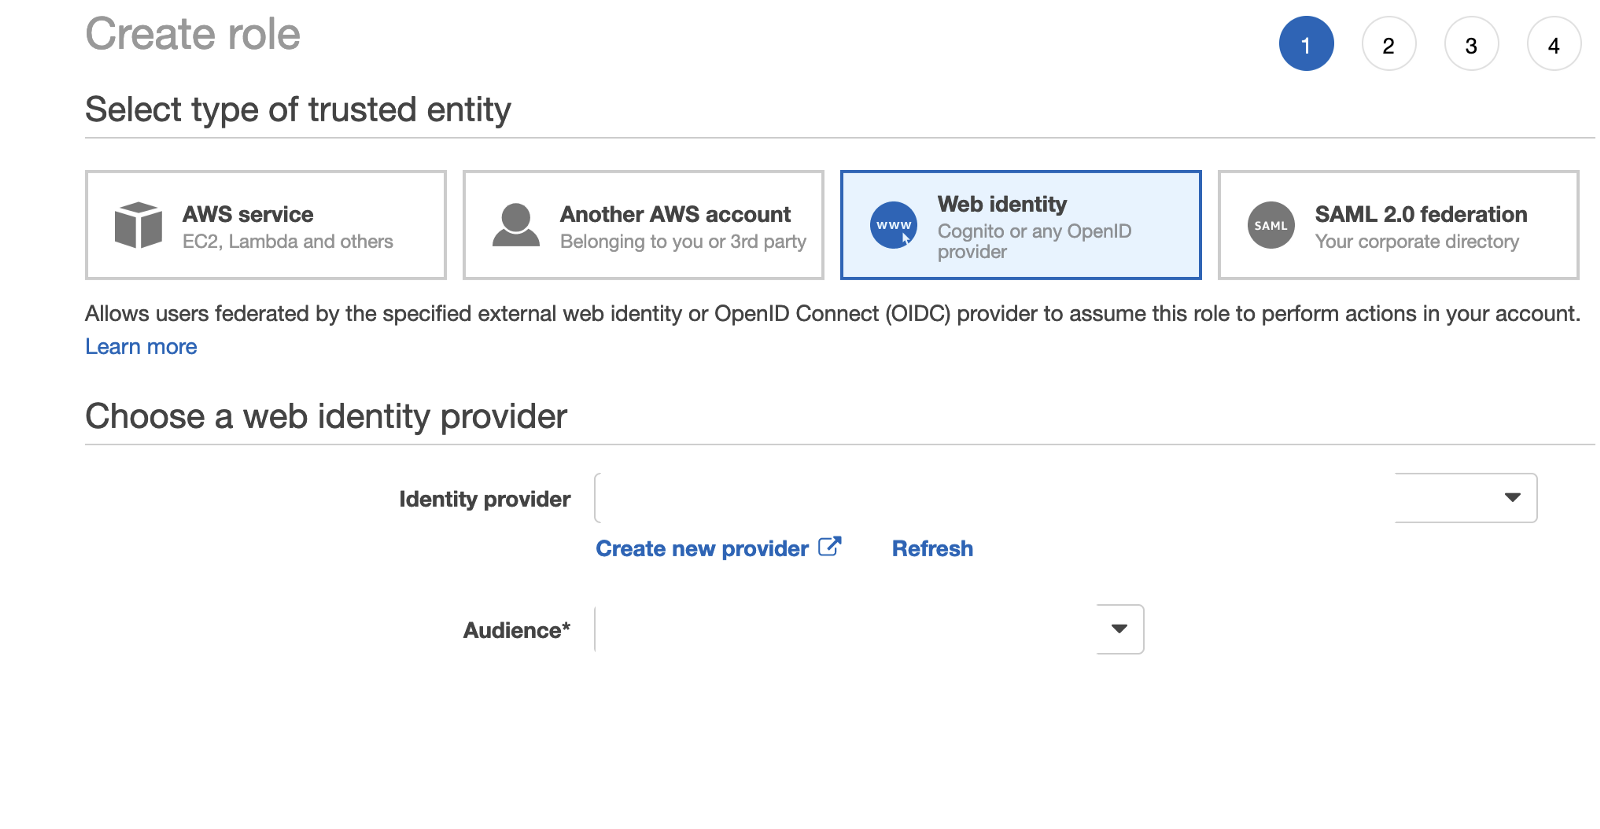
You need to give the necessary permissions for which services your application uses. S3, ElasticBeanstalk, ECS, Lambda, etc. Since I will demo on S3, I choose AmazonS3FullAccess and continue.
Click Create Role and complete.

I have completed the things to do on the AWS side. Now let’s go to Bitbucket and set the pipelines.yml file in my repo. Bitbucket has many integrations for the pipeline. You don’t need to create a deployment image from scratch. For example, AWS Elastic Beanstalk deployment;
- step:
   oidc: true
   script:
     - pipe: atlassian/aws-elasticbeanstalk-deploy:1.0.2
       variables:
         AWS_DEFAULT_REGION: $AWS_DEFAULT_REGION
         AWS_OIDC_ROLE_ARN: 'arn:aws:iam::XXXXXXXXXX:role/rolename'
         APPLICATION_NAME: 'my-app-name'
         ENVIRONMENT_NAME: 'production'
         ZIP_FILE: 'application.zip'
Or S3 Deployment;
- step:
   oidc: true
   script:
     - pipe: atlassian/aws-s3-deploy:1.1.0
       variables:
         AWS_DEFAULT_REGION: $AWS_DEFAULT_REGION
         AWS_OIDC_ROLE_ARN: 'arn:aws:iam::XXXXXXXXXX:role/rolename'
         S3_BUCKET: 'my-bucket-name'
         LOCAL_PATH: 'build'
Both examples have OIDC support. Just write your role ARN.
You can see other pipeline integrations and examples here.
Bitbucket Pipes integrations | Bitbucket
As an example, I created a repo with a single index.html file. I create an artifact and send that artifact to the bucket.

I defined Role Arn, Region, and Bucket as variables. Now I can run Pipeline.
image: atlassian/default-image:2

pipelines:
 default:
   - step:
       name: Build artifact
       script:
         - mkdir artifact
         - cp index.html artifact/
       artifacts:
         - artifact/*
   - step:
       name: Deploy to S3
       deployment: production
       oidc: true
       script:
         - pipe: atlassian/aws-s3-deploy:1.1.0
           variables:
             AWS_OIDC_ROLE_ARN: $OIDC_ROLE_ARN
             AWS_DEFAULT_REGION: $AWS_DEFAULT_REGION
             S3_BUCKET: $S3_BUCKET
             LOCAL_PATH: 'artifact'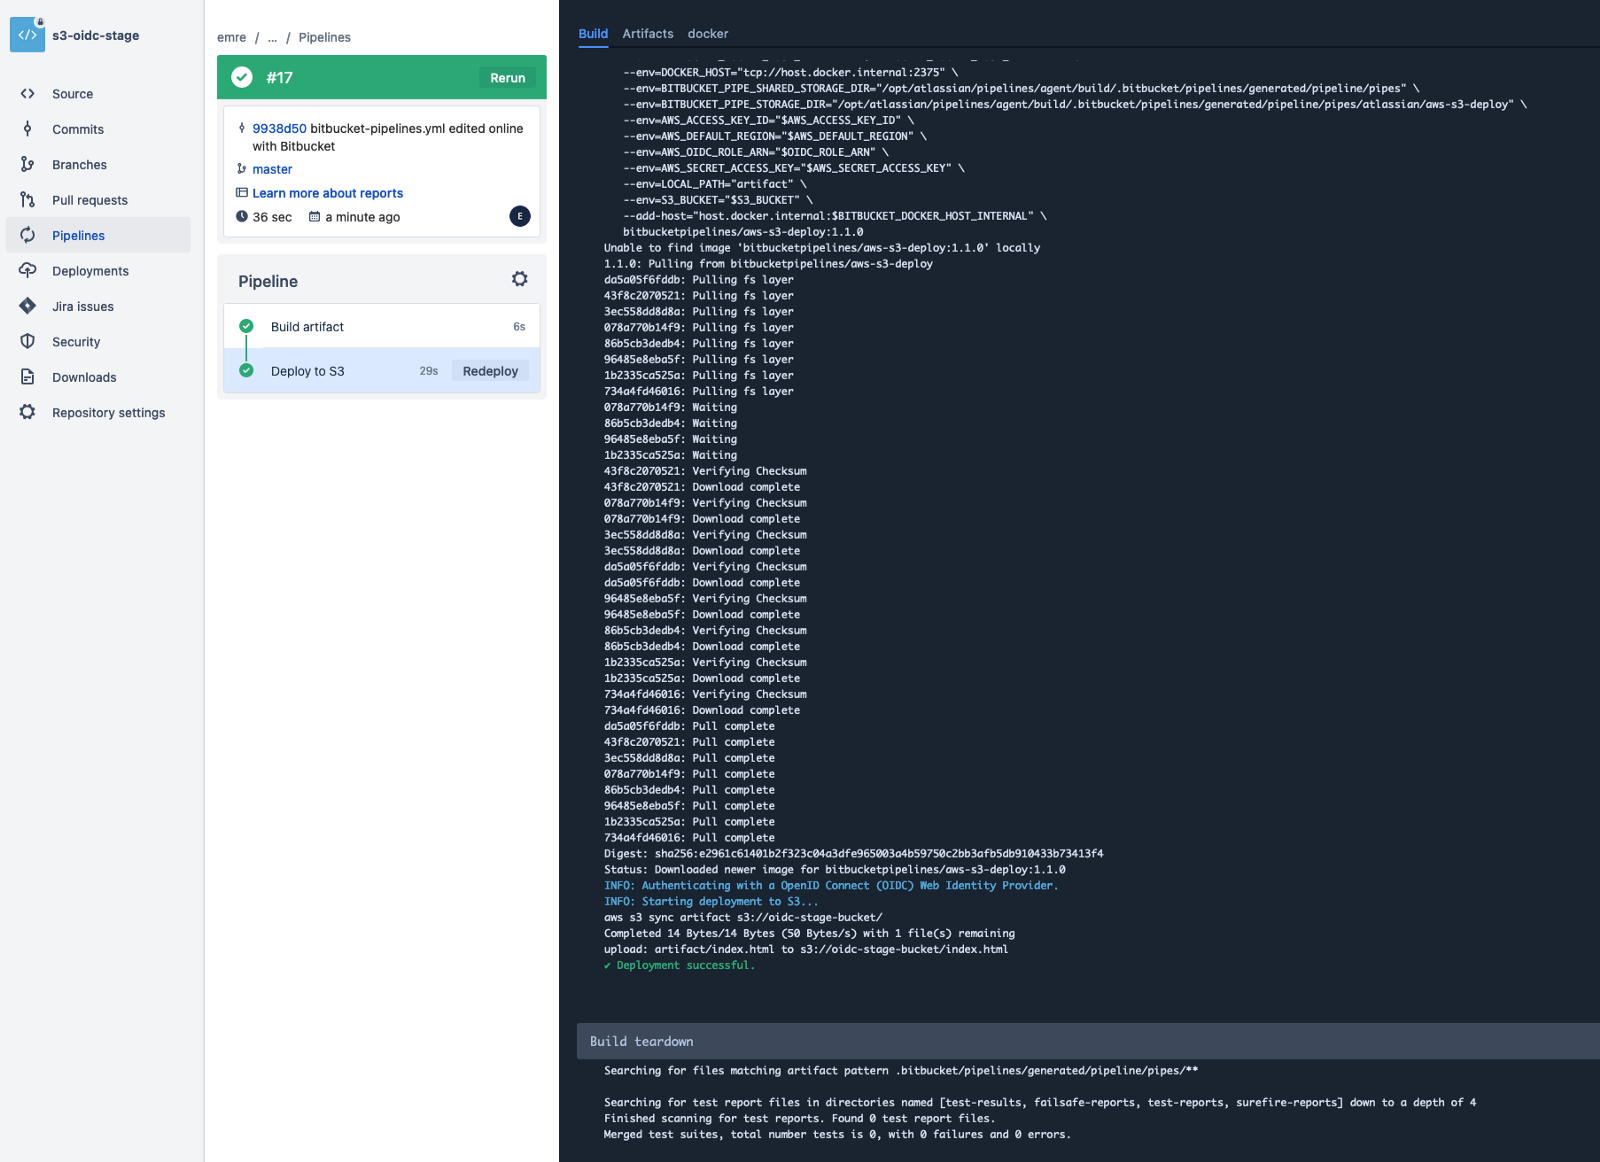

Deployment completed successfully. I completed the deployment without an access-secret key. But to increase security, I can restrict access to the role a little more. For example, I can allow only Bitbucket Pipelines IP addresses and certain Repo UUIDs. In this way, other repos can not access that role, except the repos I have specified.
I select the role and edit the Trust relationships.
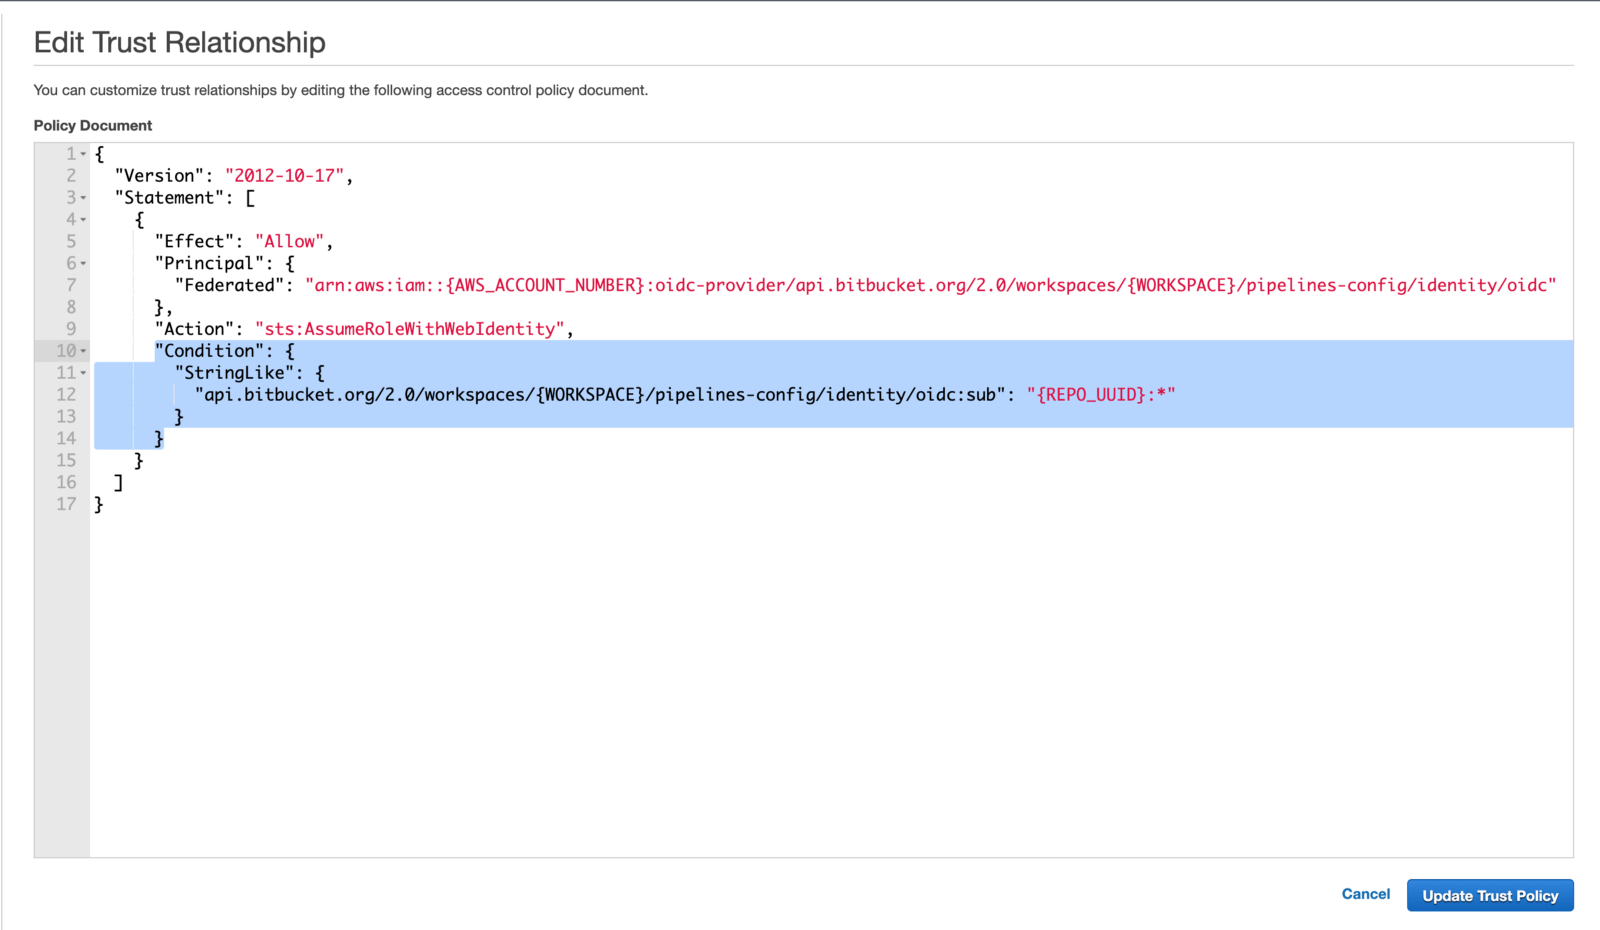
I edit this policy by adding my REPO UUID. No repository other than this repository can access this role.

As an extra, only Bitbucket Pipeline IPs will be allowed in this policy. I’ve made it one layer more secure.
Conclusion
In this blog post, I talked about authentication, authorization, OIDC, and OAuth 2.0. Deployment with OIDC is more secure and easier to manage. Even if your Role ARN leaks, no one can access your AWS resources. But if your access keys leak, they can be used anywhere. If your environment and CI/CD platform support OIDC, you can deploy AWS resources with this method.
Secure AWS Resource Access from Kubernetes with IAM Roles
.png)
AWS App Mesh on EKS: Simplify Microservices Communication

No Comments Yet
Let us know what you think