By Emin Alemdar on Dec 24, 2021 11:34:22 AM

There are three main options for autoscaling in Kubernetes clusters. HPA (Horizontal Pod Autoscaling), VPA (Vertical Pod Autoscaling) and Cluster Autoscaling. I will talk about Cluster Autoscaling in this blog post. As you already know, many Kubernetes operators have been using the Official Cluster Autoscaler for years. Cluster Autoscaler works perfectly for most environments.
AWS has developed and published an Open Source Cluster Autoscaling tool called Karpenter and released the GA version at re:Invent 2021. Right now, Karpenter only supports AWS as the underlying Cloud Provider but I believe this will extend in the future with contributions from the community.
The tool aims to simplify the Autoscaling configurations. With Karpenter, we don’t have to worry about configuring Node Pools beforehand, we don’t have to worry about right-sizing the compute resources beforehand. That improves the application availability and minimizes the operation overhead. Also, this helps with Cost Optimization.
Karpenter watches the events in the Kubernetes cluster and resource requests for workloads. After detecting unschedulable pods Karpenter makes the decisions about creating and terminating the nodes. It doesn’t use Node Groups, instead it uses Launch Templates for nodes and you can configure custom Launch Templates for your needs.
With Karpenter, as operators we only need to configure Provisioner CRDs. We can configure Provider options, Annotations, Taints and most importantly TTL second values for node termination. With the TTL options Karpenter cordons the nodes, drains all the pods and finally safely deletes the node. We can also add multiple provisioners with different configurations to a single cluster and separate our workloads within these provisioners.
So, the question is how Karpenter differentiates from Cluster Autoscaler. Mostly these two tools are doing the same thing, that is managing nodes in your cluster on your behalf. But there are three main differences between the two. Let me explain those.
- Karpenter allows you to use all the flexibility of the cloud. That means you use all of the EC2 instance types AWS has to offer. Also, you can choose the purchase options like On-Demand and Spot, Availability Zone options.
- Karpenter does not use Node Groups. Karpenter manages each instance directly without configuring any other orchestration mechanism. In Cluster Autoscaler, you need to configure Node Groups for each instance type, purchasing options. That brings operational overhead.
- With Karpenter you don’t need to rely on the kube-scheduler. When Cluster Autoscaler launches a node, it doesn’t bind the pods to those nodes. Kube-scheduler makes that decision. But Karpenter uses a scheduler plugin for these operations. This plugin creates a v1/Binding object and injects the node’s information into the pod without waiting for the node to become ready. By doing that, when a node becomes ready, pod schedules on that node immediately. This approach saves some time off of latency.
Let’s See Karpenter in Action!
I’ve prepared a GitHub repository for this demonstration. You can follow the instructions in this blog post and codes from the repository to try Karpenter. In the repo, there are some Terraform codes to deploy an EKS cluster, necessary IAM Roles for Karpenter and of course Karpenter Controller itself. Also, there are some yaml files for example Provisioner and application deployments as well.
I’ve deployed the EKS cluster and Karpenter controller already.
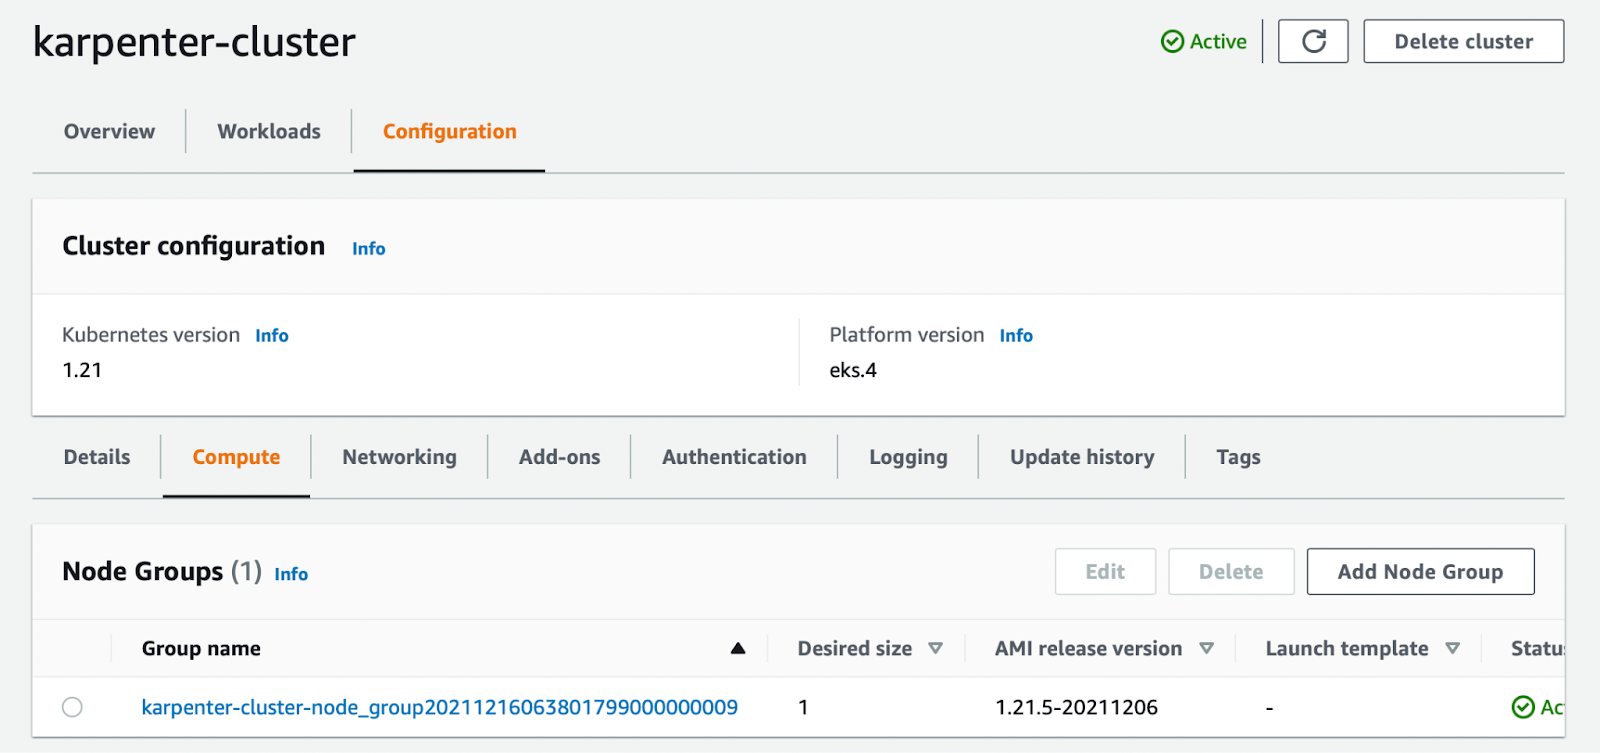

I only have one Node Group in the cluster and one Node inside the Node Group. I’ll only use this Node for Karpenter resources.
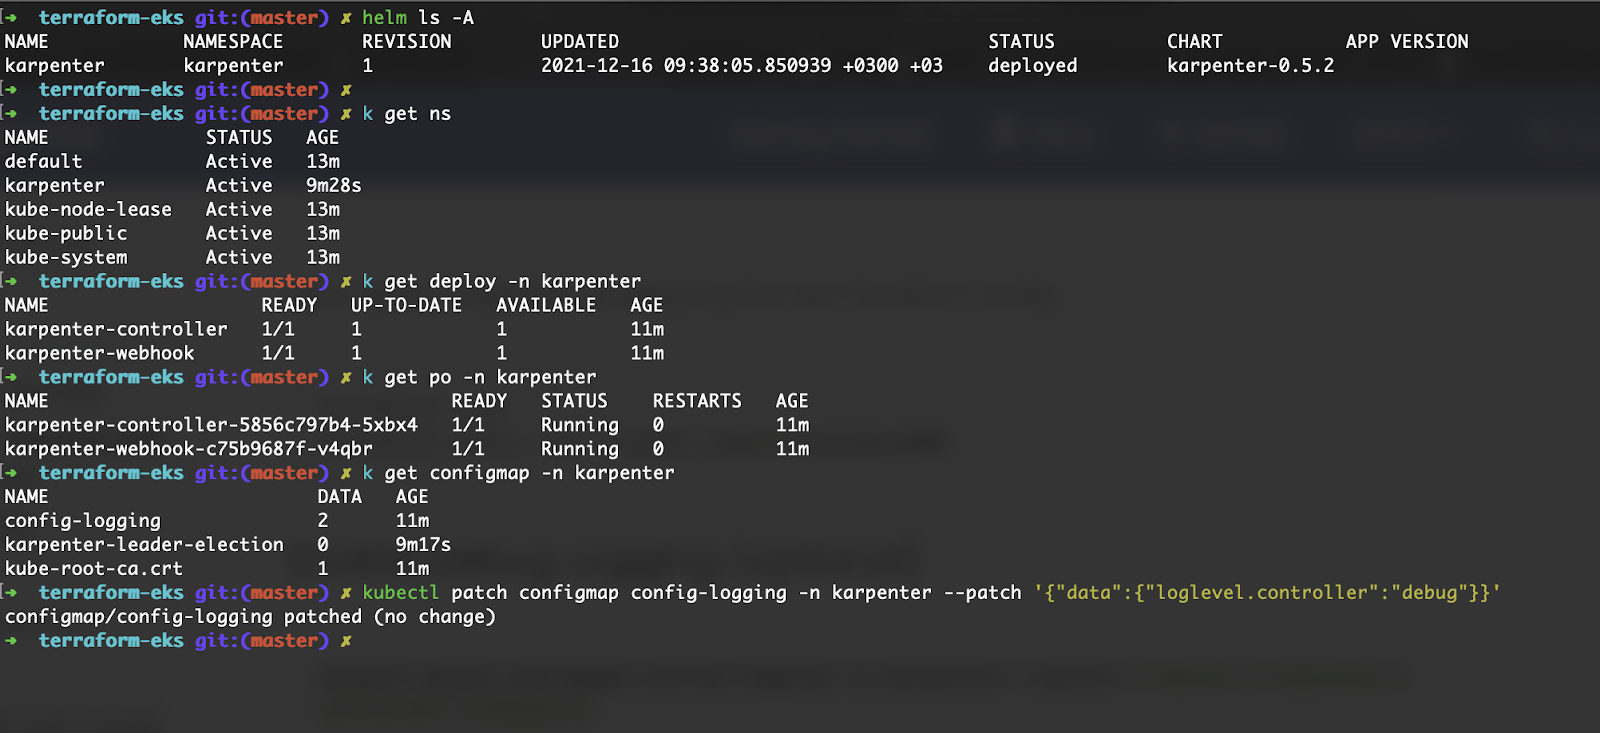
As you can see from the screenshot, the Karpenter Helm chart creates a Namespace, two Deployments, and some Configmaps. The
kubectl patch configmap config-logging -n karpenter --patch '{"data":{"loglevel.controller":"debug"}}
command changes the log level to DEBUG.
Karpenter also creates some Role, RoleBinding, ClusterRole and ClusterRoleBinding resources. After deploying Karpenter, you can inspect those resources too.
By the way, I’m using an alias for kubectl as k .
Next, I am going to create Provisioners for different Node Types. Provisioner resources are just CRDs and easily configurable as Kubernetes yaml definition files. You can find the examples in the GitHub repository as well.
First one is for AMD64 type architecture.

As you can see, in the spec.Requirements section I’ve defined three parameters. First one is purchasing options, the second one is for AWS Availability Zones and the final one is for Node Architecture. I’ve also added the Instance Profile to the nodes that Karpenter will create. I haven’t added any instance types for this provisioner but you can add them to the requirements section if you want specific instance types for your workloads. With this configuration, Karpenter will choose the right instance type and size for my application.
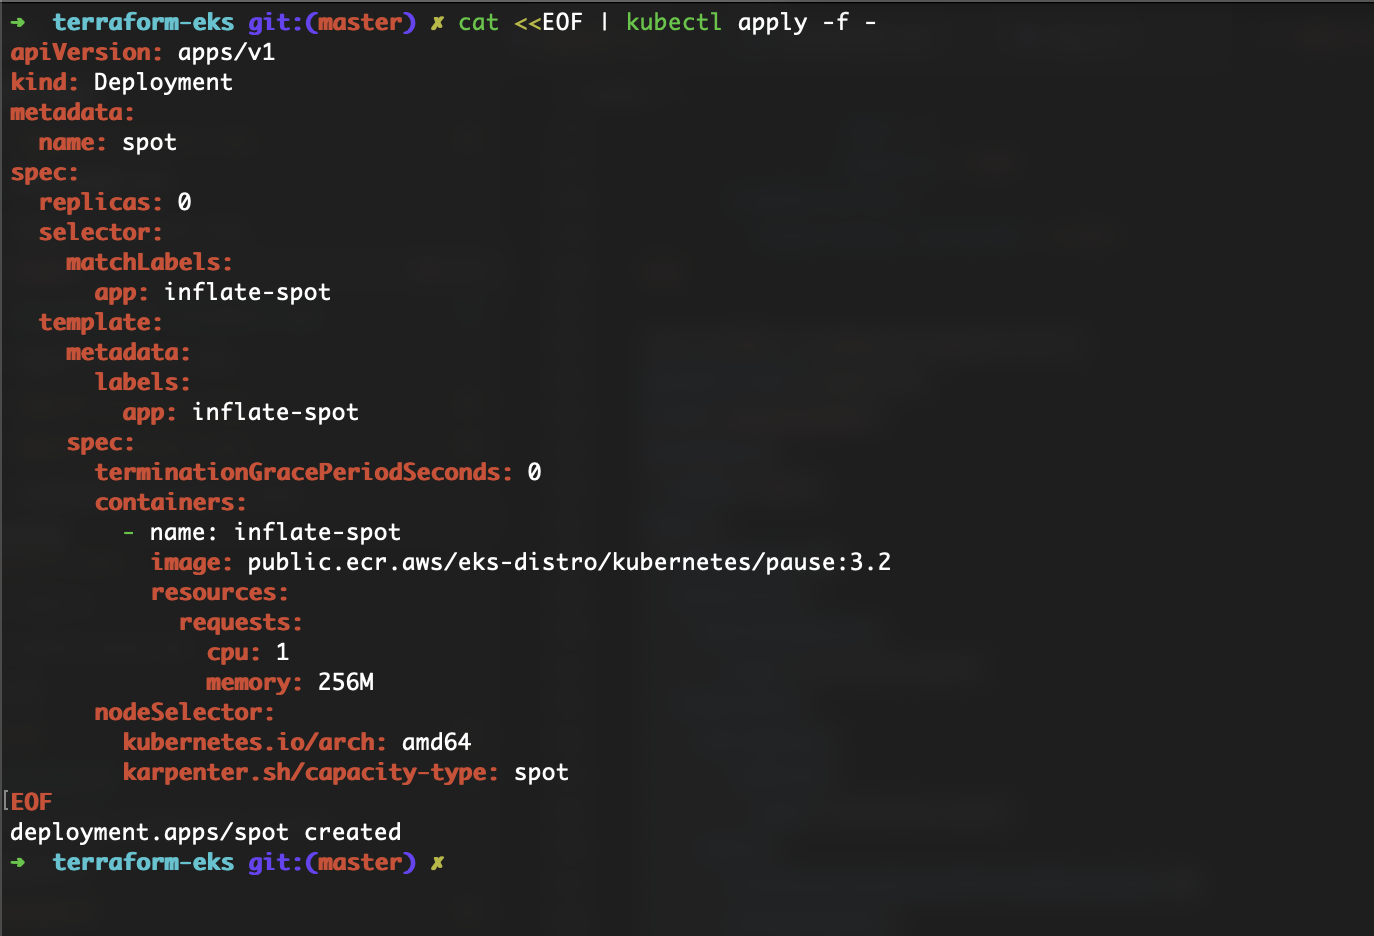
I will create a Deployment for this amd64 Provisioner. I will create the Deployment with 0 replicas and scale it afterward.

In the screenshot above, you can see I’ve added a nodeSelector that has the necessary parameter to match the amd64 Provisioner.
Now, let’s scale the deployment and see what happens.

It’s time to see the logs of the Karpenter Controller. I use the
kubectl logs -f -n karpenter $(kubectl get pods -n karpenter -l karpenter=controller -o name)
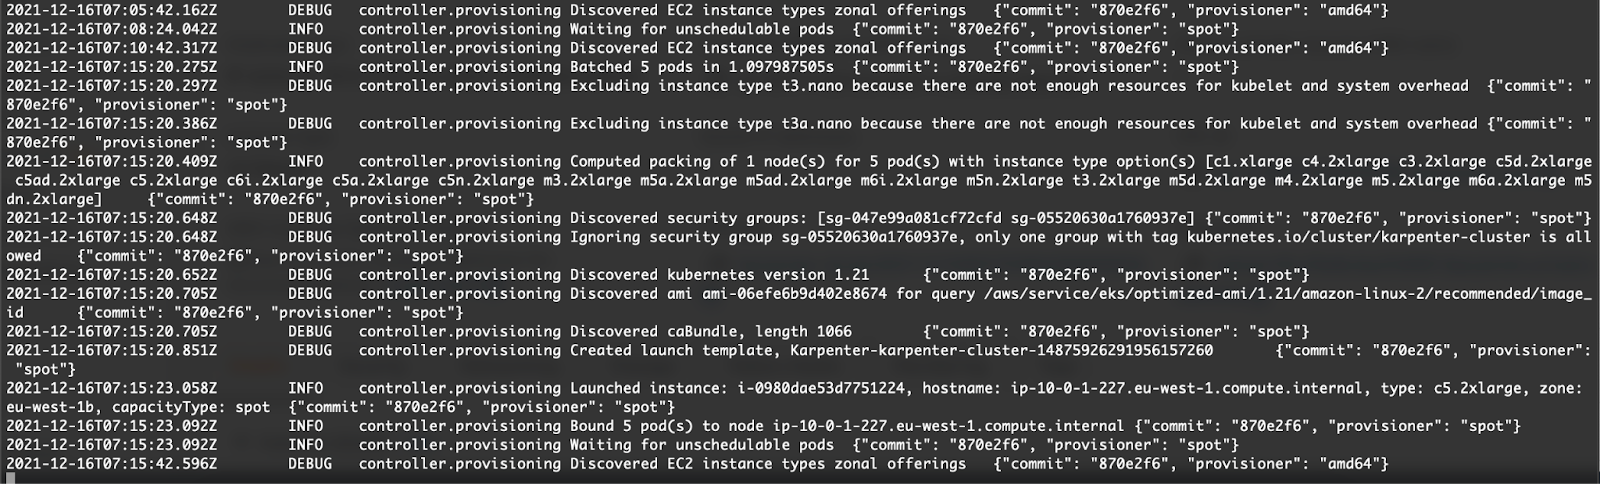
command for this. Here is the output.

Let me explain what is happening in this output. First, Karpenter detects there are some unschedulable pods in the cluster and triggers the node provisioning action. It reads some information from AWS like EC2 Instance types with amd64 architecture in the specified region, subnets, and security groups with the tag kubernetes.io/cluster/karpenter-cluster.
Next, Karpenter excludes some instance types because it detects that my workload will not fit into those instances. It decides to launch 1 instance for 10 pods from the listed instance type options. That means I won’t under-provision or over-provision anything in my AWS account. That's one of the golden rules in Cost Optimization when using Public Cloud Providers and Karpenter does it for me. Then Karpenter creates a Launch Template for the right instance and launches it.
Finally, Karpenter schedules the pods into the newly launched EC2 instance and starts waiting for unschedulable pods.

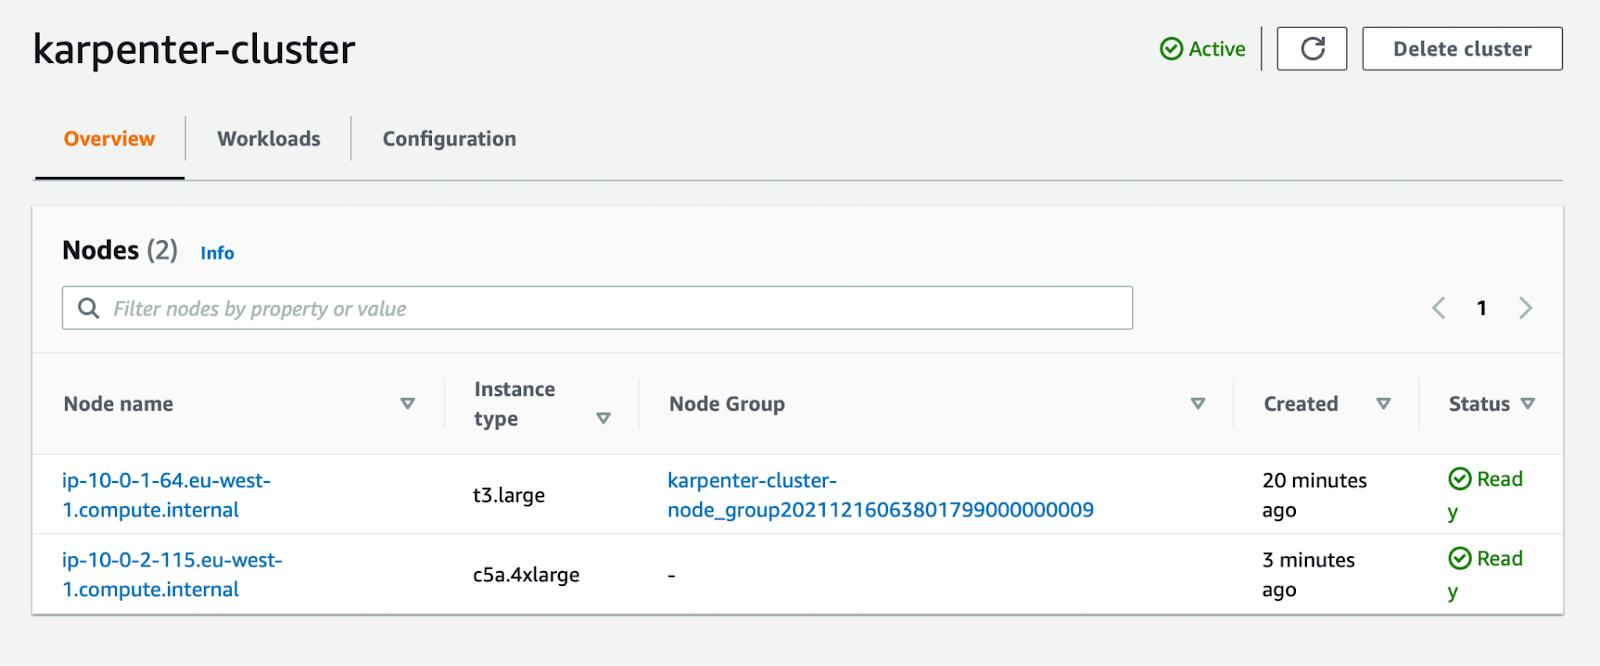
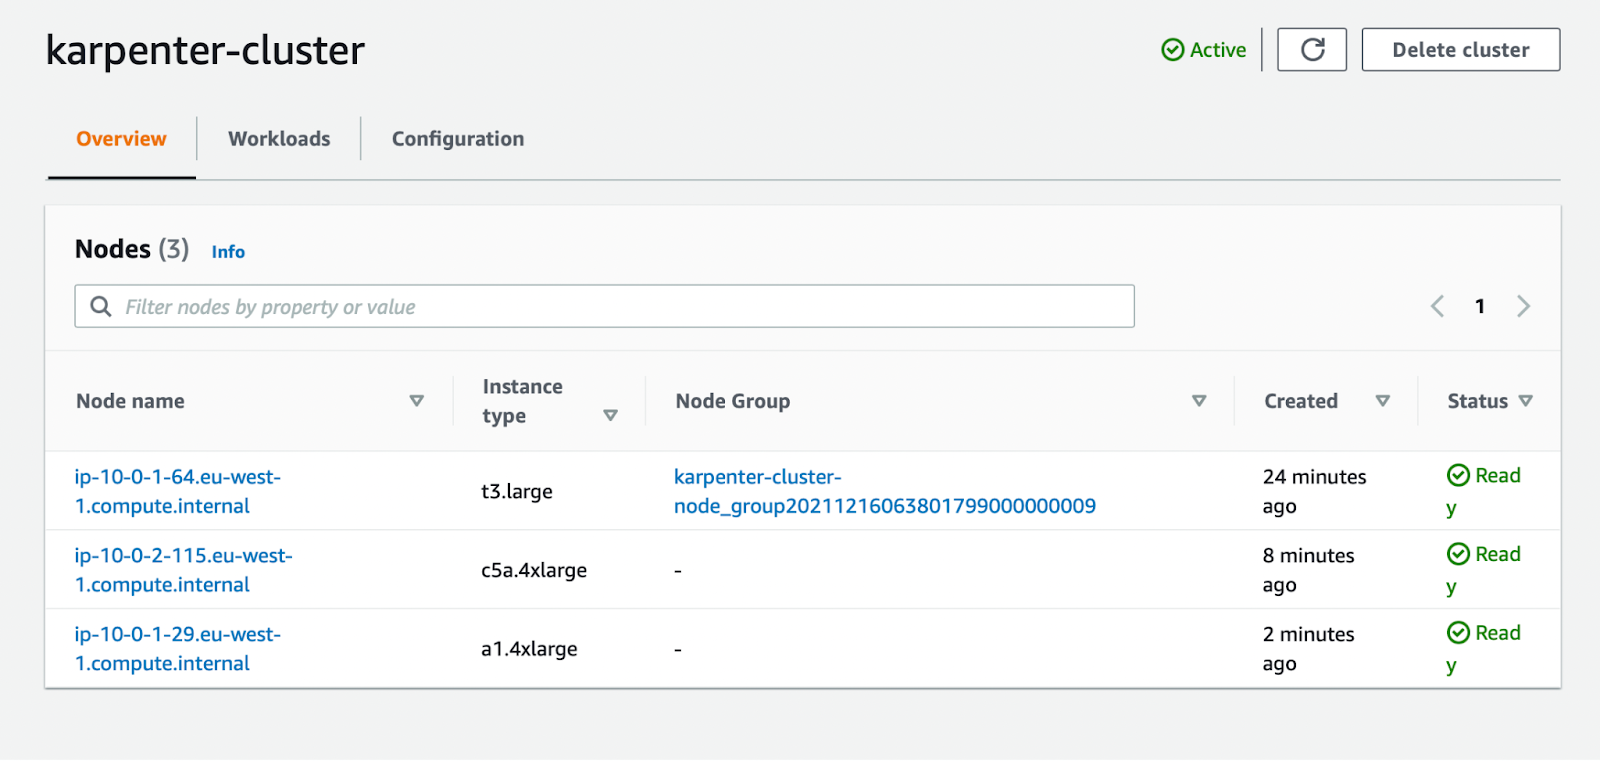
As you can see, the node is added to the cluster. It is not in a Node Group and I didn’t have to configure any Node Groups before deploying the application for it. Also, I didn’t have to configure the instance type or anything related to instance configuration. That saves a lot of time.
Perfect! Now I’m moving on to another Provisioner.

This time I’ve created a Provisioner for arm64 architecture. Let me deploy a new application for this provisioner.
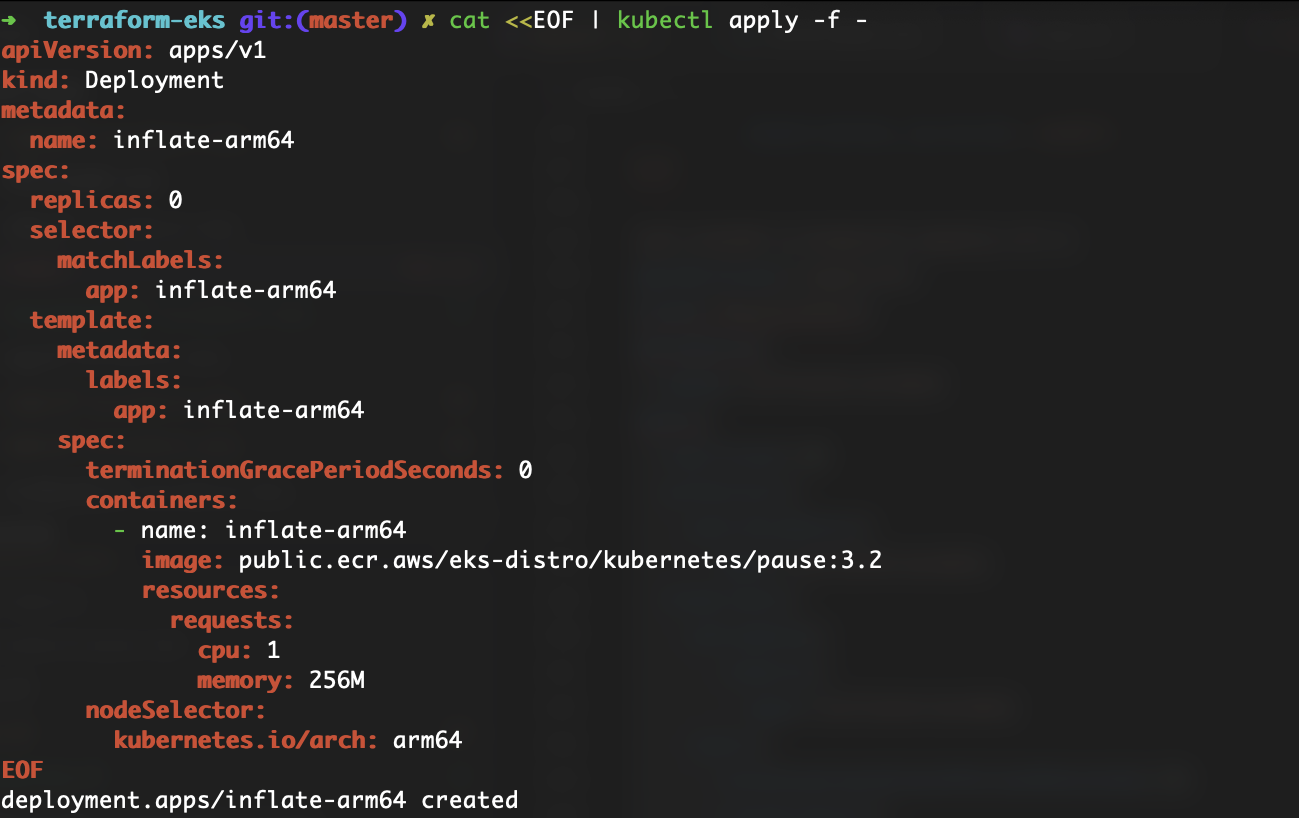
I’m going to scale this application from 0 to 10.

Let’s see the logs again.

Starting from line 3, Karpenter detects the scaling of the application and starts provisioning a node with ARM processor. It again excludes the tiny instance types, creates another Launch Template for this node, launches the instance, and schedules the pods into that node.
Again, I didn’t have to configure anything prior to deploying the application except creating the Provisioner.


Like I’ve mentioned before, Karpenter can also provision Spot instances. I’m going to follow the same procedures as before. Create a Provisioner for Spot instances, Deploy an application with the right Node Selector configuration, and scale the deployment from 0 to 5.
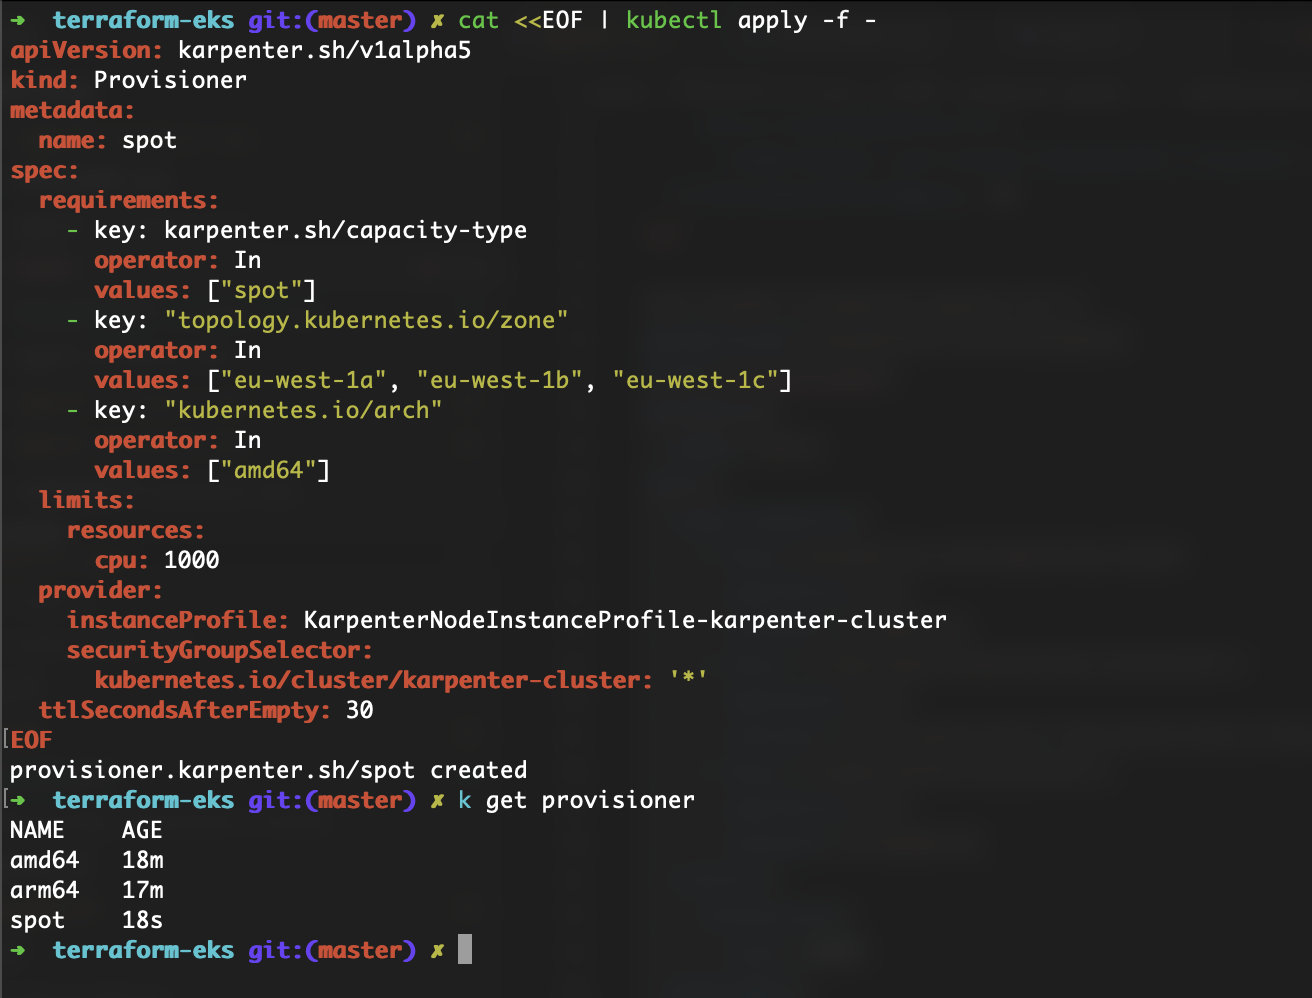

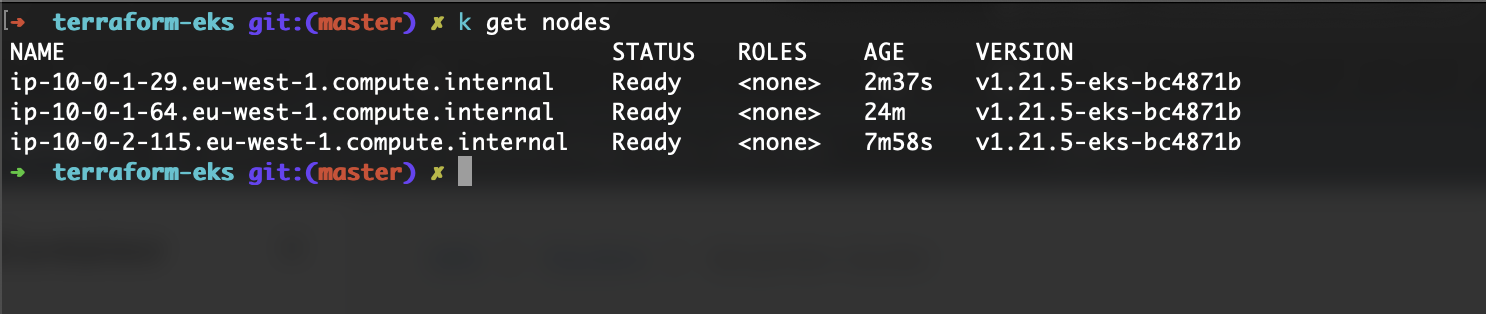
As you can see, Karpenter does its job and launches the Spot instance.

You can see the node architecture details and instance type details with this command:
kubectl get no -L node.kubernetes.io/instance-type,kubernetes.io/arch,karpenter.sh/capacity-type

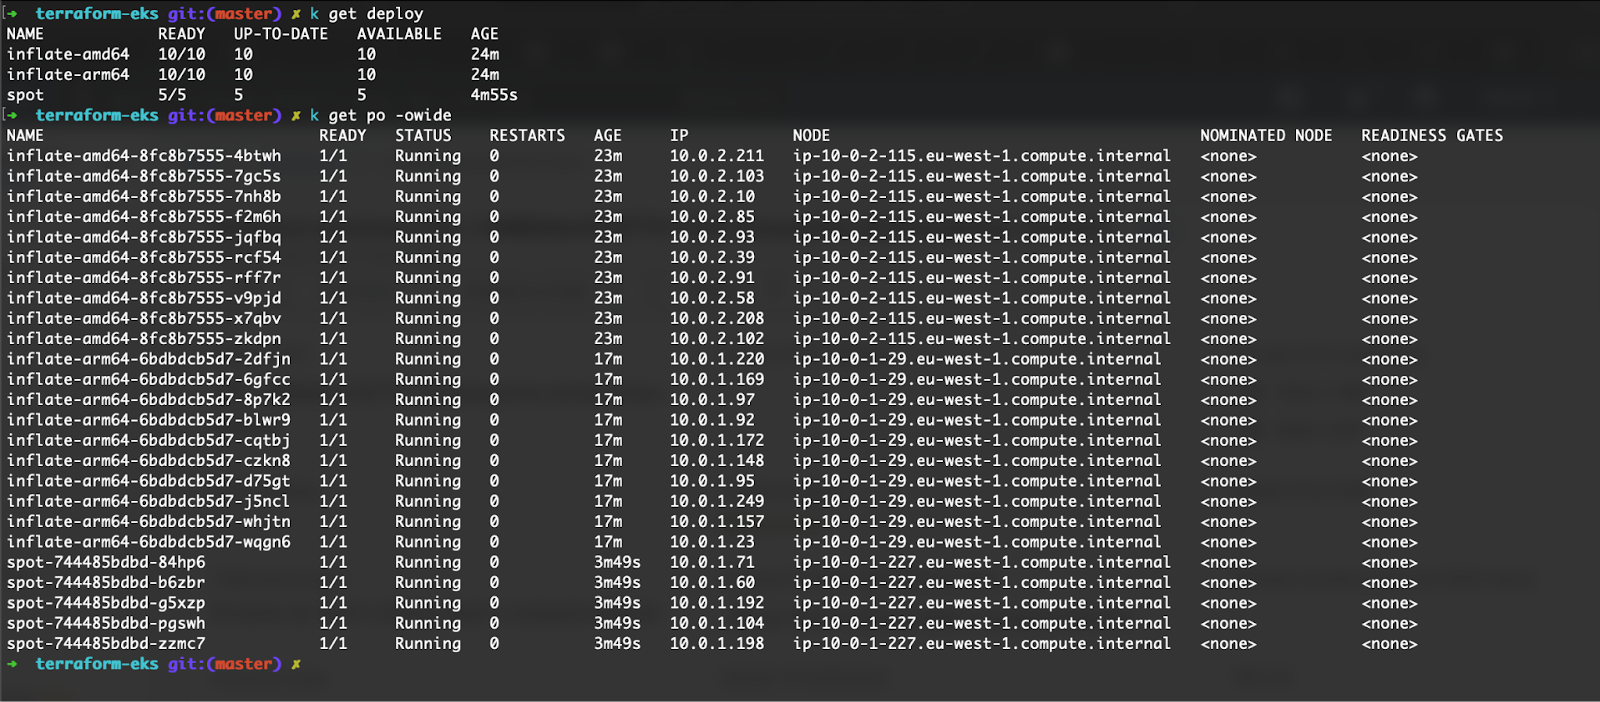
When I look at the instance details, I can see that the last created node is actually a Spot instance.

Finally, let me delete the deployments and see how Karpenter handles that. As you’ve already seen, my Provisioner configurations have the ttlSecondsAfterEmpty
parameter set to 30. With this configuration parameter, Karpenter adds the TTL (Time to Live) to nodes, Drain the nodes, and after TTL period safely removes the nodes. When I run the k get nodes command, I can see the nodes are in Scheduling Disabled status.

The process can be seen from the logs output screenshot above.
Conclusion
The Karpenter project is in the early stages right now. But if you are running your Kubernetes clusters on AWS and tired of configuring different Node Groups for every workload that needs something different or managing the configuration of Cluster Autoscaler, you can give Karpenter a try. It is simple, efficient and promising.


An Introduction to Kubernetes Horizontal Pod Autoscaler

CSI Performans Benchmark

No Comments Yet
Let us know what you think