In this series of blog posts, we will be creating an end-to-end Web Test Automation Project. The series consists of 8 posts in total:
- Let’s Create and Configure Our Web Test Automation Project!
- Let’s Write Our Test Scenarios!
- Bonus: Recording Failed Scenario Runs in Ruby
- Let’s Configure Our Web Test Automation Project for Remote Browsers and Parallel Execution
- Let’s Dockerize Our Web Test Automation Project
- Bonus: Recording Scenario Runs on Docker with Selenium Video!
- Let’s Integrate Our Dockerized Web Test Automation Project with CI/CD Pipeline!
- Auto-Scaling and Kubernetes Integration with KEDA
We are going to create our test automation project with Ruby which is a high-level programming language. Capybara Framework helps us automate browsers and Cucumber Framework allows us to write our scenarios in Behavior Driven Development format. You don’t know BDD approach? Do not worry, I will cover it.
To make our project executable on any machine without setting up environmental configurations and preventing the common programming issue of “But it works on my machine!”, we are going to dockerize our project using Docker Engine!
And finally, we are going to integrate CI/CD pipeline by using Jenkins and make our project auto-scalable by using Kubernetes.
It will be a pretty cool project, and presumably a longer one, but bear with me, it will be worth your while.

Let’s Create and Configure Your Web Test Automation Project!
To begin, you need a website to test. You are going to develop test suites and create automated tests for that website.
I think a popular website would be the best option since it would give you the opportunity to work on real-life cases and lets us tackle possible challenges. So here it is:
“I choose you Amazon!”
Now you can start installing what we are going to need.
Note: All installation tutorials will be for MacOS. Package management systems or some commands may differ, but the process will be more or less the same.
Xcode Installation
You are going to use Homebrew as a package management system. But most of its packages require a compiler. You can install the full Xcode or just Command Line Tools from the App Store or using the command below.
xcode-select --install
Homebrew Installation
A package management system makes installing packages much easier. Note that you do not need to install Homebrew to install the following languages or frameworks, but it is convenient.
You can find more detailed Homebrew Installation instructions here. You can take a look at if you want.
Install homebrew with the following command:
/bin/bash -c "$(curl -fsSL
https://raw.githubusercontent.com/Homebrew/install/HEAD/install.sh)"
After the installation, enter this:
brew --version
You should see something similar to the one below If your installation is successful:

Ruby Installation
Next, you will install rbenv with its ruby-build plugin, which allows you to install more than one Ruby version on our machine and manage them easily. It is a light weighted and useful package. To install both of these:
brew install rbenv ruby-build
The command below gives you the instructions to load rbenv in your shell.
rbenv init
If you use bash as a shell, with the following command you can load rbenv in your shell.
eval "$(rbenv init -)" >> ~/.bash_profile
The next command reloads your .bash_profile so the changes take effect. Or you can simply close your terminal and open a new one.
source ~/.bash_profile
Now pick the preferred Ruby version by listing and choosing the version you want to work with. Note that Capybara supports Ruby version 3.0+ as of now. So make sure to install 3.0 or later version of it.
# lists all available versions $ rbenv install -l# install a Ruby version $ rbenv install -package-# check installed version $ ruby -v
To make this Ruby version the default for your machine, use the command below:
rbenv global
For the official and comprehensive installation guide, please refer to this documentation.
Bundler Installation
RubyGems serves as a package manager for the Ruby programming language. It establishes a uniform method for distributing Ruby applications and libraries. The gems are simply open-source libraries that contain Ruby code and are packaged with a little extra data.
Bundler is a dependency management gem that allows you to list all required gems in a file and automatically download them. It also gives you the flexibility to declare gem versions.
Install the bundler with the command below:
gem install bundler
RubyMine Installation
I am going to use RubyMine of JetBrains as my IDE but you can choose your own favorite tool. You can download RubyMine on this link, it is pretty straightforward.
Note that it gives a one-year license if you have an education e-mail. The community trial version gives you one month of trial license.
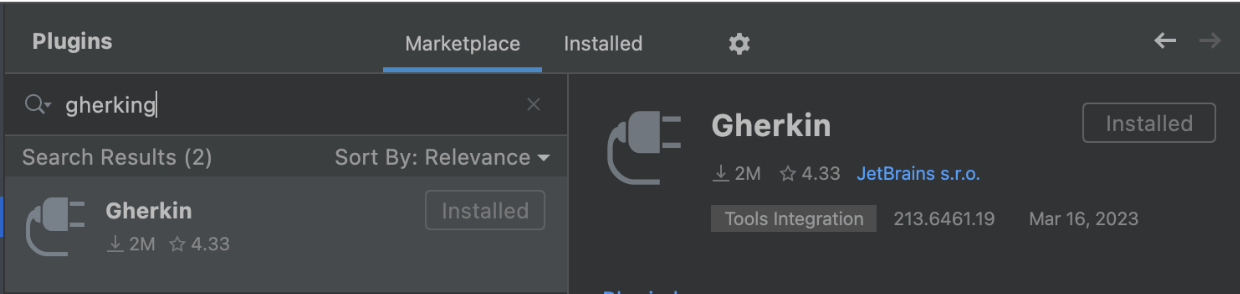
RubyMine Configuration
RubyMine => Preferences => Plugins and search for Gherkin. Install it.
Extra: Installing Cucumber+ plugin makes it easy to execute scenario runs. You might find it useful as well.

Why do we use Gherkin? It helps us to create code steps using English-like sentences that anyone without coding knowledge could understand.
Why do we need the plugin? It provides coding assistance for step definitions.
For comprehensive information, please refer to our blog posts about Gherkin Syntax and Cucumber Framework and Behavior Driven Development.
Now you are all set! It’s time to create your project.
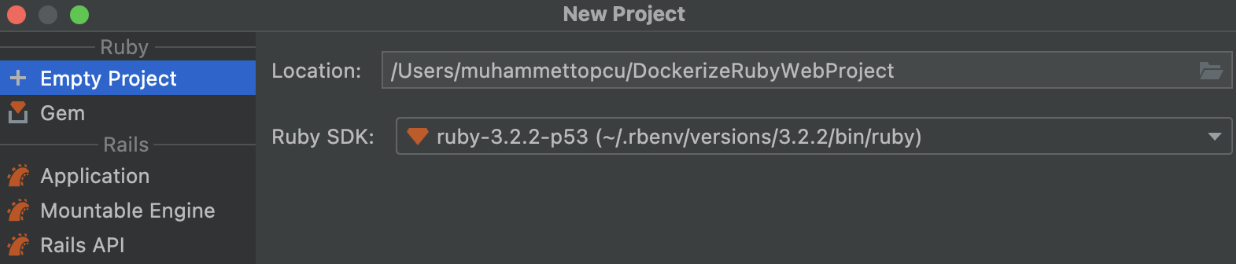
Creating the Project
Use File => New => Project… , name your project, and choose your Ruby SDK. Then click create.
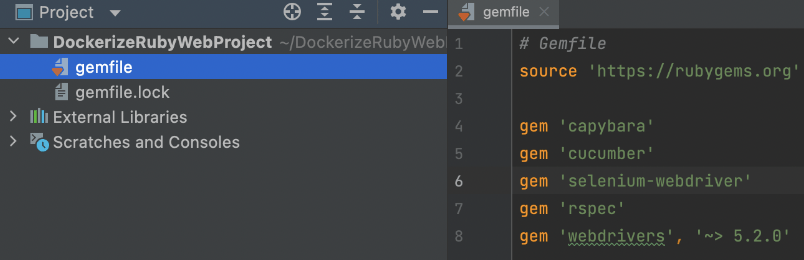
Gemfile Configuration
Next, you will create your gemfile. Gemfile is the list of our dependencies. You are going to need the below gems for your project.
# Gemfile
source 'https://rubygems.org'
gem 'capybara'
gem 'cucumber'
gem 'selenium-webdriver'
gem 'rspec'
gem 'webdrivers', '~> 5.2.0'
Let me give you a brief explanation about what these gems do:
-
capybara: This gem provides much more readable and easier automation methods than Selenium’s native ones.
-
cucumber: Cucumber is a framework for running automated tests written in plain language.
-
selenium-webdriver: This gem provides Ruby bindings for Selenium.
-
rspec: RSpec is a unit test framework for the Ruby programming language.
-
webdrivers: This gem automatically installs and updates all supported drivers, which are essential for controlling web browsers through code. Note: If you use Selenium 4.6.0, you won’t be needing this game and Selenium would set up the required web drivers for you.
After creating and saving the file with the gems listed, run `bundle install` command in your project’s directory.

Congratulations, you’ve installed everything you need!
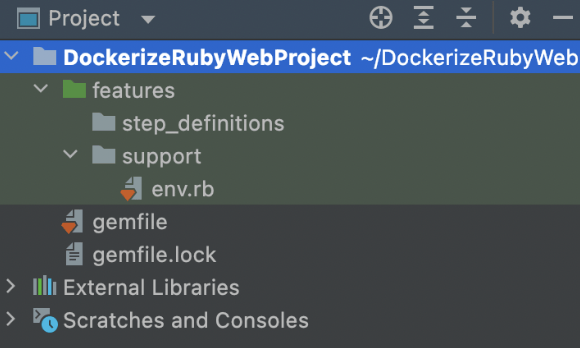
Next, create Cucumber’s base folder structure:
cucumber --init
You will see that a feature folder is created along with some sub-folders.
Now you can start creating some important files and populate them!
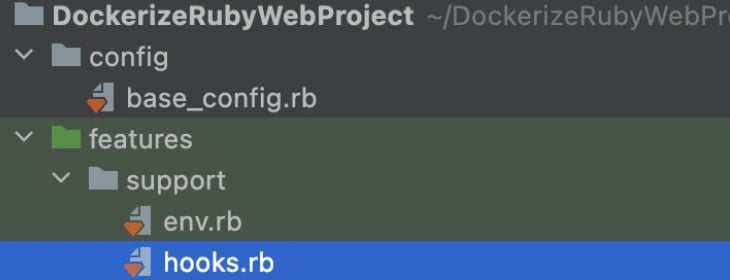
Config Folder and base_config.rb
It is best to store the project’s configurations explicitly in a file. To do that, create a folder named “config” under the root of the project and then create a file named “base_config.rb” under it.

What are you going to write in it? The project variables that do not change usually and environmental variables that you will manage dynamically. Your driver and execution configurations are examples of this.
# frozen_string_literal: true

module BaseConfig

  @wait_time = 20
# Default wait time variable to be used on Capybara functions.
  def self.wait_time
    @wait_time
  end

  @browser = ENV['browser'] || 'chrome'
#     Available options
#       * chrome
#       * firefox
  def self.browser
    @browser
 end

  @headless = ENV['headless'] || 'false'
# Available options
#   * 'false'
#   * 'true'
  def self.headless
    @headless
  end
end- # frozen_string_literal: true` freezes every string literal in our file explicitly, meaning that you cannot change them in run time..
- @wait_time defines a custom wait time before a driver function fails. With the `def self.wait_time` line, you can call it outside this file by simply calling BaseConfig.wait_time
- @browser variable lets you define the default web driver to run tests on. ENV[‘browser’] || ‘chrome’ means that if you provide an argument for the browser while running the Cucumber in the command line, it uses that argument, otherwise uses ‘chrome’ as your default browser value. (E.g. parallel_cucumber -o ‘browser=”firefox”’)
- @headless defines whether your tests would be run on the browser in headless mode or not. ENV[‘headless’] || ‘false’ is just the same as above.
Now let’s create your driver configurations and make use of the above settings.
Utils Folder and driver.rb
Create a folder named “utils” under the root of the project and then create a file named “driver.rb” under it. You can store your custom-made general functions in this folder and call them wherever you need.

You need to configure your drivers by populating driver.rb file with the code below!
class Driver

  def self.get_driver
    case BaseConfig.browser
    when 'chrome'
      options = Selenium::WebDriver::Chrome::Options.new
      add_default_values(options)
      Capybara.register_driver :selenium do |app|
        Capybara::Selenium::Driver.new(app,
                                       browser: :chrome,
                                       options: options)
      end

    when 'firefox'
      options = Selenium::WebDriver::Firefox::Options.new
      add_default_values(options)
      Capybara.register_driver :selenium do |app|
        Capybara::Selenium::Driver.new(app,
                                       browser: :firefox,
                                       options: options)
      end
  end

  def self.add_default_values(options)
    options.add_argument('--disable-popup-blocking')
    options.add_argument('--ignore-certificate-errors')
    options.add_argument('--disable-notifications')
    add_headless_options(options) if BaseConfig.headless == 'true'
  end

  def self.add_headless_options(options)
    options.add_argument('--no-sandbox')
    options.add_argument('--headless')
    options.add_argument('--window-size=1280,720')
    options.add_argument('--disable-dev-shm-usage')
    options.add_argument('--disable-gpu')
    options.add_argument('--test-type=browse')
  end

end
Now I am going to break it down bit by bit:
class Driver

  def self.get_driver
    case BaseConfig.browser
    when 'chrome'
      options = Selenium::WebDriver::Chrome::Options.new
      add_default_values(options)
      Capybara.register_driver :selenium do |app|
        Capybara::Selenium::Driver.new(app,
                                       browser: :chrome,
                                       options: options)
      end
This part creates a class named Driver. The class has a get_driver method with the self prefix, that will enable us to call it from outside by using Driver.get_driver.
The method has a switch-case block, customized with BaseConfig.browser variable. You remember the @browser variable on our base_config.rb file? It will match with this and use the matching configurations!
Now let’s inspect the browser-specific driver configurations:
- options = Selenium::WebDriver::Chrome::Options.new, with this line, you create a chrome browser options object
- add_default_values(options), with this method, you add default browser options to your web driver. Now you implement this method with the code below:
def self.add_default_values(options)
    options.add_argument('--disable-popup-blocking')
    options.add_argument('--ignore-certificate-errors')
    options.add_argument('--disable-notifications')
    add_headless_options(options) if BaseConfig.headless == 'true'
  end
You created a method named add_default_values that takes an `options object` as a parameter and adds arguments to it with the add_argument method.
You have another method named add_headless_options(options) which only gets activated and adds another set of arguments to your options object if the @headless variable in our base_config.rb file is ‘true’.
def self.add_headless_options(options)
    options.add_argument('--no-sandbox')
    options.add_argument('--headless')
    options.add_argument('--window-size=1280,720')
    options.add_argument('--disable-dev-shm-usage')
    options.add_argument('--disable-gpu')
    options.add_argument('--test-type=browse')
  end
Let’s inspect these arguments:
- '--no-sandbox', lets you run the web driver outside of a sandbox environment, which is a very restricted one with few privileges.
- '--headless', opens the web driver without a window, in the background.
- '--window-size=1280,720', sets the window size of your web browser.
- '--disable-dev-shm-usage'is a Chrome flag that is used to disable the use of /dev/shm , which is a shared memory space where Chrome stores temporary files.
- '--disable-gpu' disables hardware acceleration.
- '--test-type=browse' allows the test code to run more smoothly with the benefits listed here
Note: You can find the other browser options here.
Finally, register your driver.
Capybara.register_driver :selenium do |app|
 Capybara::Selenium::Driver.new(app,
                                browser: :chrome,
                                options: options)
end
Capybara.register_driver lets you register your web driver type. You will use Selenium web driver in the background. Inside of the do block, you state your browser type and options, which you created earlier. When you look at case blocks for firefox and chrome, you will realize that the only thing that changes is the browser type.
So, in this file, you used the @browser and @headless variables but you did not initialize the get_driver method anywhere yet. Then let’s get into it!
Support Folder and env.rb
In the previous section, you created a basic Cucumber folder structure with cucumber --init command. Before you get down to doing hooks.rb, create another important file just beside it. The env.rb!
require 'capybara'
require 'capybara/dsl'
require 'selenium-webdriver'
require 'rspec'
require 'webdrivers'

require_relative '../../utils/driver.rb'
require_relative '../../config/base_config.rb'


include Capybara::DSL
include RSpec::Matchers

Capybara.configure do |config|
 config.default_driver = :selenium
 config.default_selector = :css
 config.app_host = 'https://www.amazon.com'
 config.default_max_wait_time = BaseConfig.wait_time
end
require loads gems and executes them. With it, you import all class and method definitions in the file.
require_relative does the same thing but by specifying the relative paths of the files.
include brings in the methods of these two packages into your file.
In the Capybara.configure block, you configure Capybara with attributes.
Configuring hooks.rb!
And last but not least, let’s configure your hooks.rb file!
Hooks are tools that Cucumber provides to execute custom codes before and after a scenario is run. This is where you initiate your driver.
Before do
 Driver.get_driver
 page.driver.browser.manage.window.maximize
end

After do |scenario|
 begin
   if scenario.failed?
     puts "FAILED ==> #{scenario.name}\n#{scenario.exception}:#{scenario.exception.message}"
   else
     puts "PASSED ==> #{scenario.name}"
   end
   Capybara.current_session.driver.quit
 rescue Exception => exception
   puts "FAILED ==> #{exception}"
   Capybara.current_session.driver.quit
 end
end
In the Before block, you run the get_driver method which we defined in driver.rb. So before every scenario, a new driver instance gets created.
The additional page.driver.browser.manage.window.maximize makes your web browsers’ windows maximized.
In the After block, you have a scenario object which Cucumber provides. It has attributes such as name and exception. You use this information to increase readability by logging them or printing them to the console in the begin-rescue block. In the after block, taking screenshots of failed scenarios can be useful to pinpoint the reasons for failure.
Additional hook keywords can be found in the Cucumber Documentation.
Capybara.current_session.driver.quit terminates the current driver instance. So before every scenario, you start with a fresh driver instance, and after your scenario execution, you terminate it.
With this, I conclude the first chapter of this blogpost series. In the next chapter, you are going to write your test scripts with Page Object Model (POM) and Cucumber! If you have any questions, don’t hesitate to write a comment!
